Configure Single Sign-On between Sublime and Google
SAML Configuration
Below are the steps for setting up SAML with Google Workspace.
Obtain Your Sublime Single Sign-on URL
- Sign in to your Sublime instance. Navigate to
Admin > Account - Scroll down and under the
Authenticationsection, click the pencil icon next toSAML - Copy/take note of the
Single Sign-on URL. You'll use this URL in the next section when configuring SAML for your Google Workspace application.
Google Workspace Configuration
- Sign in to your organization's Google Workspace Admin Console
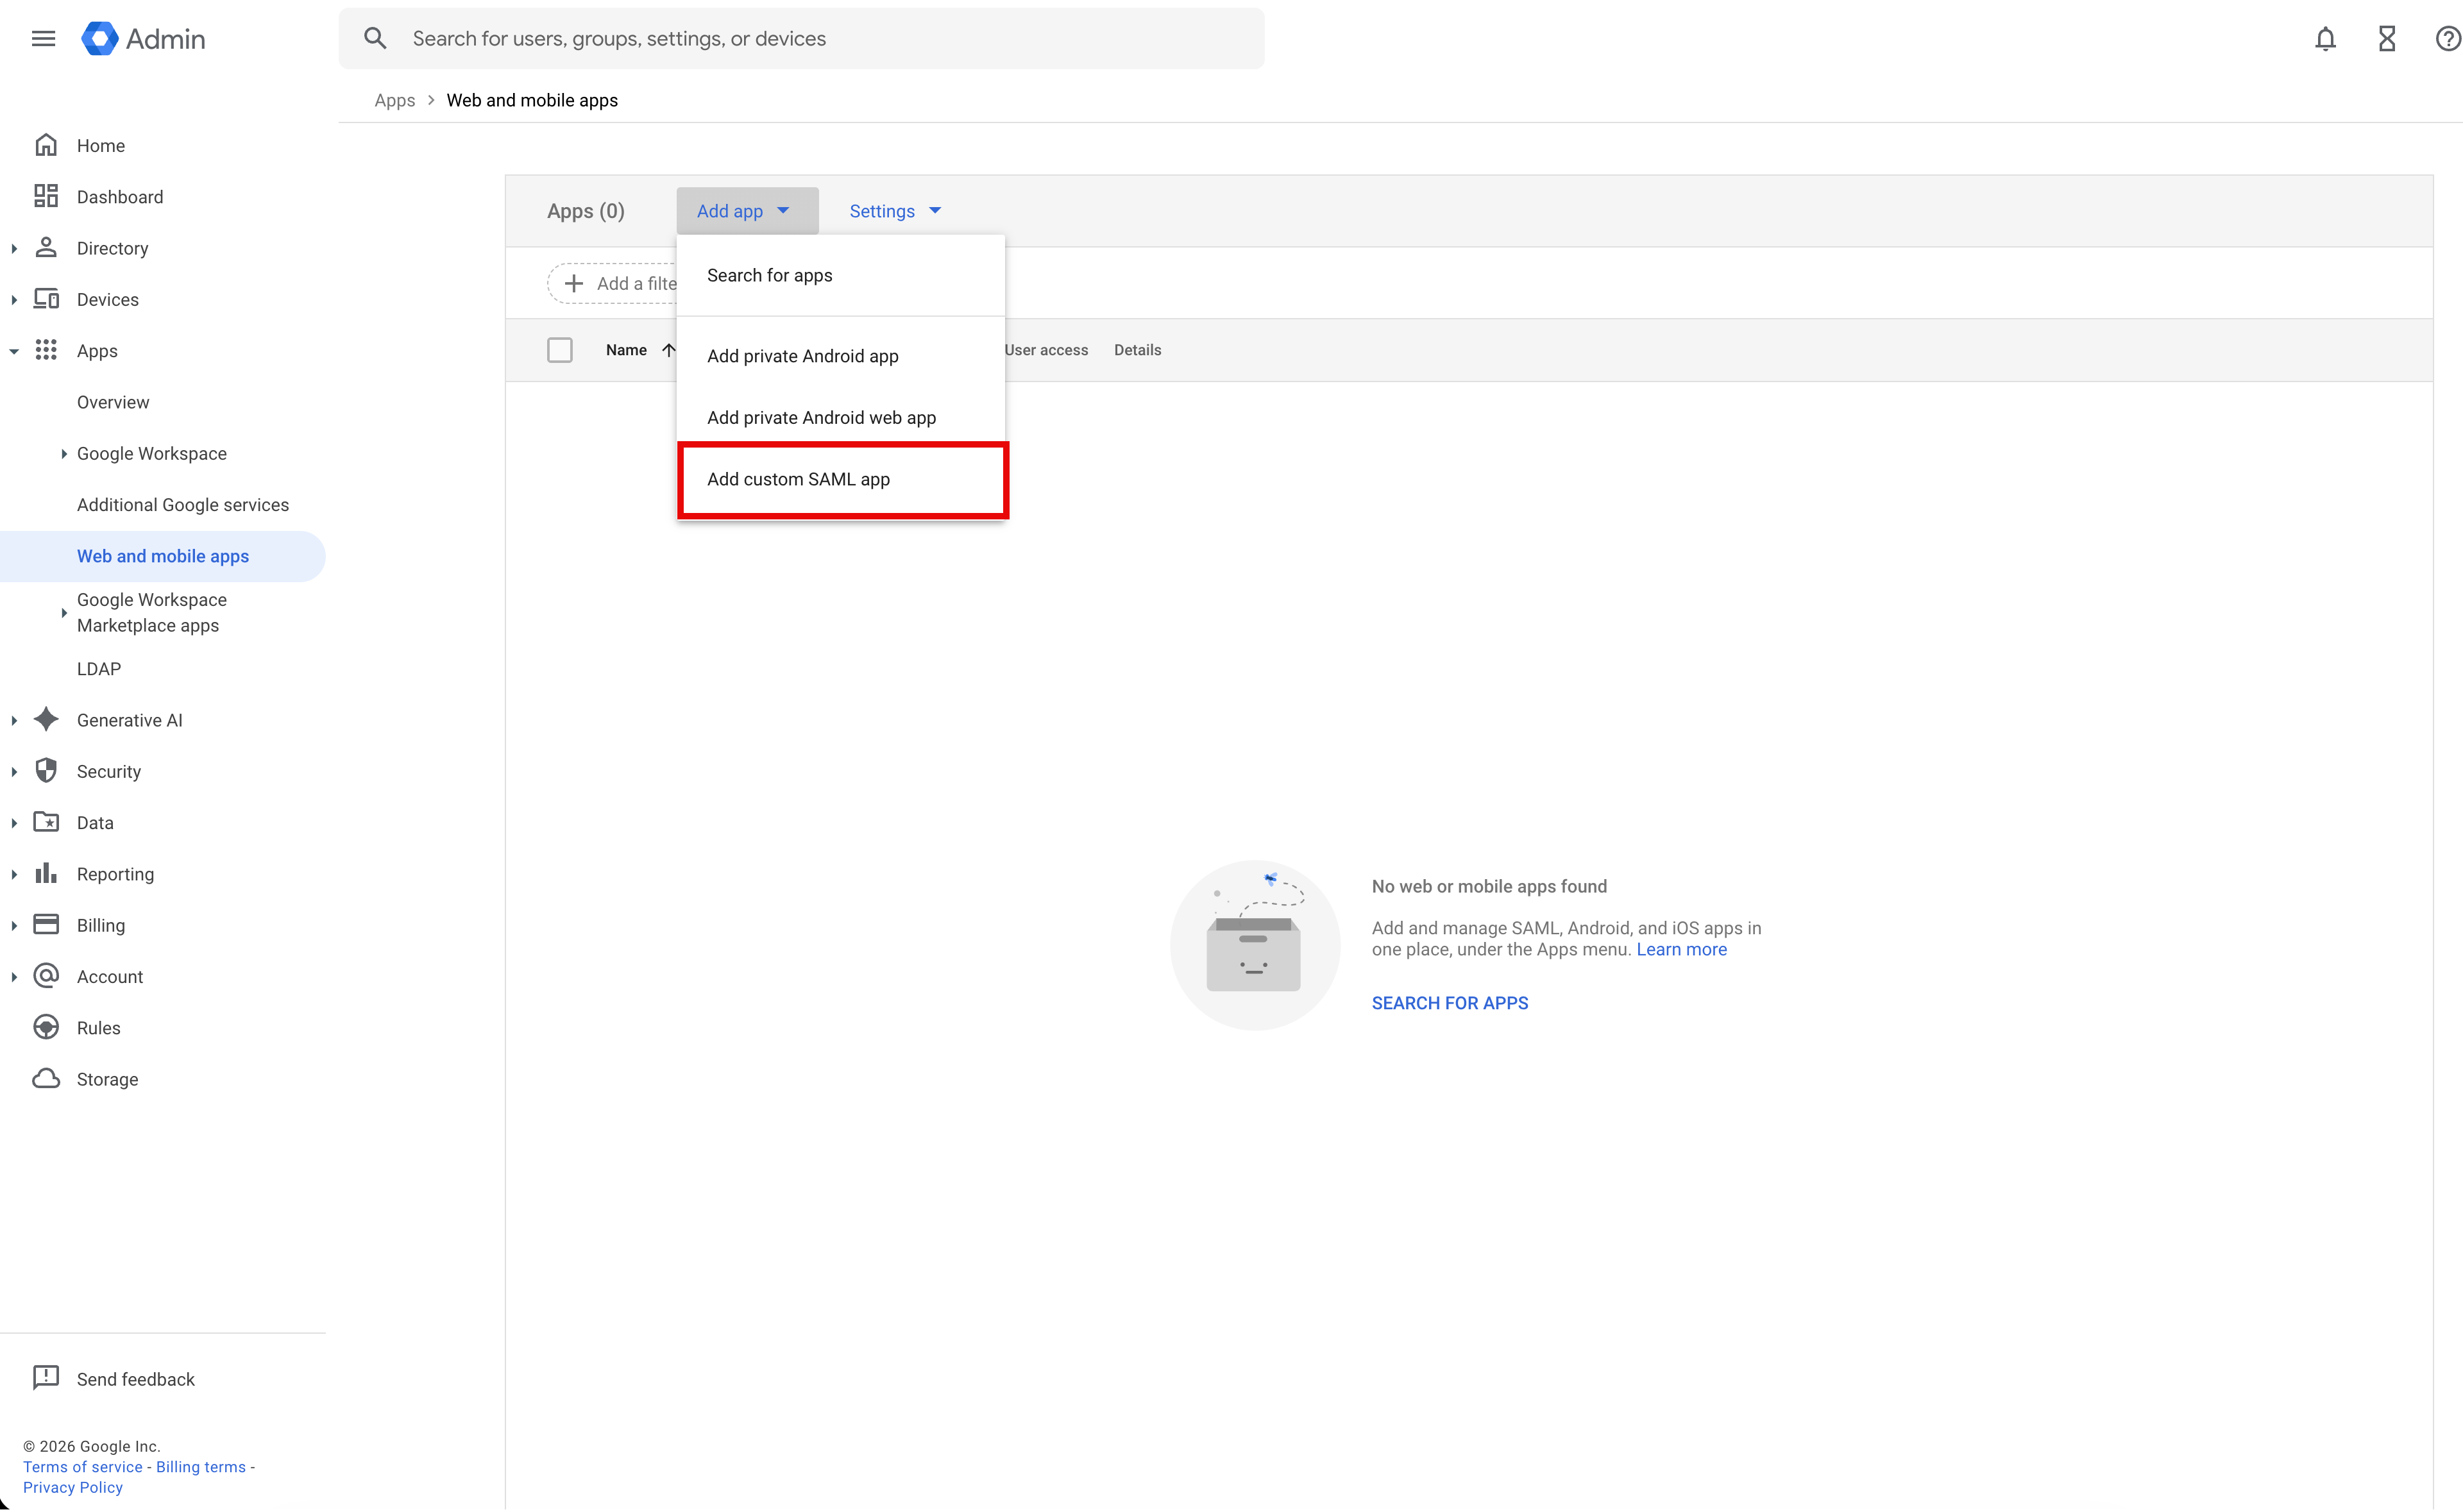
- On the left-side navigation bar, navigate to
Apps > Web and mobile apps - Click the
Add Appdropdown, and selectAdd custom SAML app
- Provide an App name, such as "Sublime Platform"
- Optionally add a logo. You can download the Sublime logo here.
- Click
Next - Download IdP metadata to be uploaded in the Sublime Dashboard in the next section
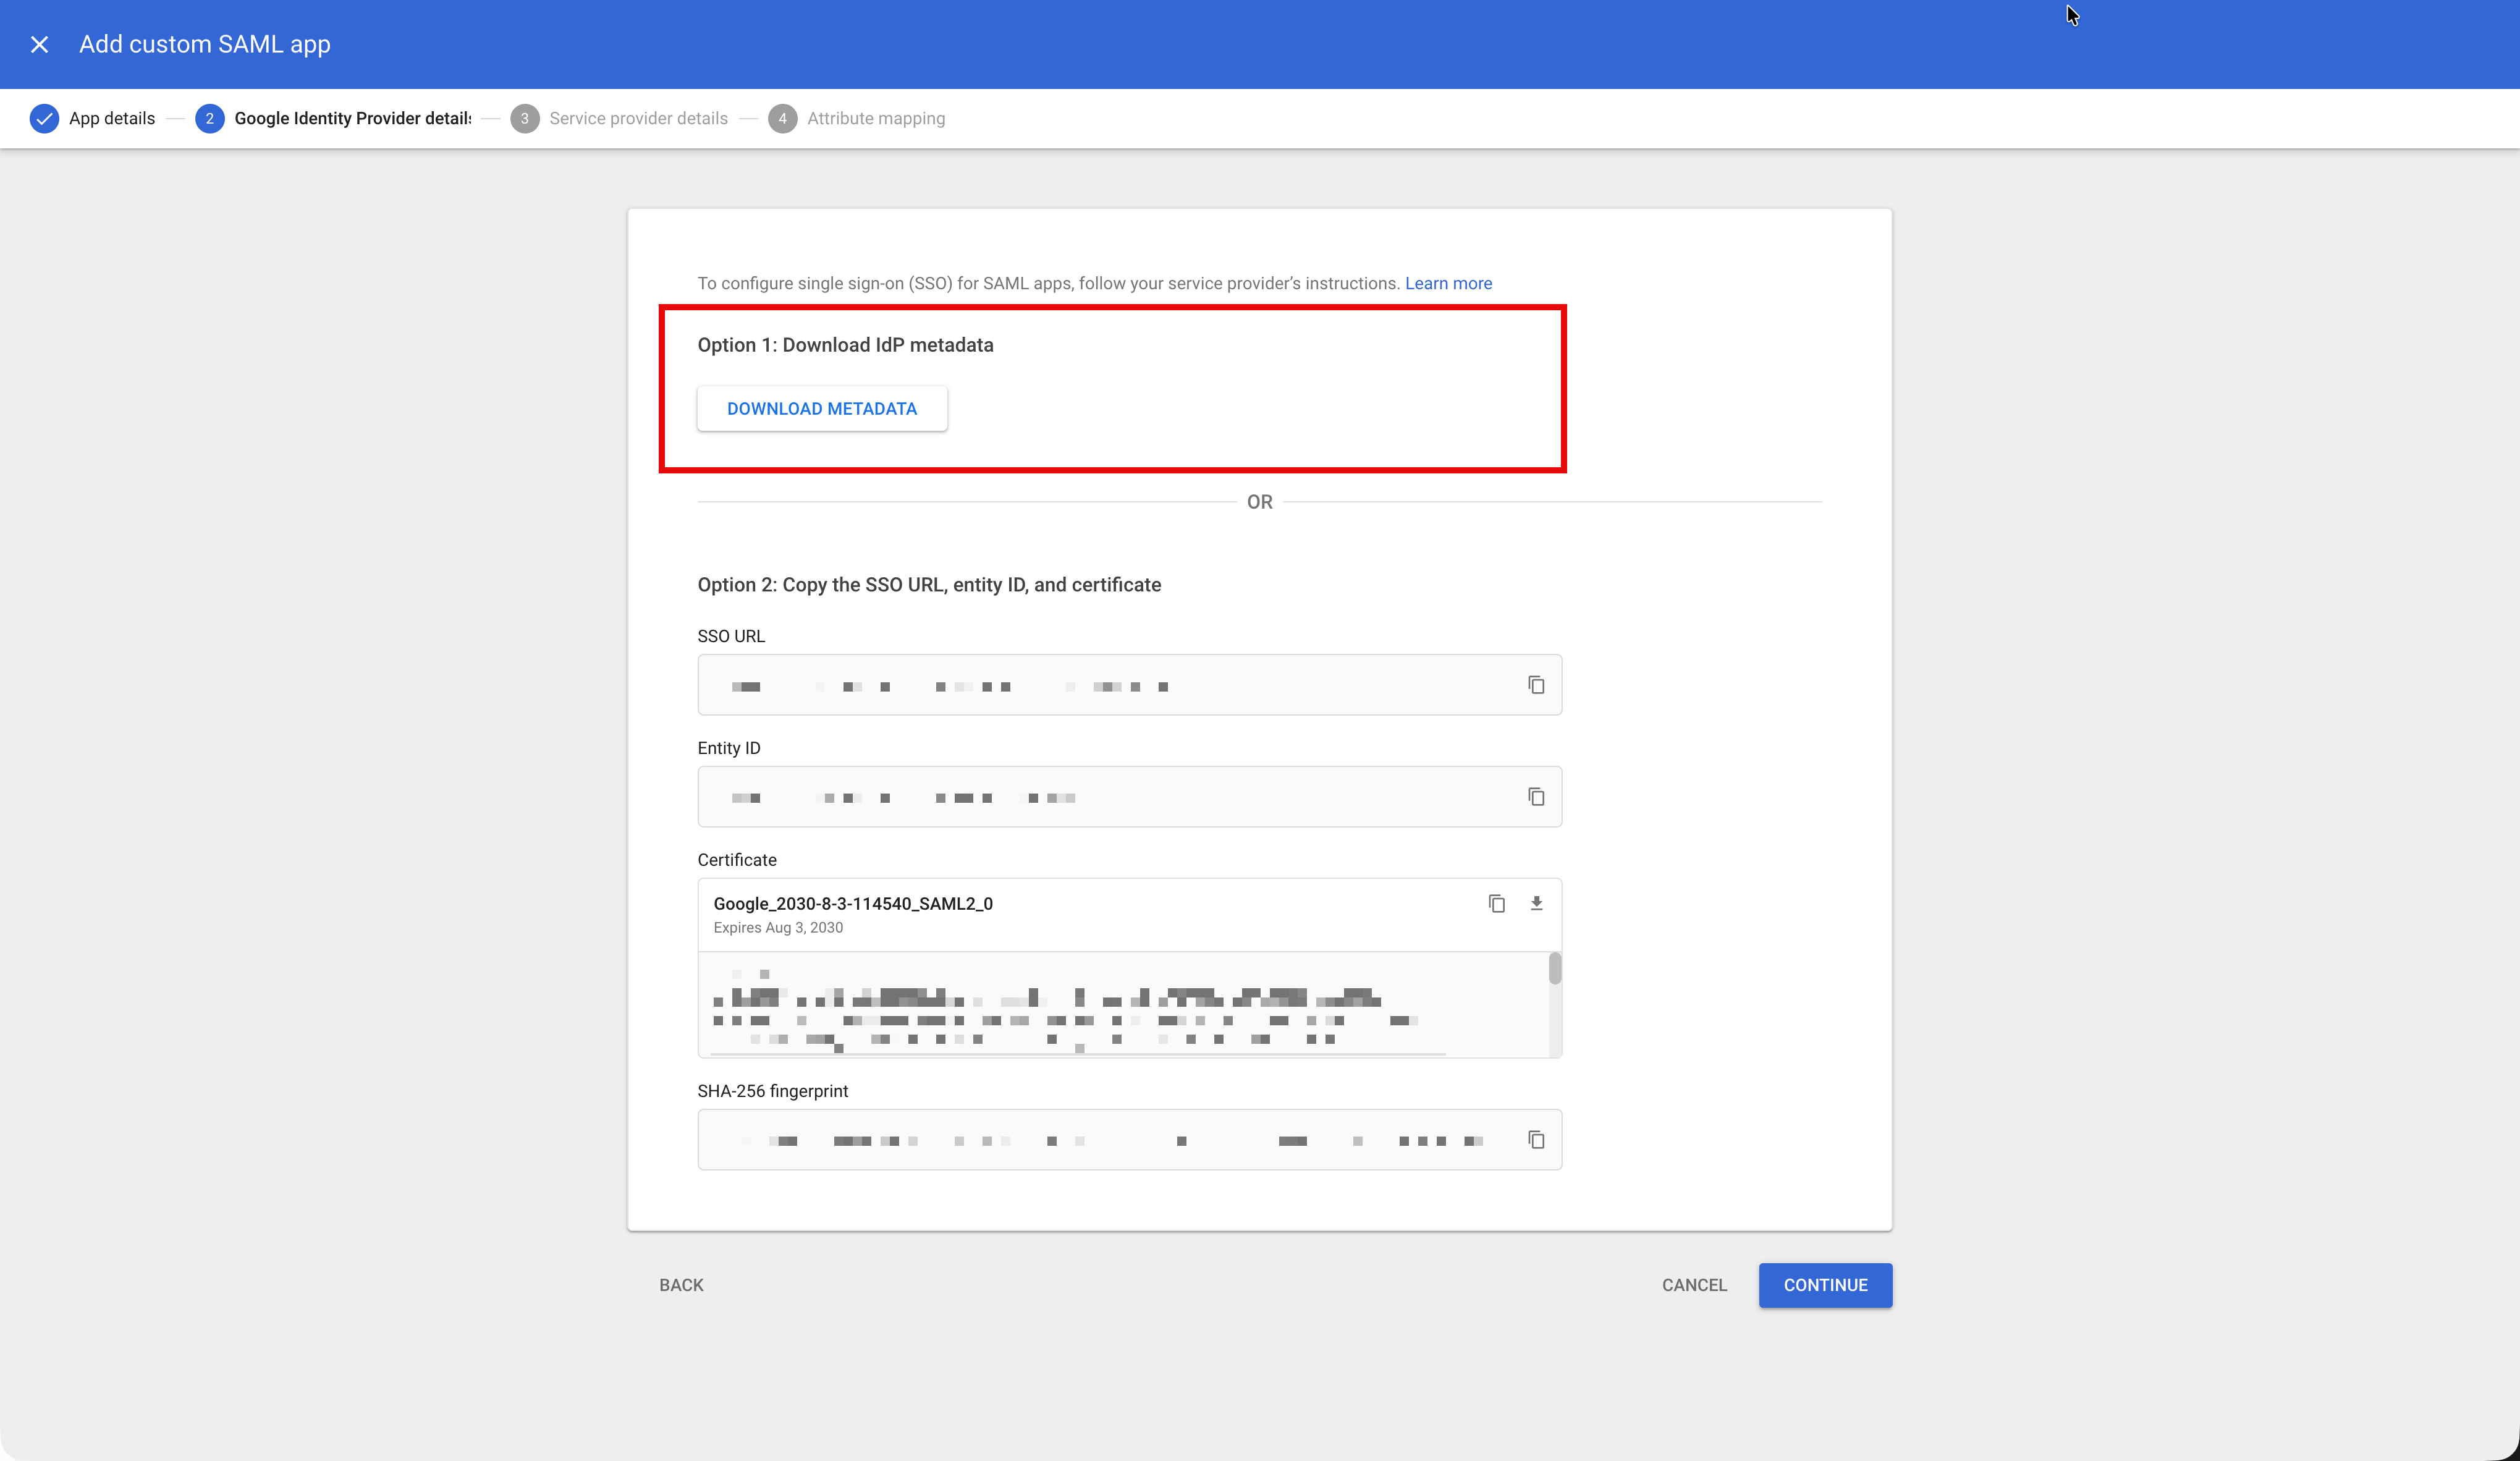
- Click
Continue - For
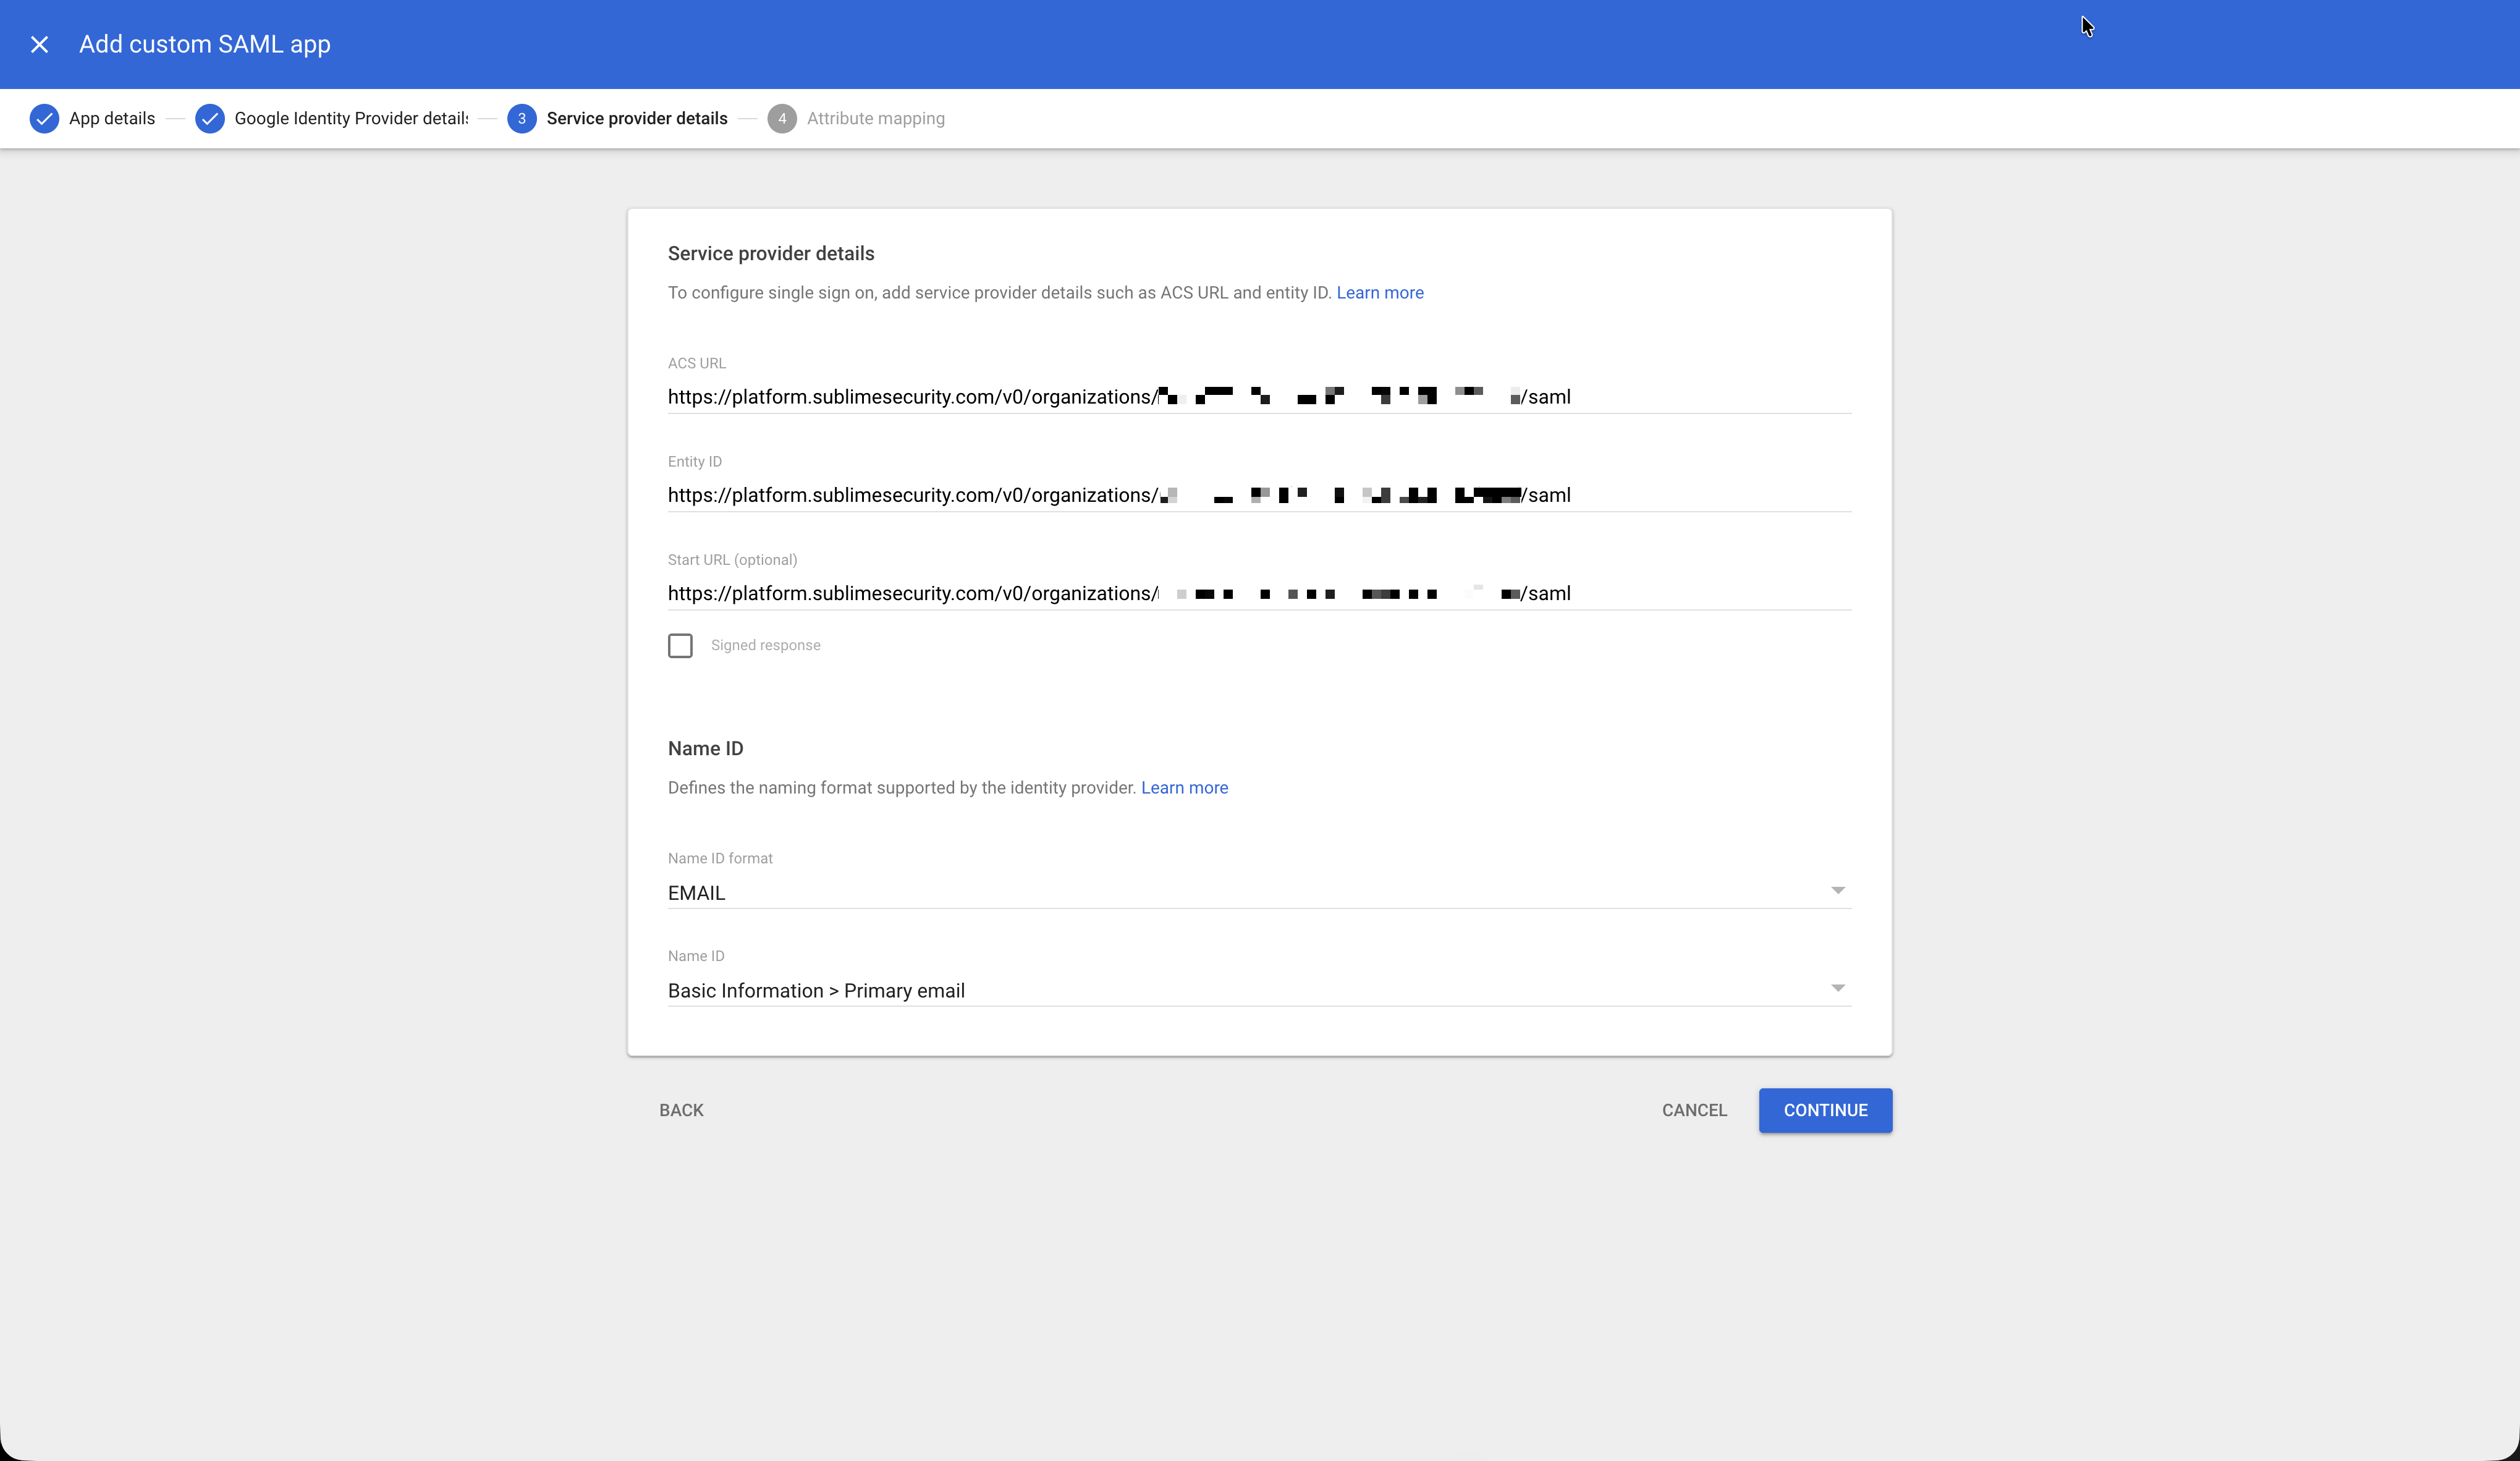
ACS URL, paste theSingle Sign-on URLyou copied from the Sublime dashboard - For
Entity ID, paste theSingle Sign-on URLyou copied from the Sublime dashboard - For
Start URL, paste theSingle Sign-on URLyou copied from the Sublime dashboard - For Name ID format, select
EMAIL - For Name ID, utilize the default selection of
Basic Information > Primary Email
- Click
Continue - Leave the Attribute Mapping configuration blank and click
Finish
Add SAML Settings to Sublime
- In Sublime, navigate to
Admin > Account - Under
Authentication, click the button next to SAML - Select
Metadata XML Uploadand upload the Google IdP Metadata XML you downloaded in the section above
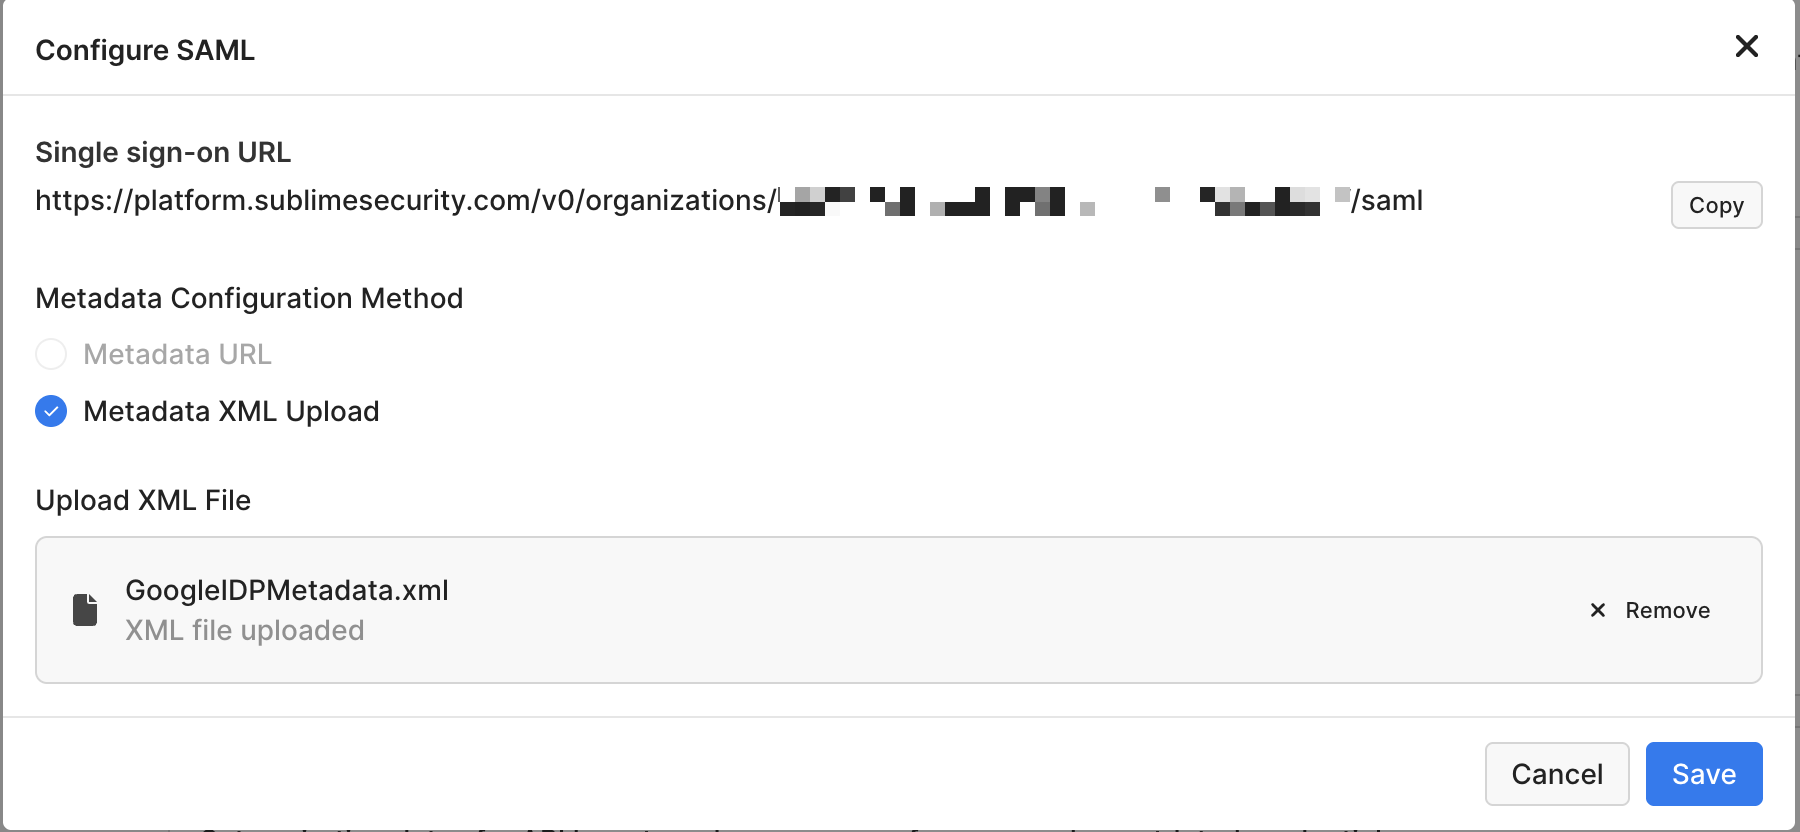
- Click
Save
Test SAML Configuration
- Add/Ensure the expected user(s) to test are present in both the Sublime Console and User Access application settings in Google Workspace.
- From the Sublime SAML app configuration page, click
Test SAML Login- If successful, you can now change the Sublime Allowed methods config to disable username/password login.
- If unsuccessful, please double check all fields with URL values across both platforms and contact us if you're still running into any issues 👋
OIDC Configuration
Below are the steps for obtaining OIDC settings via Google. In order to use Google's OpenID Connect feature, you'll need to create a Google Cloud Platform Project with an OAuth app restricted to your organization, then create a Client ID/Secret pair to use to set up OIDC in Sublime.
Obtain Your Sublime Redirect URI
- Sign in to your Sublime instance. Navigate to
Admin > Account - Scroll down and under the
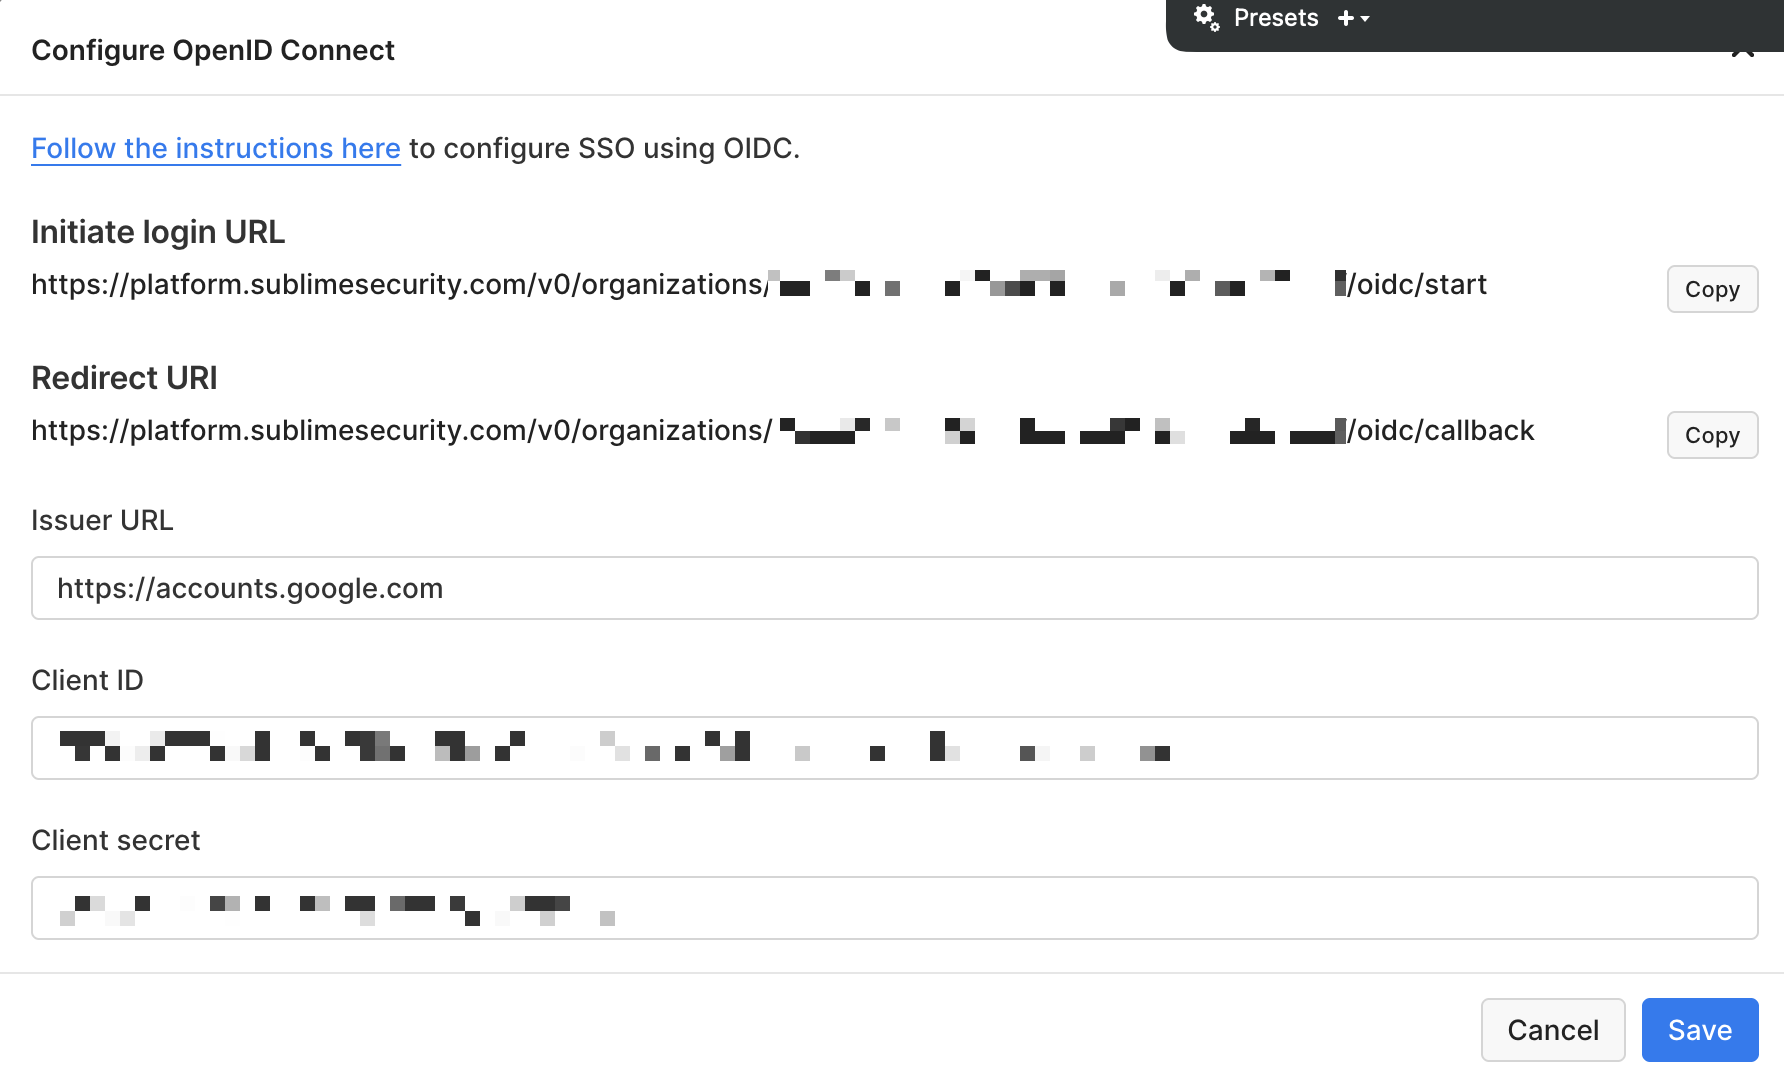
Authenticationsection, click the pencil icon next toOpen ID Connect - Copy/take note of the
Redirect URI. You'll use this URL in the next section when configuring OIDC for your Google Workspace application.
Google Cloud Configuration
-
Sign in to your organization's Google Cloud Platform (GCP) Console.
-
Create a new Project, and assign it a name. We recommend something along the lines of "Sublime Platform".
-
On the left-side navigation bar, navigate to
APIs & Services > OAuth consent screen -
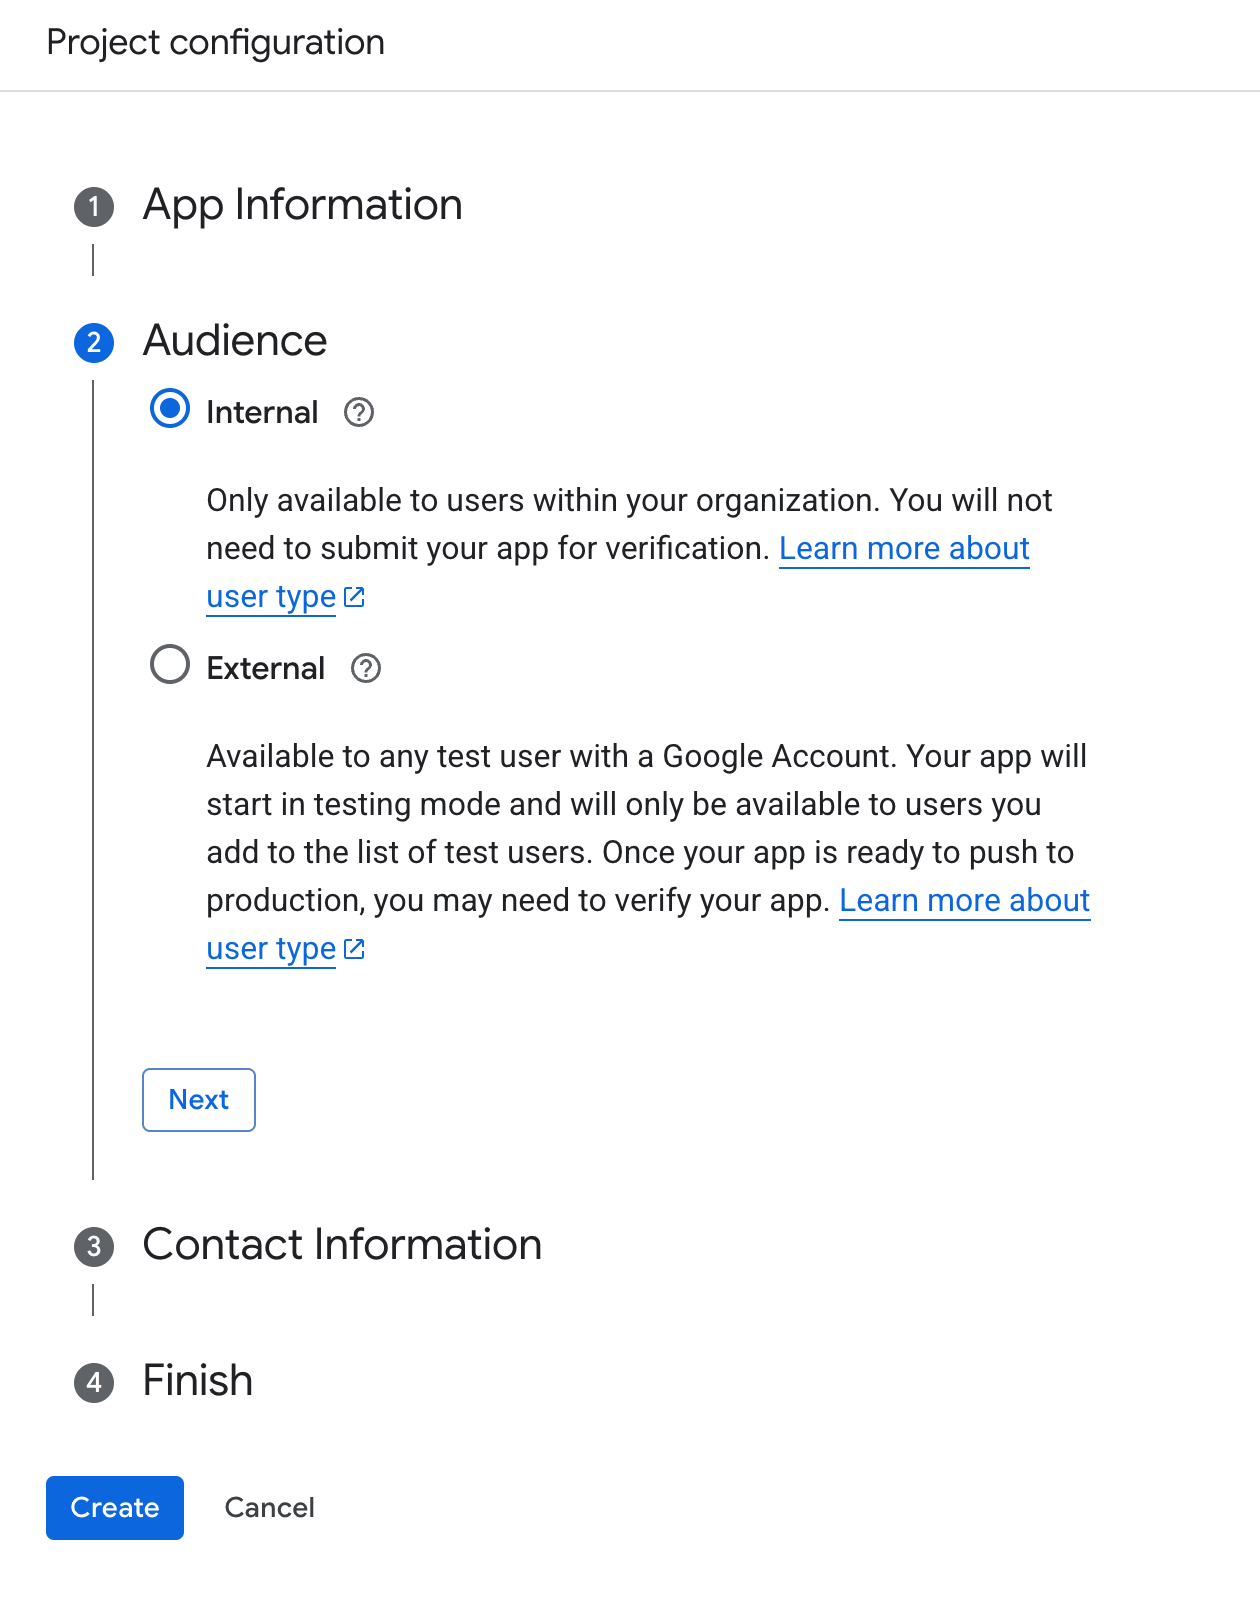
Complete the guided Project Configuration as follows:
- App Information - Input a name for the application (i.e. "Sublime Platform") and select a designated administrator as the support email address.
- Audience - Select
Internal - Contact Information - Input a designated contact from your organization (this can be the same contact specified in the step above)
- Check the Google API agreement box and click
Create
Google OAuth configuration example (Step 4.ii referenced)
-
In the OAuth project you just created, navigate to
Clientsvia the left-side Navigation Bar -
Click
Create Client -
From the Application Type dropdown, select
Web Application -
Once again, enter an application name
-
Under Authorized redirect URIs, click
+Add URI -
Enter the
Redirect URIyou copied from the section above
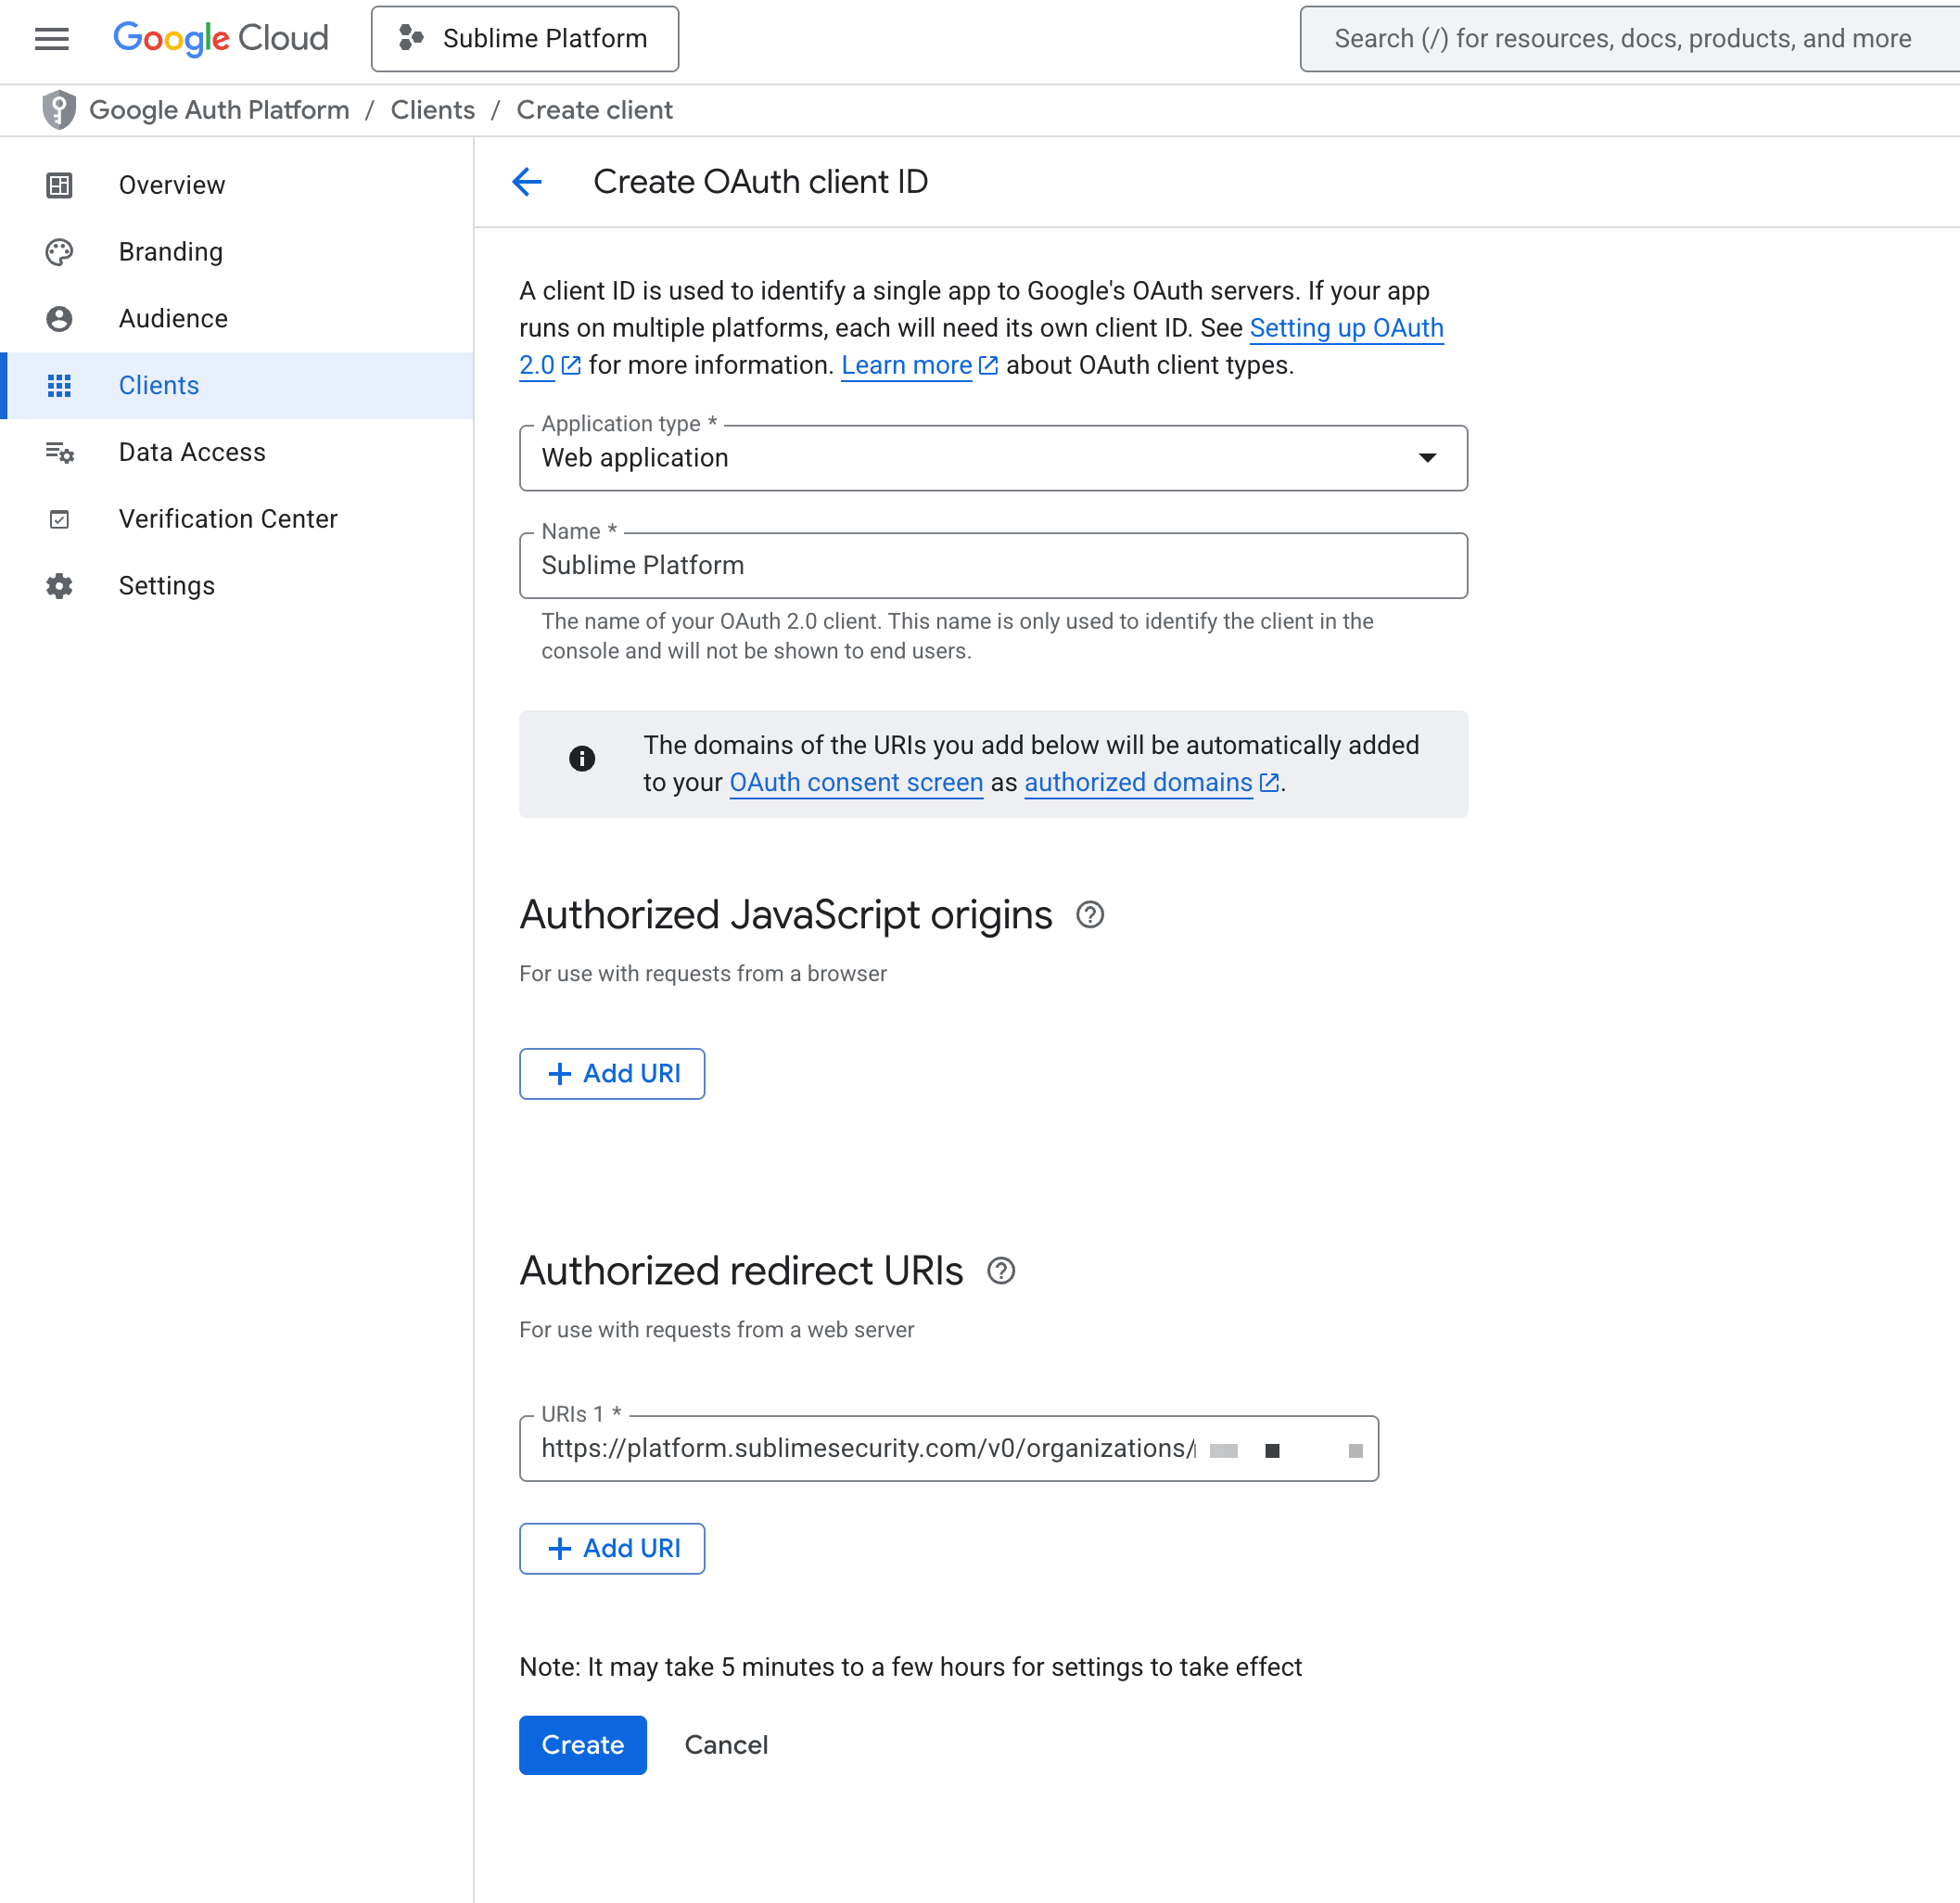
- From the presented modal, copy both the
Client IDandClient secretvalues. You'll use these values in the next section.
Add OIDC Settings to Sublime
- Log into the Sublime Platform
- Navigate to
Admin > Account - Under
Authentication, click the button next to Open ID Connect - Enter your OIDC issuer URL, client ID, and client secret
- The Issuer URL is when configuring OIDC with Google is
https://accounts.google.com - Your Client ID is the
Client IDnoted in the previous section - Your Client Secret is the
Client secretnoted in the previous section
- The Issuer URL is when configuring OIDC with Google is
- Click the Save button
Test OIDC Configuration
You should now be able to sign into Sublime with Google. You can verify the integration is working by either selecting the Sublime Platform application in Google, or by loading the Initiate login URL from your OIDC settings in Sublime.
Matching User RequiredFor a user to successfully sign into Sublime with Google, there must already be a matching user with the same email address in Sublime.
Updated 22 days ago