IMAP
Gmail
To add an IMAP message source for your Gmail or Google Workspace account, you need to:
- Be sure IMAP is enabled for your account.
- Create an app password.
2-Step Verification RequiredYou must have 2-Step Verification enabled on your Google account in order to create an app password for the IMAP integration.
To enable 2-Step Verification, see Turn on 2-Step Verification.
Advanced ProtectionApp passwords are not supported if Google Advanced Protection is enabled, and menu option will be missing to generate. To learn more visit: https://support.google.com/accounts/answer/185833?hl=en
Enabling IMAP for your account
As of January 2025, Google enables IMAP by default for all Gmail accounts. You don't need to take any action to enable IMAP in Gmail!
Creating an app password
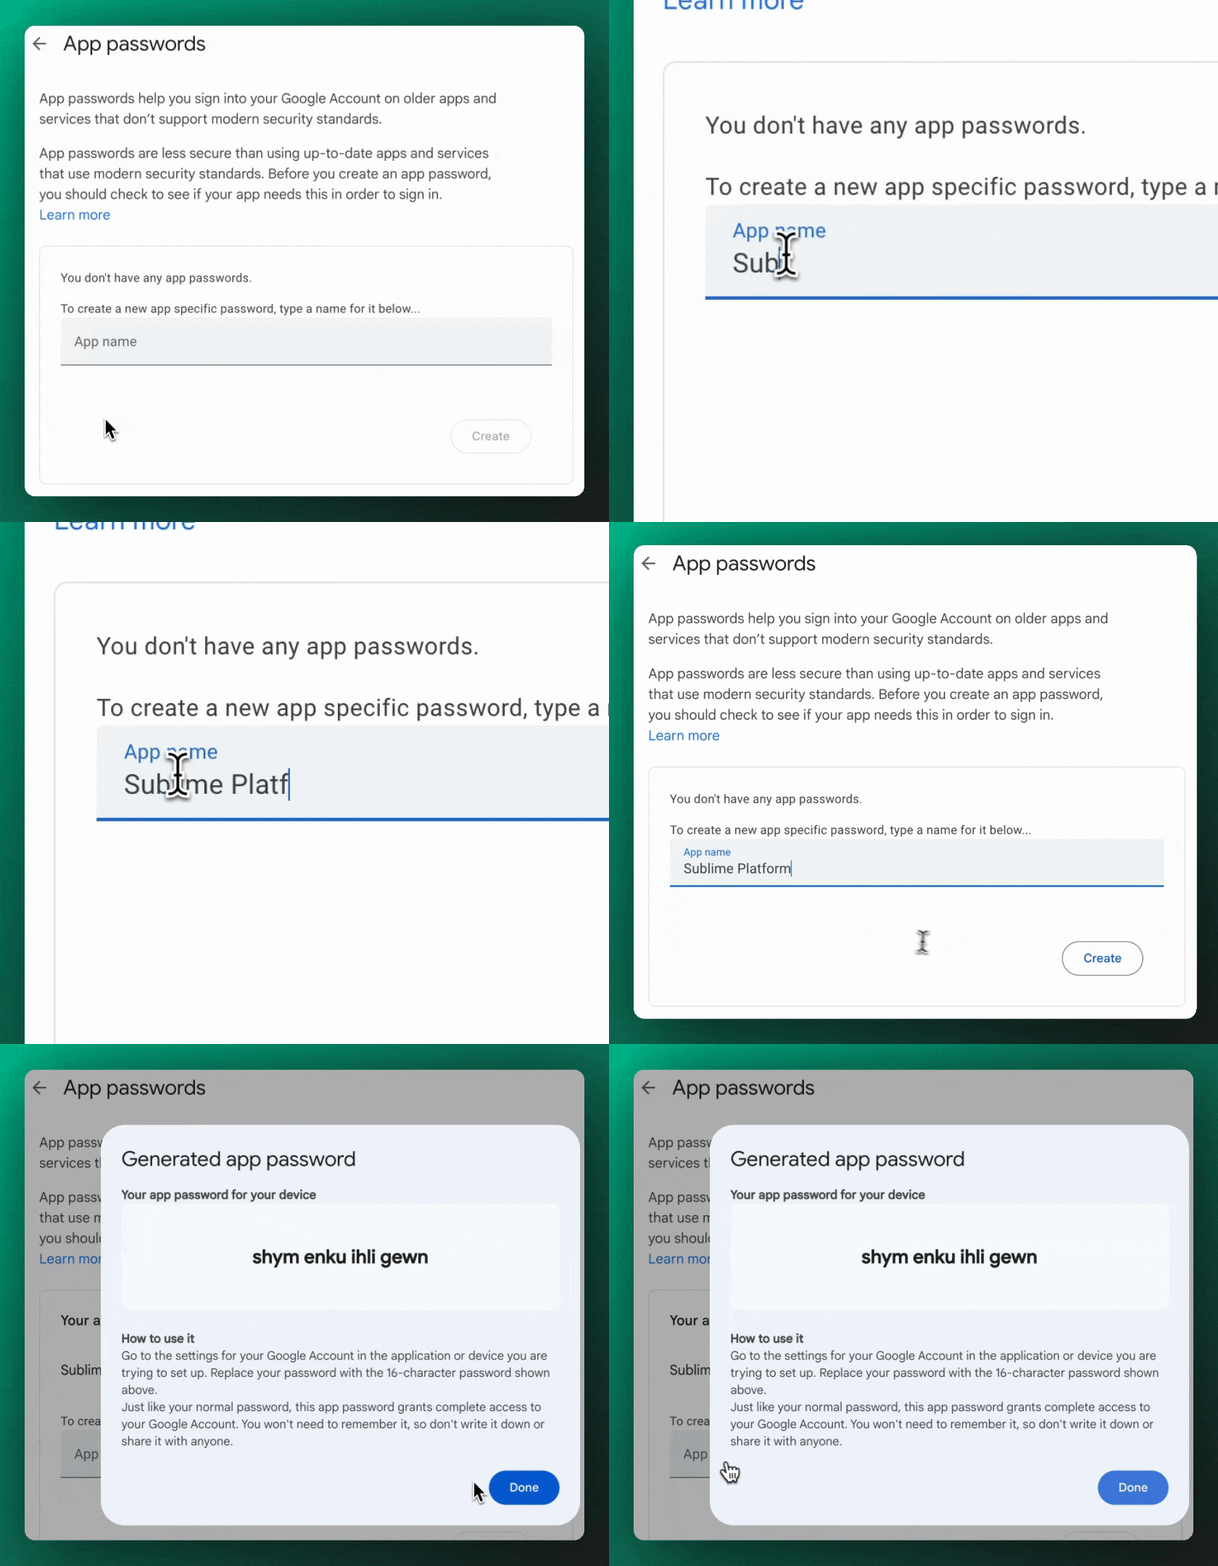
- Head to your Gmail account's app passwords page.
- You can alternatively go to the "Manage your Google Account" section and utilize the Search feature to look up "App passwords".
- To create a new app password, enter "Sublime Platform" in the app name field and click the "Create" button.

- Once you've created an app password, enter it into the IMAP / App Password field in Sublime when creating the IMAP message source.
Microsoft 365
To add an IMAP message source for your Microsoft 365 account, you need to:
- Be sure IMAP is enabled for your account.
- Create an app password, if and only if you're using two-step verification with your Microsoft 365 account.
Enabling IMAP for your account
Microsoft 365 administrator requiredYou'll need to be a Microsoft 365 administrator to follow these steps. If you're not a Microsoft 365 administrator, we recommend skipping this step, attempting to add the message source, and reaching out to your Microsoft 365 administrator for assistance if you receive a signin error when attempting to add the message source.
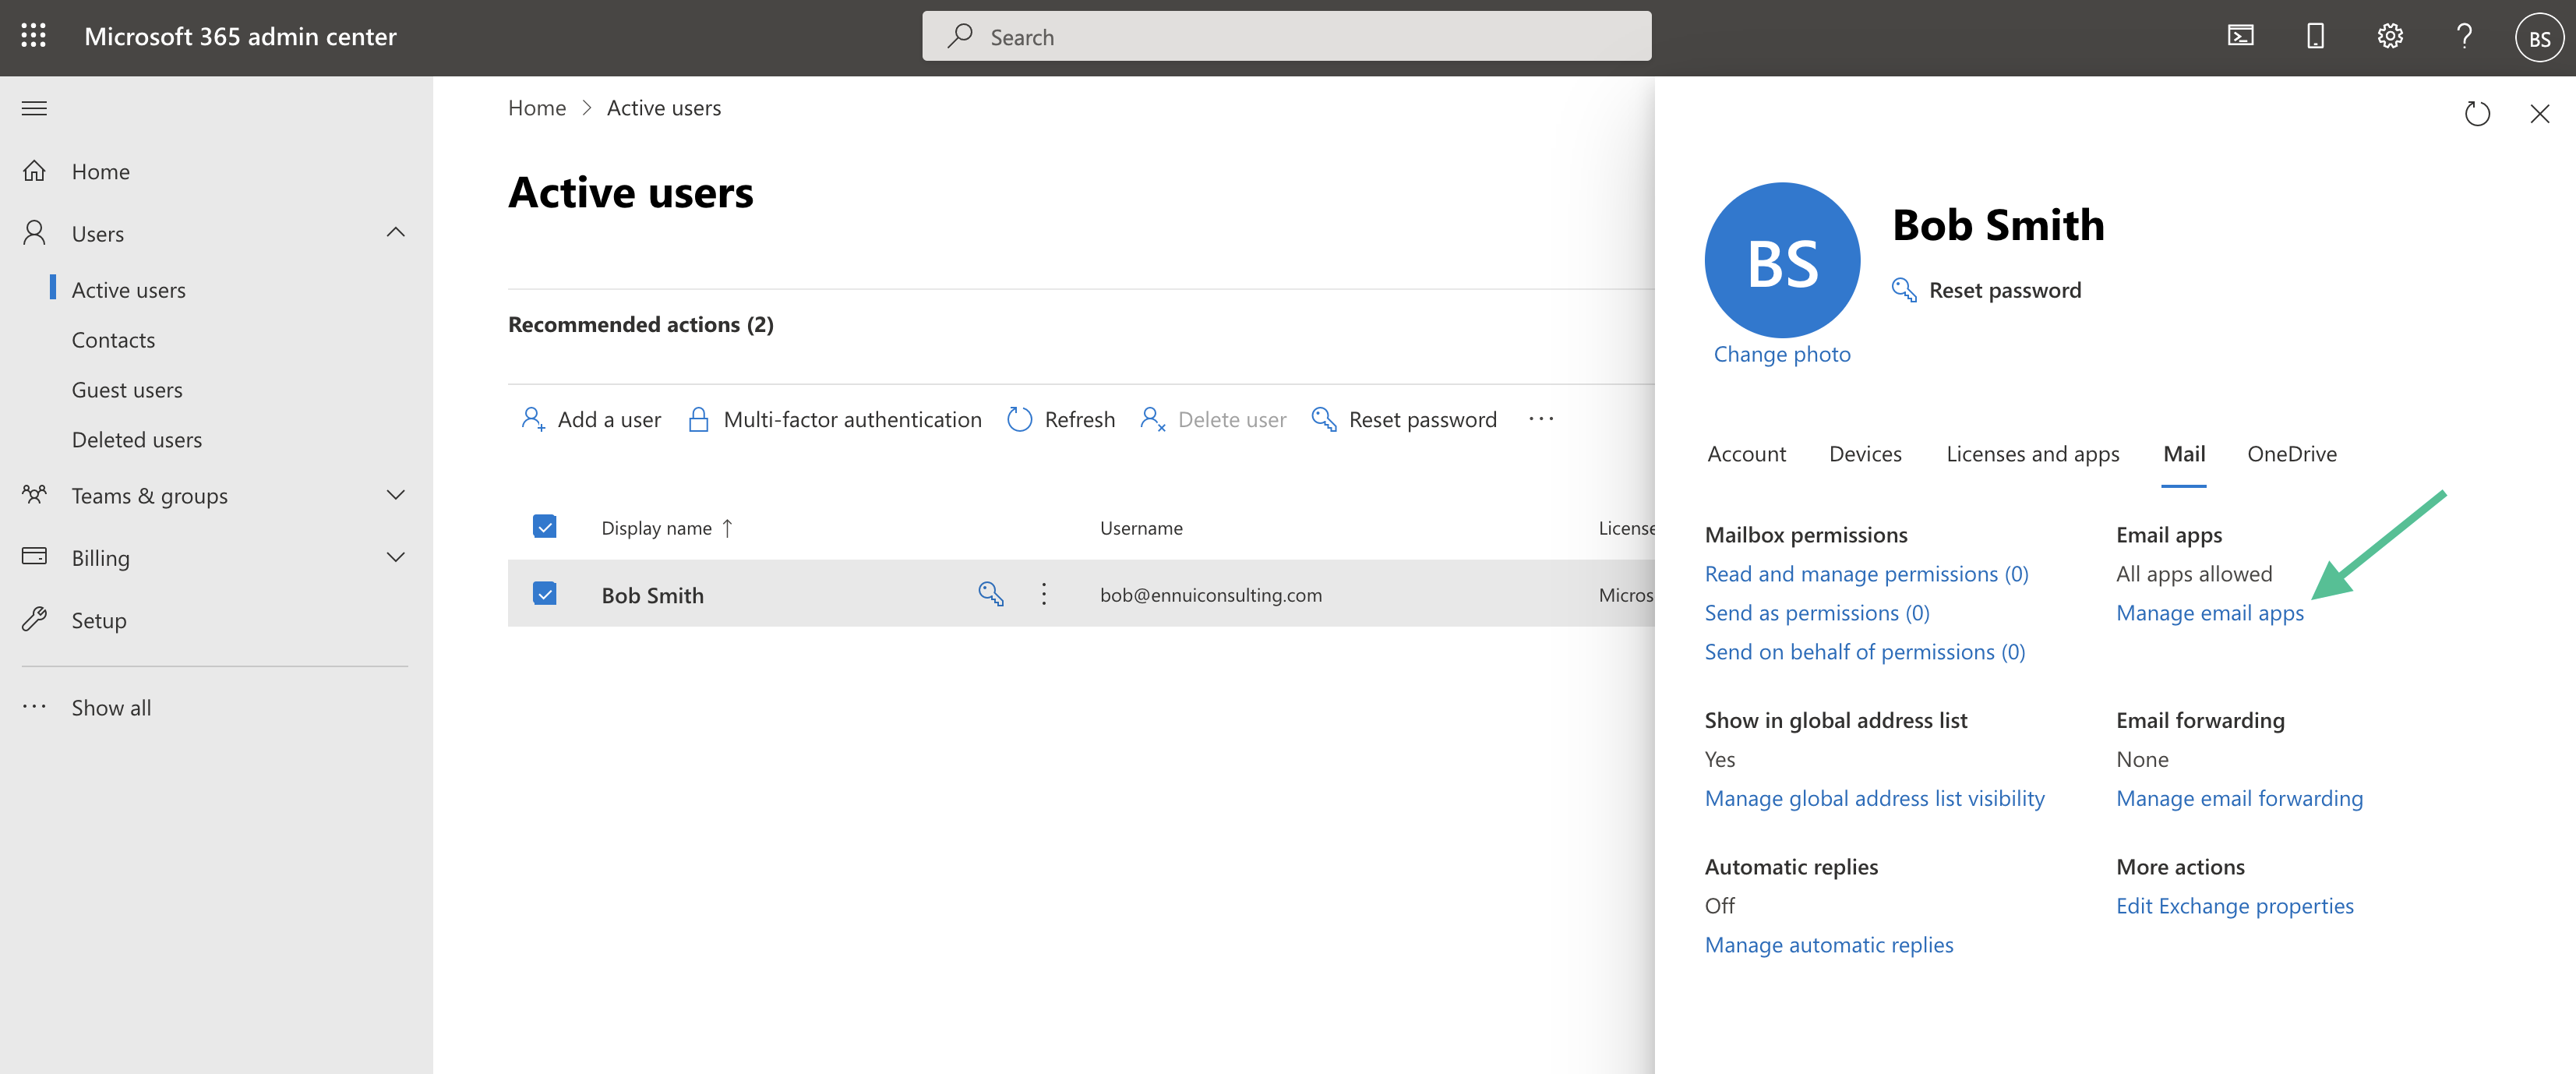
- Sign into the Microsoft 365 admin center at https://admin.microsoft.com
- In the lefthand menu, go to Users > Active Users
- Search for your user and click the matching row
- In the righthand drawer that opens up, click the Mail tab
- Under Email apps, click Manage email apps

- Check the box next to IMAP and click the Save changes button
Creating an app password
You only need to create an app password if you're using two-step verification with your Microsoft 365 account.
The pre-requisites are as follows:
- "Manage email apps" is enabled in M365 admin interface
- "Authenticated SMTP" is enabled for the user
- In Entra admin center: "Allow users to create app passwords" is enabled under Per-user multifactor authentication settings
Creating the Password
- Sign in to your Microsoft 365 account
- Go to Security Info settings
- Select "Add sign-in method"
- Choose "App password"
- Name your app password (e.g., "Sublime Email Alerts")
- Copy the generated password and enter it in the Sublime SMTP configuration
Custom IMAP servers
If your IMAP server’s capabilities include
SPECIAL-USEas defined byRFC 6154, the Sublime Platform will assume that these special use folders are properly configured to adhere to the attributes on the mailbox. For example, when theSPECIAL-USEcapability is enabled, Sublime will treat folders with the\Allattribute as a virtual mailbox containing all incoming mail, and will not ingest mail from any other folders in that mailbox.
Updated 3 months ago