

Self Managed - Microsoft 365
Estimated time: <15 minutes
Microsoft 365 Global Admin RequiredYou must be a Global Admin in Microsoft 365 to authorize access for all users on your domain.
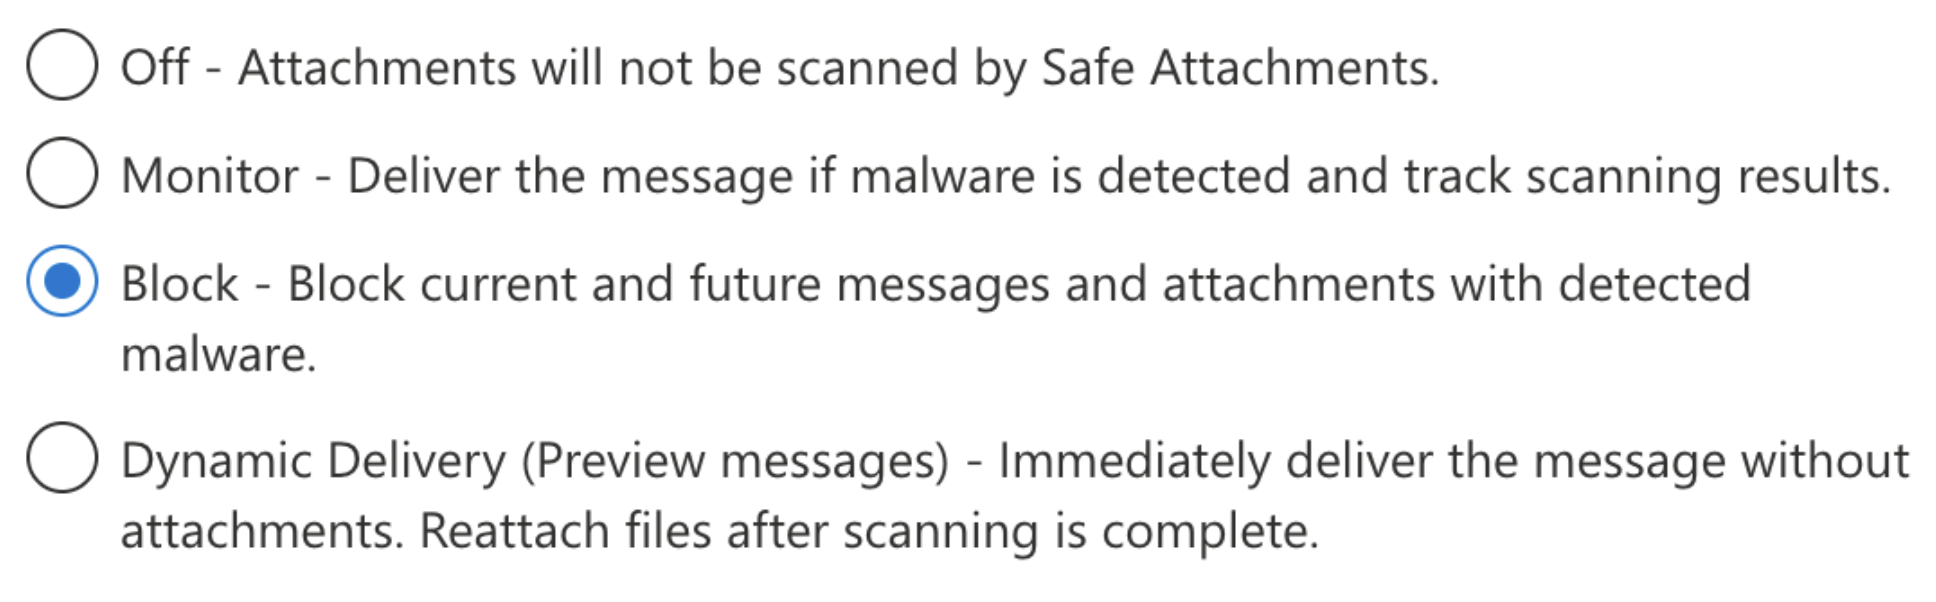
Safe Attachments Policy RequirementsMicrosoft 365 Safe Attachments will cause issues with scanning in Sublime if set to
Dynamic Delivery.Recommended setting for best compatibility is
Block. (Microsoft recommendation and default)
You can add a Microsoft 365 message source when setting up your Sublime organization or by going to Admin > Message Sources > New message source in the Sublime dashboard and selecting Microsoft 365.
Overview
In order for your Enterprise self-hosted instance of Sublime on AWS to access mail from your tenant programmatically, you must create a new Azure app and authorize it for access. This is required so that only you have access to your mail, and not anyone else, including the Sublime team.
After completing the steps below, you'll copy over the following to add the message source in Sublime:
- Application (client) ID
- Directory (tenant) ID
- Client secret
Setup
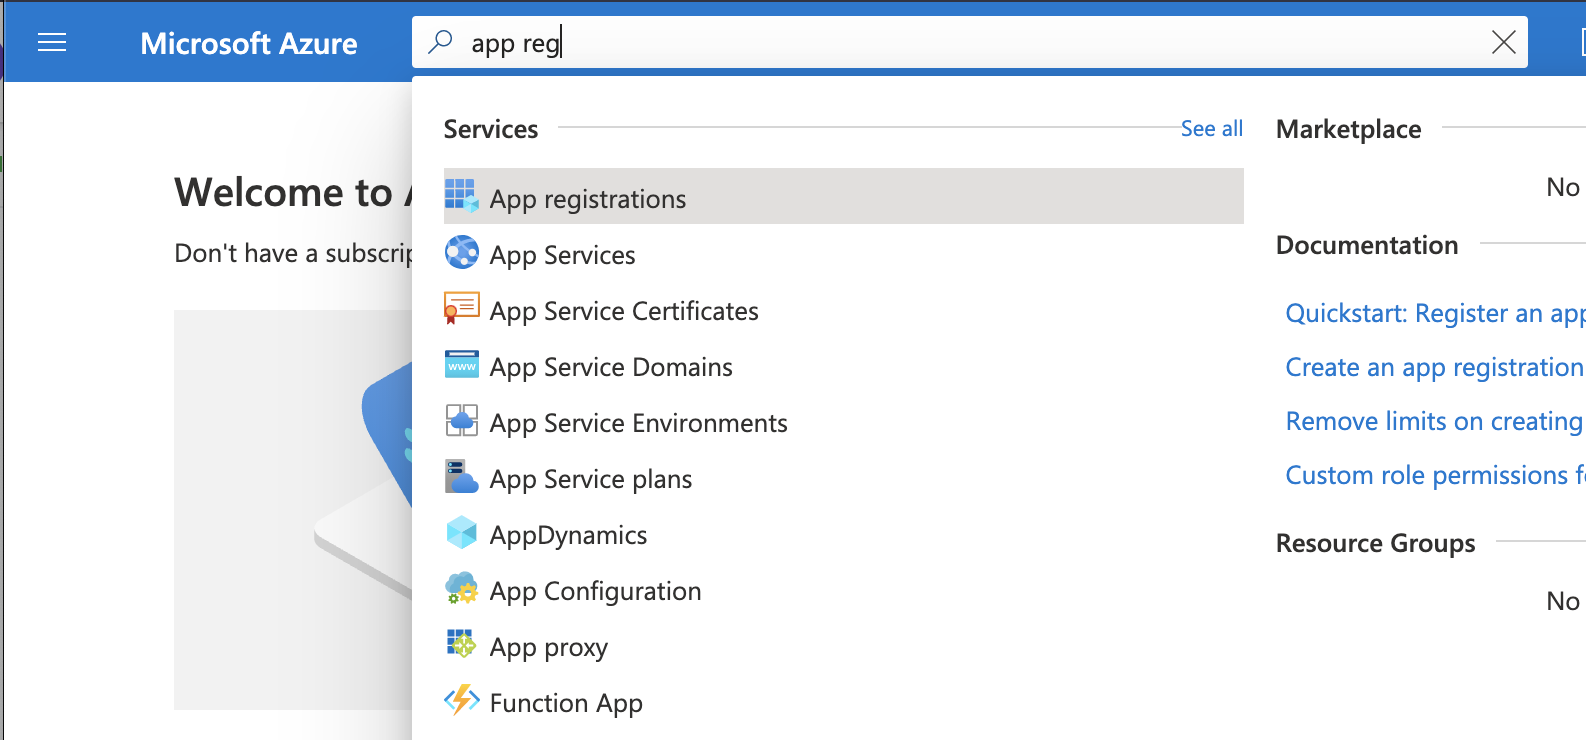
- Login to https://portal.azure.com
- Search for
App registrations
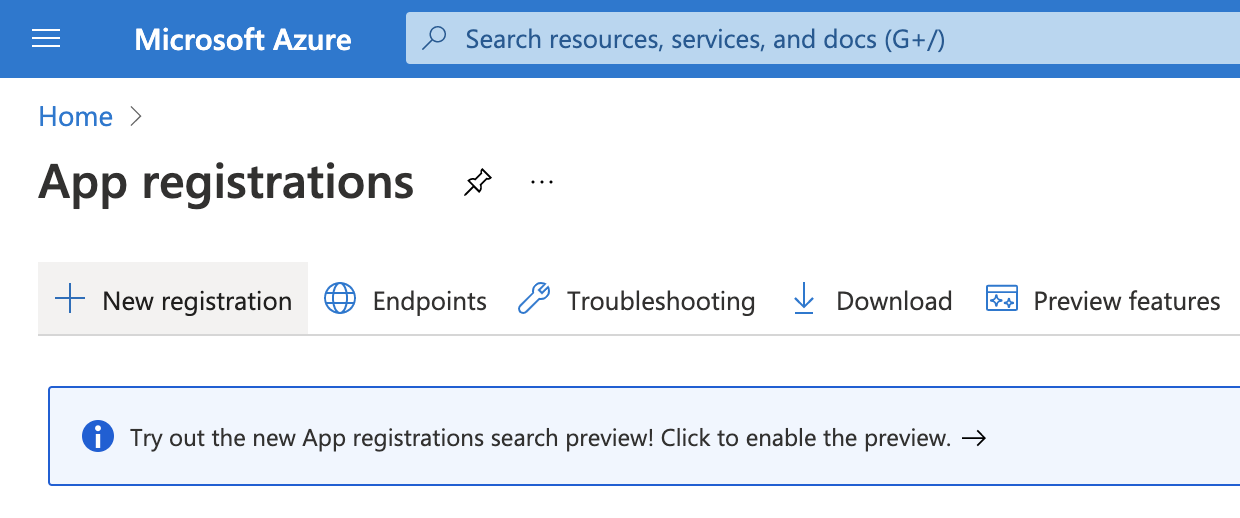
- Click
+ New registration
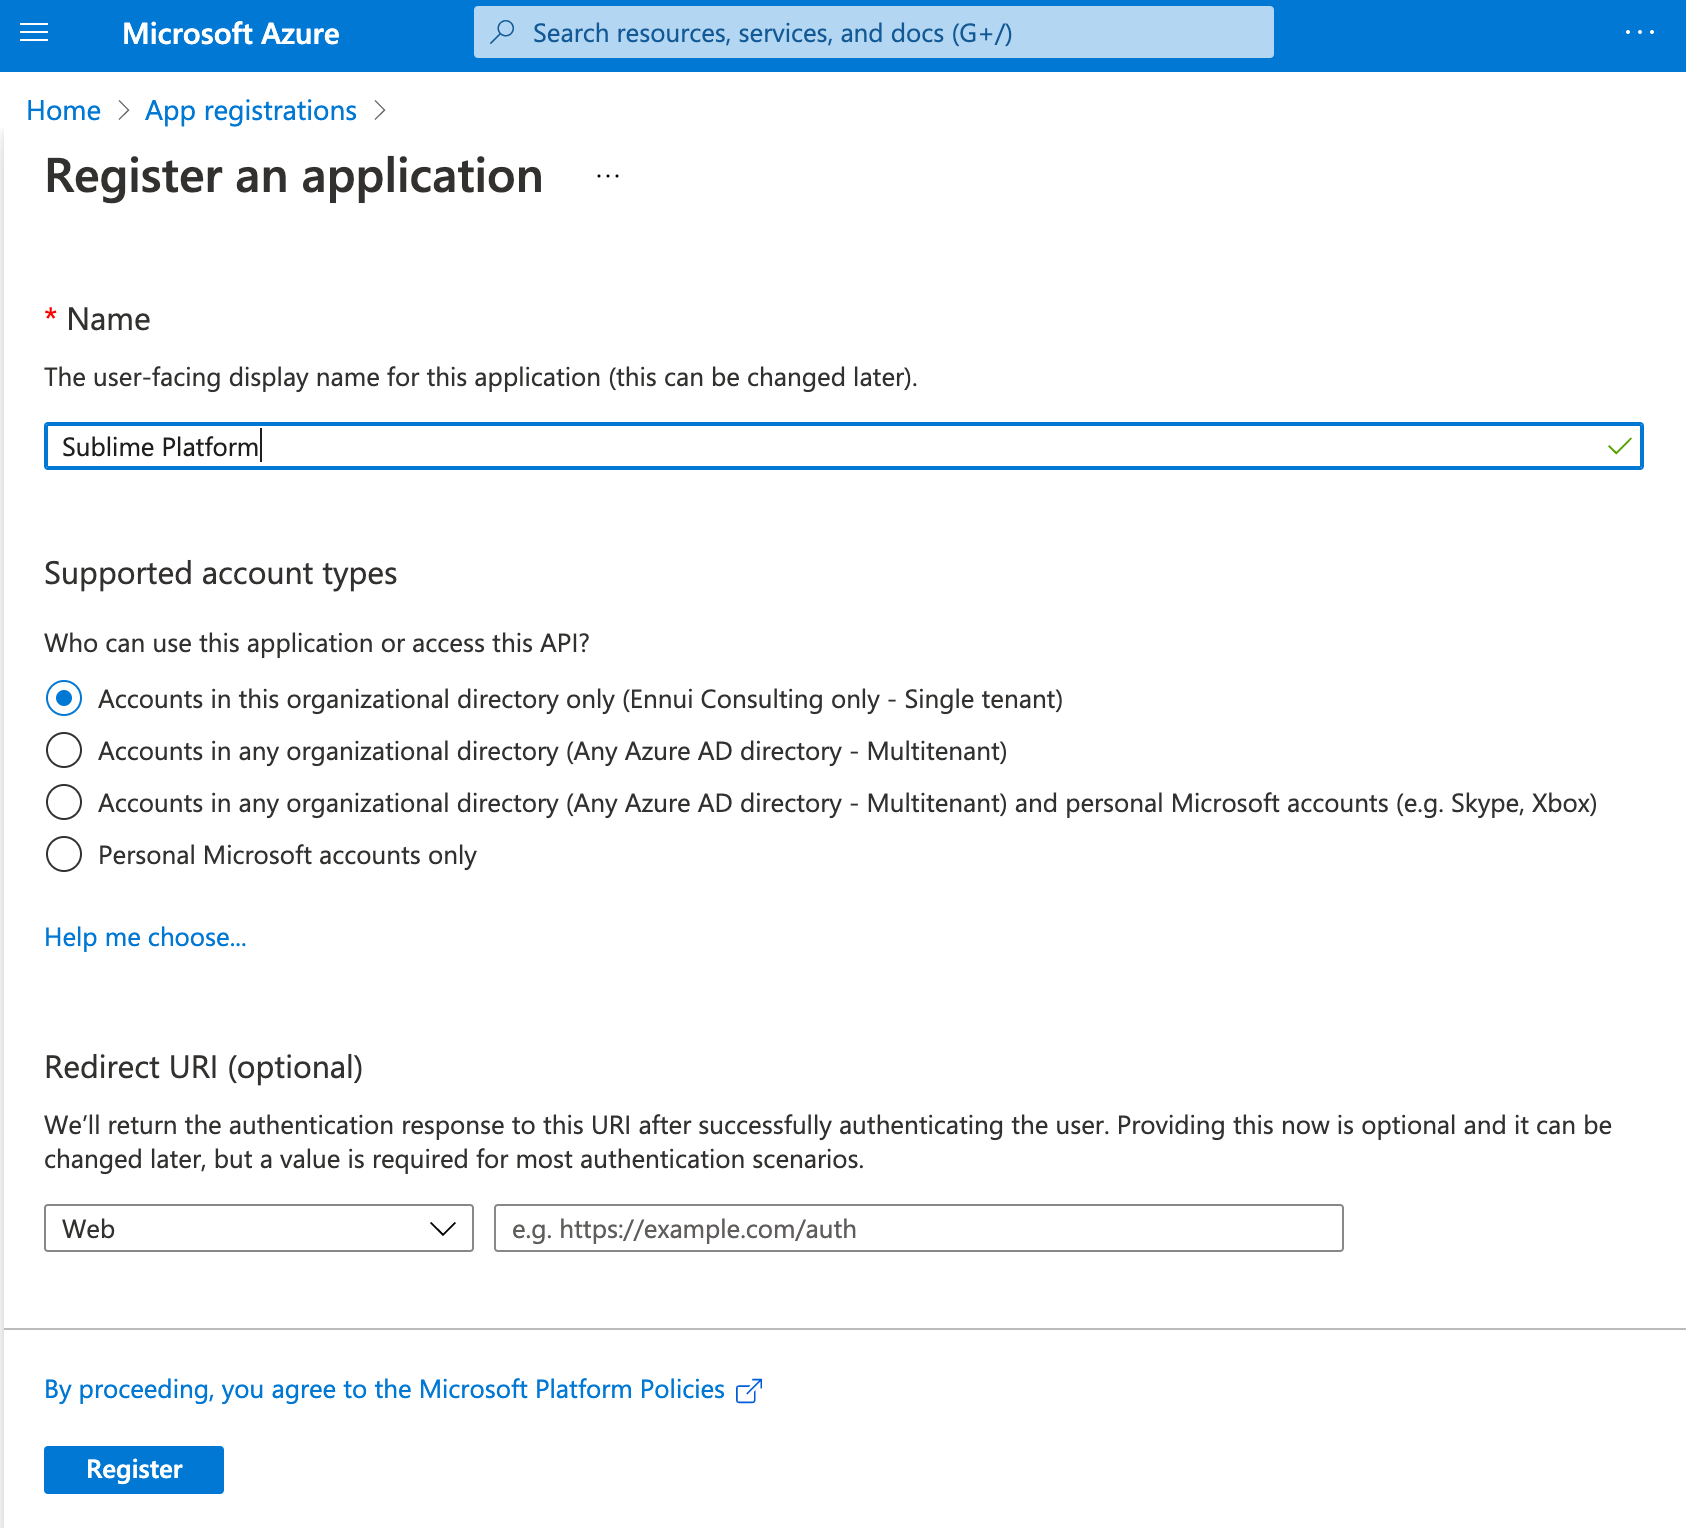
- Enter "Sublime Platform" for the app name. Leave the other defaults (Single-tenant, no Redirect URI). Click "Register".
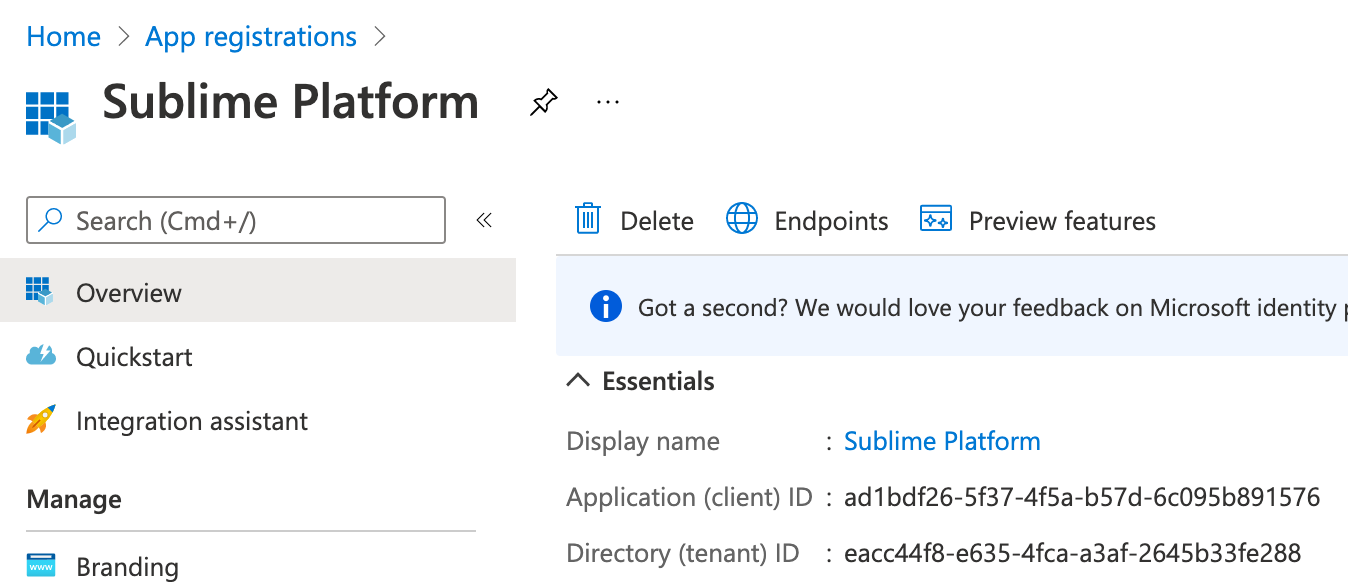
- Copy the application (client) ID and the Directory (tenant) ID over to the Sublime Platform setup
- Click
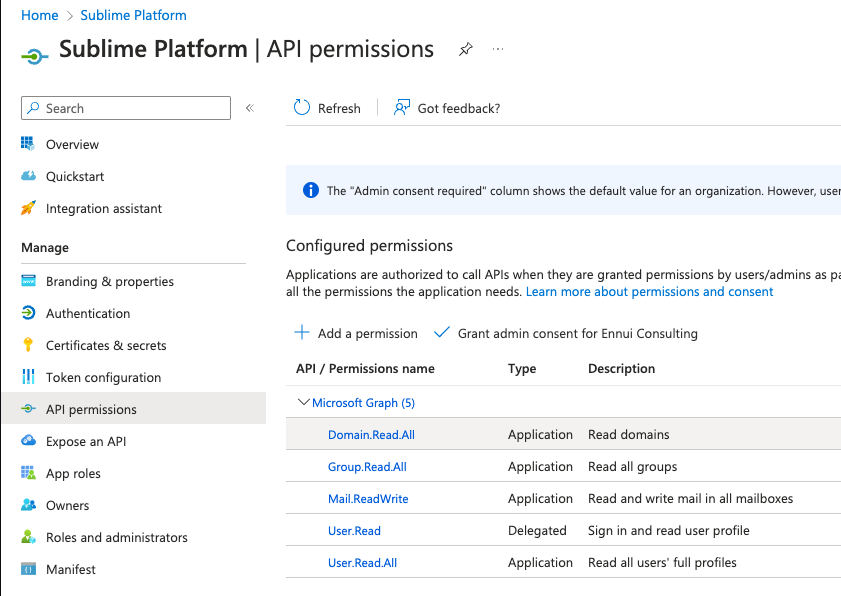
View API permissionsand then+ Add a permission
- Select
Microsoft Graph - Select
Application permissions - Choose
Mail.ReadWrite,User.Read.All,Group.Read.All,Domain.Read.All, andCalendars.ReadWrite - Click
Add permissions
- Then,
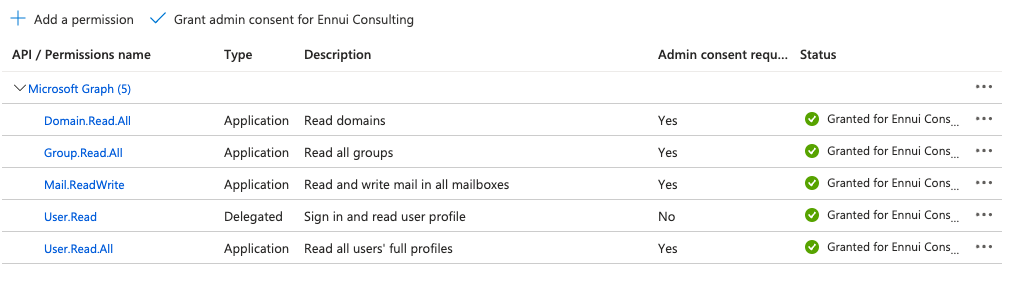
Grant admin consentfor your domain. Note that if this button is greyed out for you, you may need to have a Domain Admin grant the consent.
You should see green checkmarks like this:
- Navigate to
Certificates & secretsin the sidebar
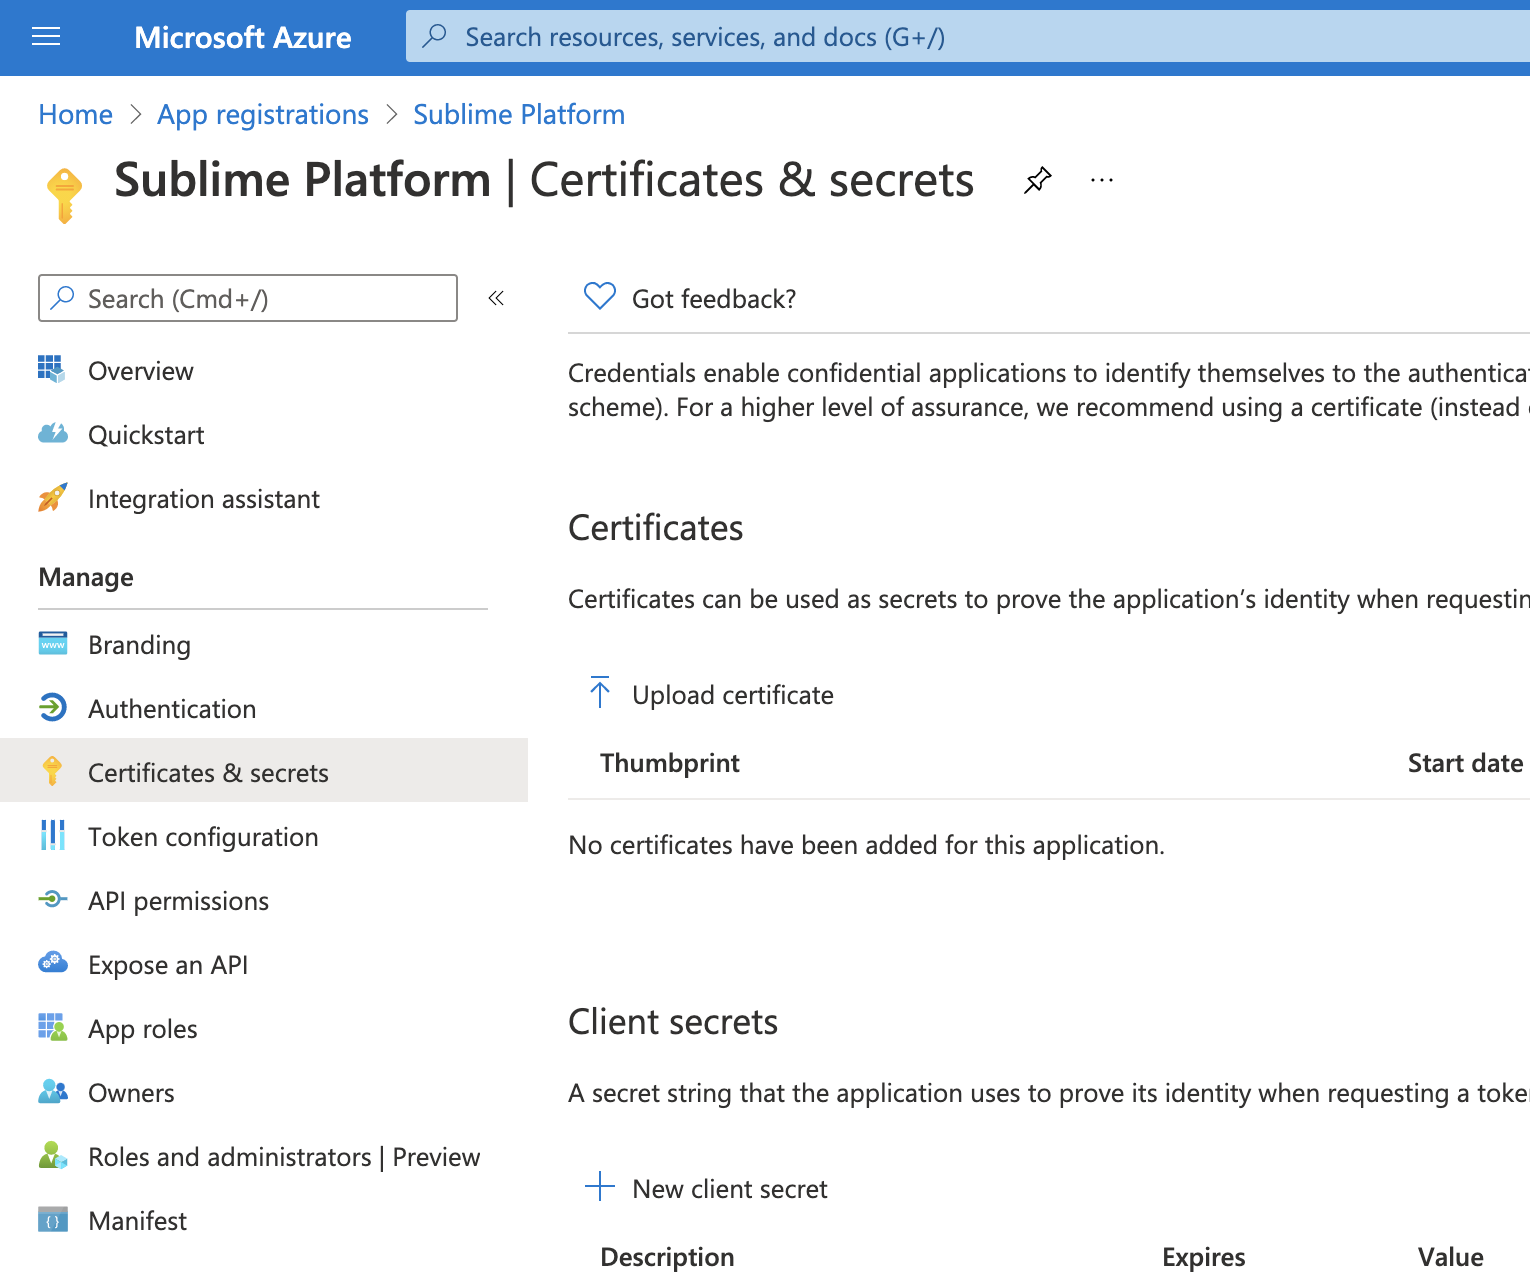
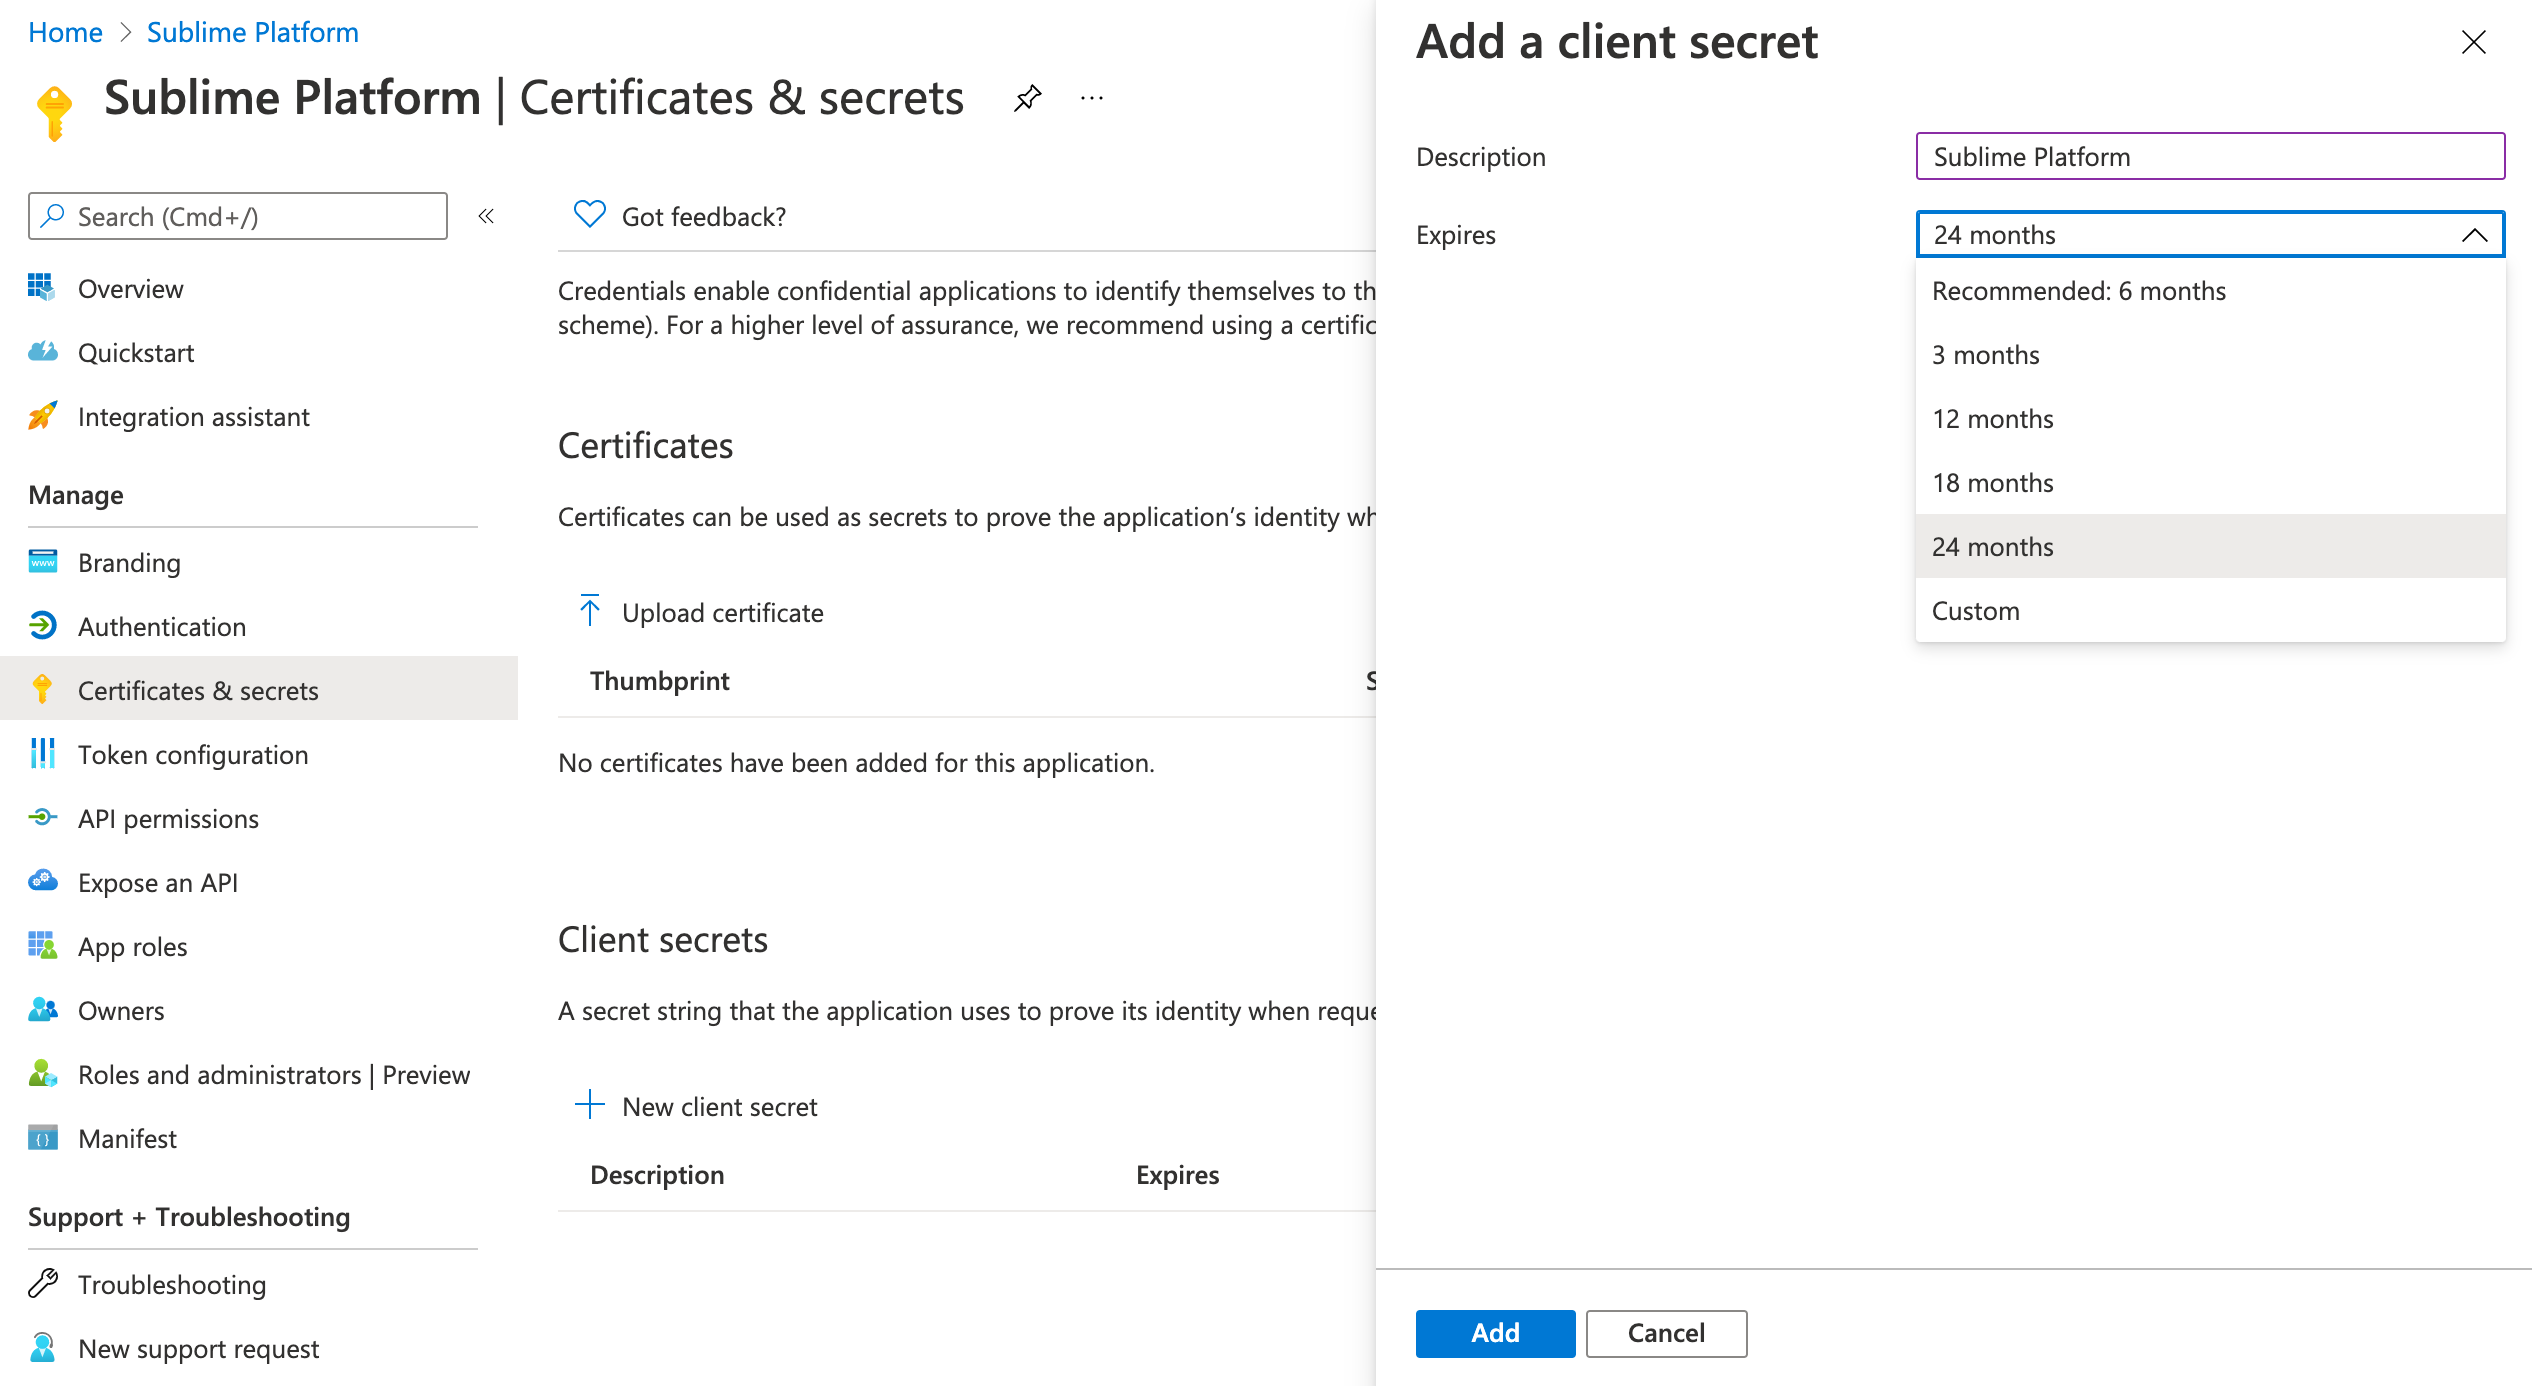
- Create a new Client secret. Enter "Sublime Platform" for the description and choose "24 months".
-
Navigate to your Sublime Instance -> New Message Source -> Microsoft M365
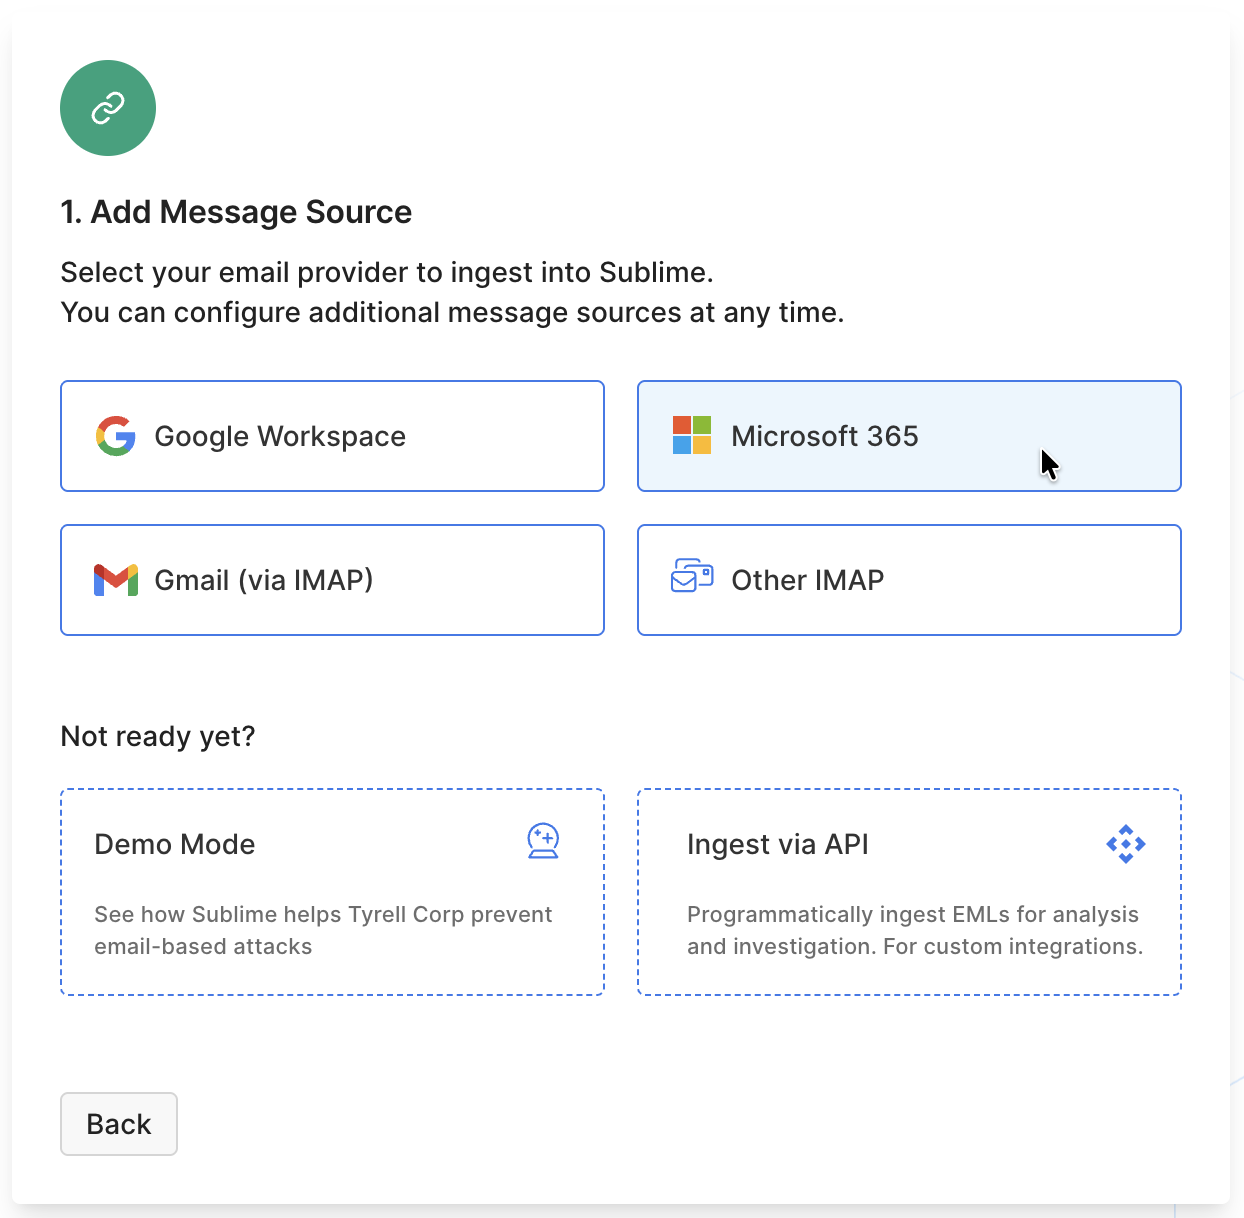
-
Enter the your newly created
Application ID,Directory (tenant) IDandClient Secretand click Continue!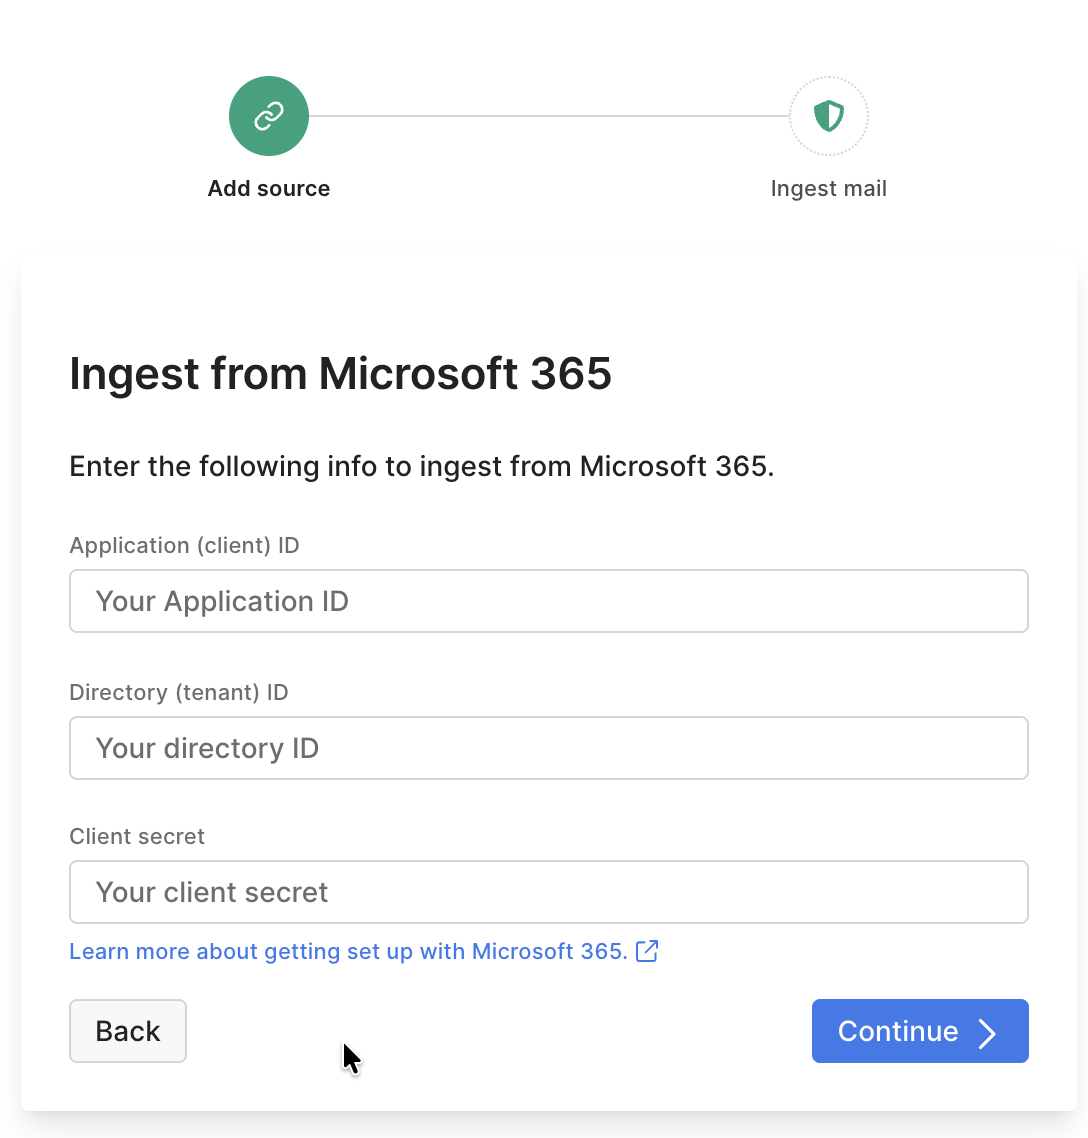
- Once the Sublime Platform successfully authenticates to your M365 email tenant, you can follow the steps to Activate all mailboxes, test mail flow, and kick off Historical Ingestion.
🎉 That's it!
Safe Attachments Recommended Policy Settings
If you have Safe Attachments enabled, the Dynamic Delivery unknown malware response setting will cause issues with scanning in Sublime. Specifically, Sublime currently does not scan attachments that are placed back into a message post-delivery.
Any of the other settings will work with Sublime (Block, Monitor, or None). In order to get the best of Microsoft and the best of Sublime together, our recommendation is Block (also Microsoft's recommended and default setting).
Authorizing a Subset of Mailboxes
If you wish to restrict the access of the Sublime Azure app to a subset of mailboxes — for
example, to limit access to a specific domain, department, or set of users — you can do so
using Exchange Online Role Based Access Control (RBAC) for Applications.
Why RBAC for Applications?Microsoft has deprecated
New-ApplicationAccessPolicyin favor of RBAC for Applications.
Do not create new Application Access Policies — Microsoft requires migration to RBAC and
these policies will eventually stop working.RBAC for Applications also has a key practical advantage: scopes are defined as
dynamic property filters evaluated at authorization time, so newly provisioned mailboxes
are automatically included or excluded without any manual group maintenance.
Prerequisites
- Exchange Administrator role in Entra ID (or membership in the Organization Management
role group in Exchange Online). - The Exchange Online PowerShell module installed:
Install-Module -Name ExchangeOnlineManagement
- Your Sublime Azure app's Application (client) ID and its Service Principal Object ID.
Retrieve the Service Principal Object ID from Entra ID > Enterprise Applications (not
App Registrations — the two pages show different Object ID values).
Step 1 — Connect to Exchange Online
Connect-ExchangeOnline -UserPrincipalName {EMAIL_OR_UPN}Step 2 — Create a Management Scope
A Management Scope defines which mailboxes the app is permitted to access. The filter is
evaluated dynamically, so any new mailbox matching the filter is automatically in scope.
Use WindowsEmailAddress as the filter property. Note that two other address properties exist but
behave differently:
PrimarySmtpAddress— despite the name, Microsoft's documentation confirms it also matches
proxy/alias addresses, not just the primary. Do not use.EmailAddresses— matches the primary address and all proxy addresses.
WindowsEmailAddress maps to the Active Directory mail attribute and matches only the
primary SMTP address. This is the correct property when you need to scope by primary domain
without picking up aliases in other domains.
The example below scopes access to all mailboxes whose primary address is in @example.com.
Replace the domain with your own, and choose a descriptive scope name.
New-ManagementScope -Name "Sublime Scope - example.com" `
    -RecipientRestrictionFilter "WindowsEmailAddress -like '*@example.com'"
To scope by a specific mail-enabled security group instead of a domain, use:
New-ManagementScope -Name "Sublime Scope - Pilot Group" `
    -RecipientRestrictionFilter "MemberOfGroup -eq '[email protected]'"
Use a mail-enabled security group, or turn off welcome emails on an existing Microsoft 365 Group
MemberOfGroupaccepts any mail-enabled group. Create a mail-enabled security
group for this. Avoid a Microsoft 365 Group (also called a Unified Group),
because adding a member to one triggers a system-generated welcome email to that
member, and this is on by default. At the scale of a pilot or department rollout,
that's a lot of unexpected email landing in inboxes at once.If you're stuck scoping by an existing Microsoft 365 Group, disable its welcome
message before adding any more members by running
Set-UnifiedGroup -Identity "Pilot Group" -UnifiedGroupWelcomeMessageEnabled:$false.
New-UnifiedGroupdoesn't expose this setting at creation time, so run
Set-UnifiedGroupright after creating the group and before adding members.
New-UnifiedGroupalso accepts a-Membersparameter. If you create the group and add
its members in one command, those members are added before you can disable the welcome
message, and they receive it. Create the group with no members first, run
Set-UnifiedGroup, then add members withAdd-UnifiedGroupLinks.
Scoping multiple domains or groupsRun
New-ManagementScopeonce per domain or group. You will create a separate RBAC role
assignment for each scope in Step 3.
Step 3 — Register the Service Principal pointer in Exchange
Exchange Online needs a local pointer object linked to the Entra ID service principal before
you can assign it roles.
Use the Enterprise Applications Object IDGet the
ObjectIdfrom Entra ID > Enterprise Applications, not App Registrations.
The two pages show different Object ID values.
New-ServicePrincipal `
    -AppId    "{APP_CLIENT_ID}" `
    -ObjectId "{SERVICE_PRINCIPAL_OBJECT_ID}" `
    -DisplayName "Sublime Platform"
Replace {APP_CLIENT_ID} with the Application (client) ID and {SERVICE_PRINCIPAL_OBJECT_ID}
with the Object ID from Enterprise Applications.
Step 4 — Assign scoped RBAC roles
Assign Mail.ReadWrite and Calendars.ReadWrite to the service principal, restricted to the
scope created in Step 2. If you use the Track Link Clicks action, also assign
ThreatHunting.Read.All.
PowerShell
New-ManagementRoleAssignment `
    -Name "Sublime-MailReadWrite" `
    -App  "{SERVICE_PRINCIPAL_OBJECT_ID}" `
    -Role "Application Mail.ReadWrite" `
    -CustomResourceScope "Sublime Scope - example.com"

New-ManagementRoleAssignment `
    -Name "Sublime-CalReadWrite" `
    -App  "{SERVICE_PRINCIPAL_OBJECT_ID}" `
    -Role "Application Calendars.ReadWrite" `
    -CustomResourceScope "Sublime Scope - example.com"

# Only needed if Track Link Clicks is enabled:
# New-ManagementRoleAssignment `
#     -Name "Sublime-ThreatHunting" `
#     -App  "{SERVICE_PRINCIPAL_OBJECT_ID}" `
#     -Role "Application ThreatHunting.Read.All" `
#     -CustomResourceScope "Sublime Scope - example.com"
If you created multiple scopes in Step 2, repeat the above for each scope using the
corresponding scope name.
Step 5 — Remove unscoped Entra ID consents for mailbox permissions
Exchange RBAC scopes only take effect if the corresponding permissions are not also granted as unscoped application permissions in Entra ID. If present, any lingering unscoped Entra grant would also gives the Sublime app access to every mailbox in the tenant and so should be revoked.
In Entra ID > App Registrations > [your app] > API Permissions, revoke admin consent for:
Mail.ReadWriteCalendars.ReadWriteThreatHunting.Read.All(if present).
Leave User.Read.All, Group.Read.All, and Domain.Read.All — these are directory-level
permissions that cannot be scoped via Exchange RBAC and are safe to retain as tenant-wide grants.
Expected subscription errors for out-of-scope mailboxesSublime uses the
/usersendpoint to enumerate mailboxes, which is governed by the
unscopedUser.Read.Allgrant. As a result, Sublime will attempt to subscribe to all
mailboxes in the tenant, including those outside the RBAC scope. Subscription attempts for
out-of-scope mailboxes will be rejected by Microsoft with a permission error. This is
expected behavior and does not affect delivery or scanning for in-scope mailboxes.
Step 6 — Verify the configuration
Use Test-ServicePrincipalAuthorization to confirm the scope is working correctly. The cmdlet
bypasses the permission cache (which can take up to 2 hours to propagate), making it useful for
immediate validation.
InScope: True means the app can access that mailbox; InScope: False means it cannot.
Test-ServicePrincipalAuthorization `
    -Identity "Sublime Platform" `
    -Resource "[email protected]"
Permission cache latencyProduction permission changes can take 30 minutes to 2 hours to take effect.
Test-ServicePrincipalAuthorizationbypasses the cache and reflects the current state
immediately.
Updated 5 days ago