How to manage users with SCIM
Introduction
Sublime's SCIM API allows you to provision, update, and deprovision Sublime users from your identity provider (e.g., Okta), including managing each user's Sublime role.
Sublime and identity provider admin requiredTo integrate with SCIM, you'll need to be an administrator for both Sublime and your identity provider, or get the help of an admin for each.
Below are the steps for integrating Okta with SCIM. If you need help integrating another identity provider with SCIM, drop us a message.
Okta Setup
Gather Sublime info
To integrate Okta with SCIM, you'll need the following from the Sublime dashboard:
- The SCIM API base URL for your Sublime instance:
- In Sublime, navigate to the API page
- Copy the Base URL. For example, Sublime Cloud's US region has the API base URL
https://platform.sublime.security - Append
/v0/scimto the base URL to construct a SCIM API base URL likehttps://platform.sublime.security/v0/scim - Hold onto this URL
- An API key for a Sublime admin:
- In Sublime, navigate to the API page
- Click New Key
- Enter a key name, such as "SCIM Integration"
- Click Save
- Copy and hold onto the new key
Create a custom SAML app
Follow the instructions here to set up a custom SAML app in Okta. You'll need an Okta SAML app to integrate Sublime's SCIM API with Okta.
Add SCIM provisioning to the Okta app
- Go to the overview page for the Okta application you created
- Click the General tab
- In the App Settings section, click Edit
- Check Enable SCIM provisioning
- Click Save
- Click the Provisioning tab that appears
- Click Edit
- For SCIM connector base URL, enter
https://platform.sublime.security/v0/scim - For Unique identifier field for users, enter
userName - For Supported provisioning actions, check:
Import New Users and Profile UpdatesPush New UsersPush Profile Updates
- For Authentication Mode, select HTTP Header
- For Authorization, enter the Sublime API key you created
- Click Test Connector Configuration and confirm you get a Connector configured successfully message
- Close the Test Connector Configuration modal
- Click Save
- Click the To App subtab
- In the Provisioning to App section, click Edit
- Check Enable for:
Create UsersUpdate User AttributesDeactivate Users
- Click Save
- Under Sublime Platform Attribute Mappings, update the mappings as follows. You should only need to remove some of the default mappings.
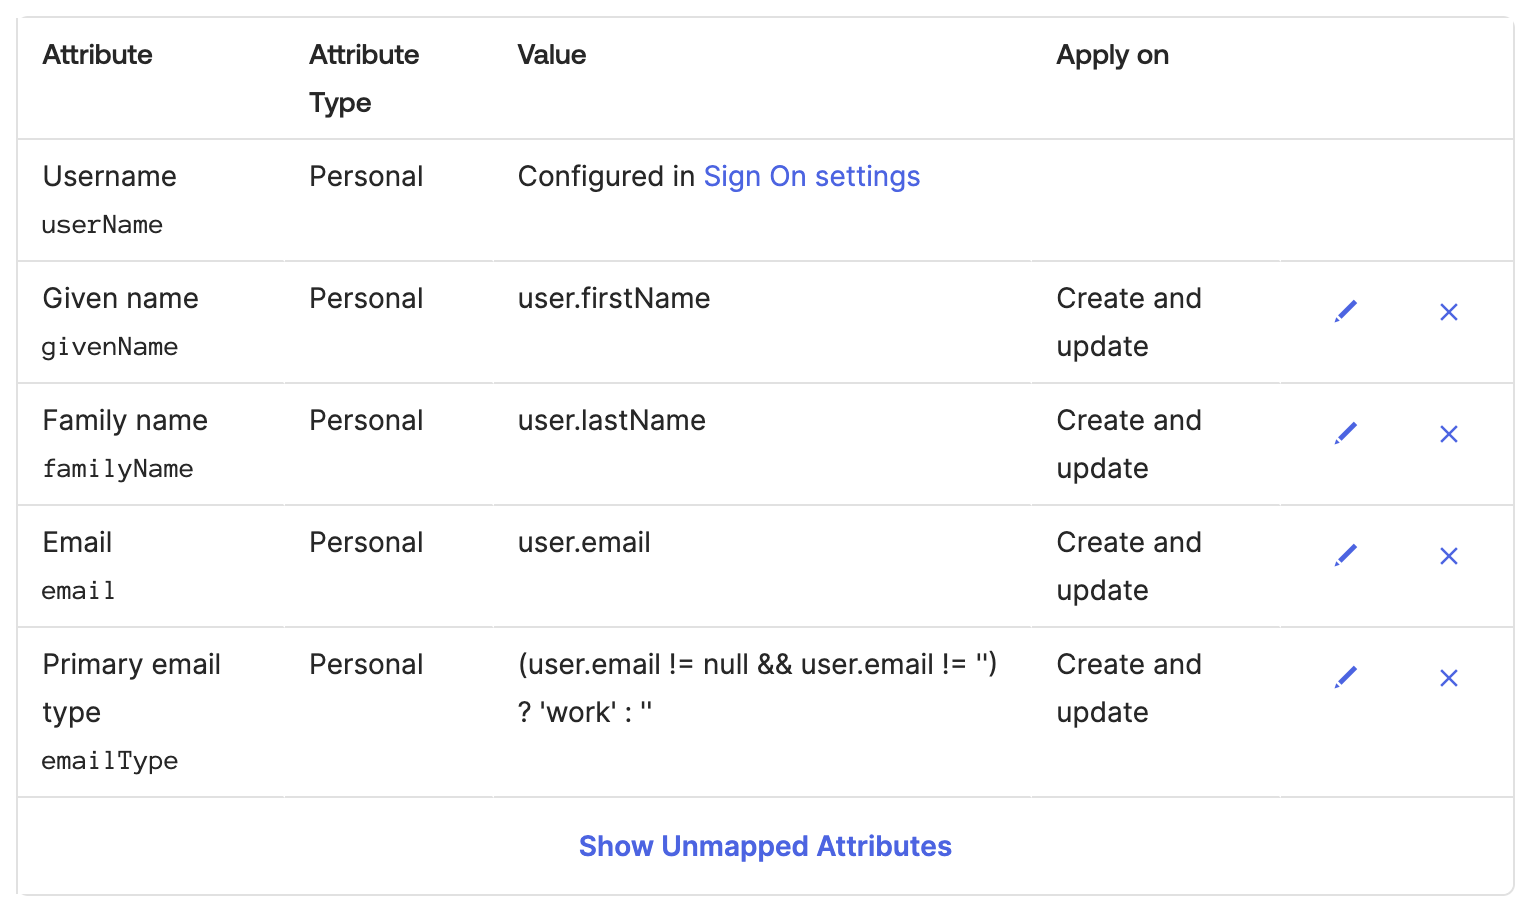
- Leave all other provisioning settings unchanged
Map Okta groups to Sublime roles
- In Okta, go to Directory > Profile Editor
- Under the Users tab, click your Sublime Okta app
- Click Add Attribute
- Add a new attribute with these properties:
- Data type:
string - Display name:
Sublime Role - Variable name:
sublimeRole - External name:
sublimeRole - External namespace:
urn:ietf:params:scim:schemas:core:2.0:User - Enum: checked, with these options:
Admin:adminEngineer:engineerAnalyst:analyst
- Attribute length: between 0 and 50
- Attribute required: unchecked
- Attribute type:
Group
- Data type:
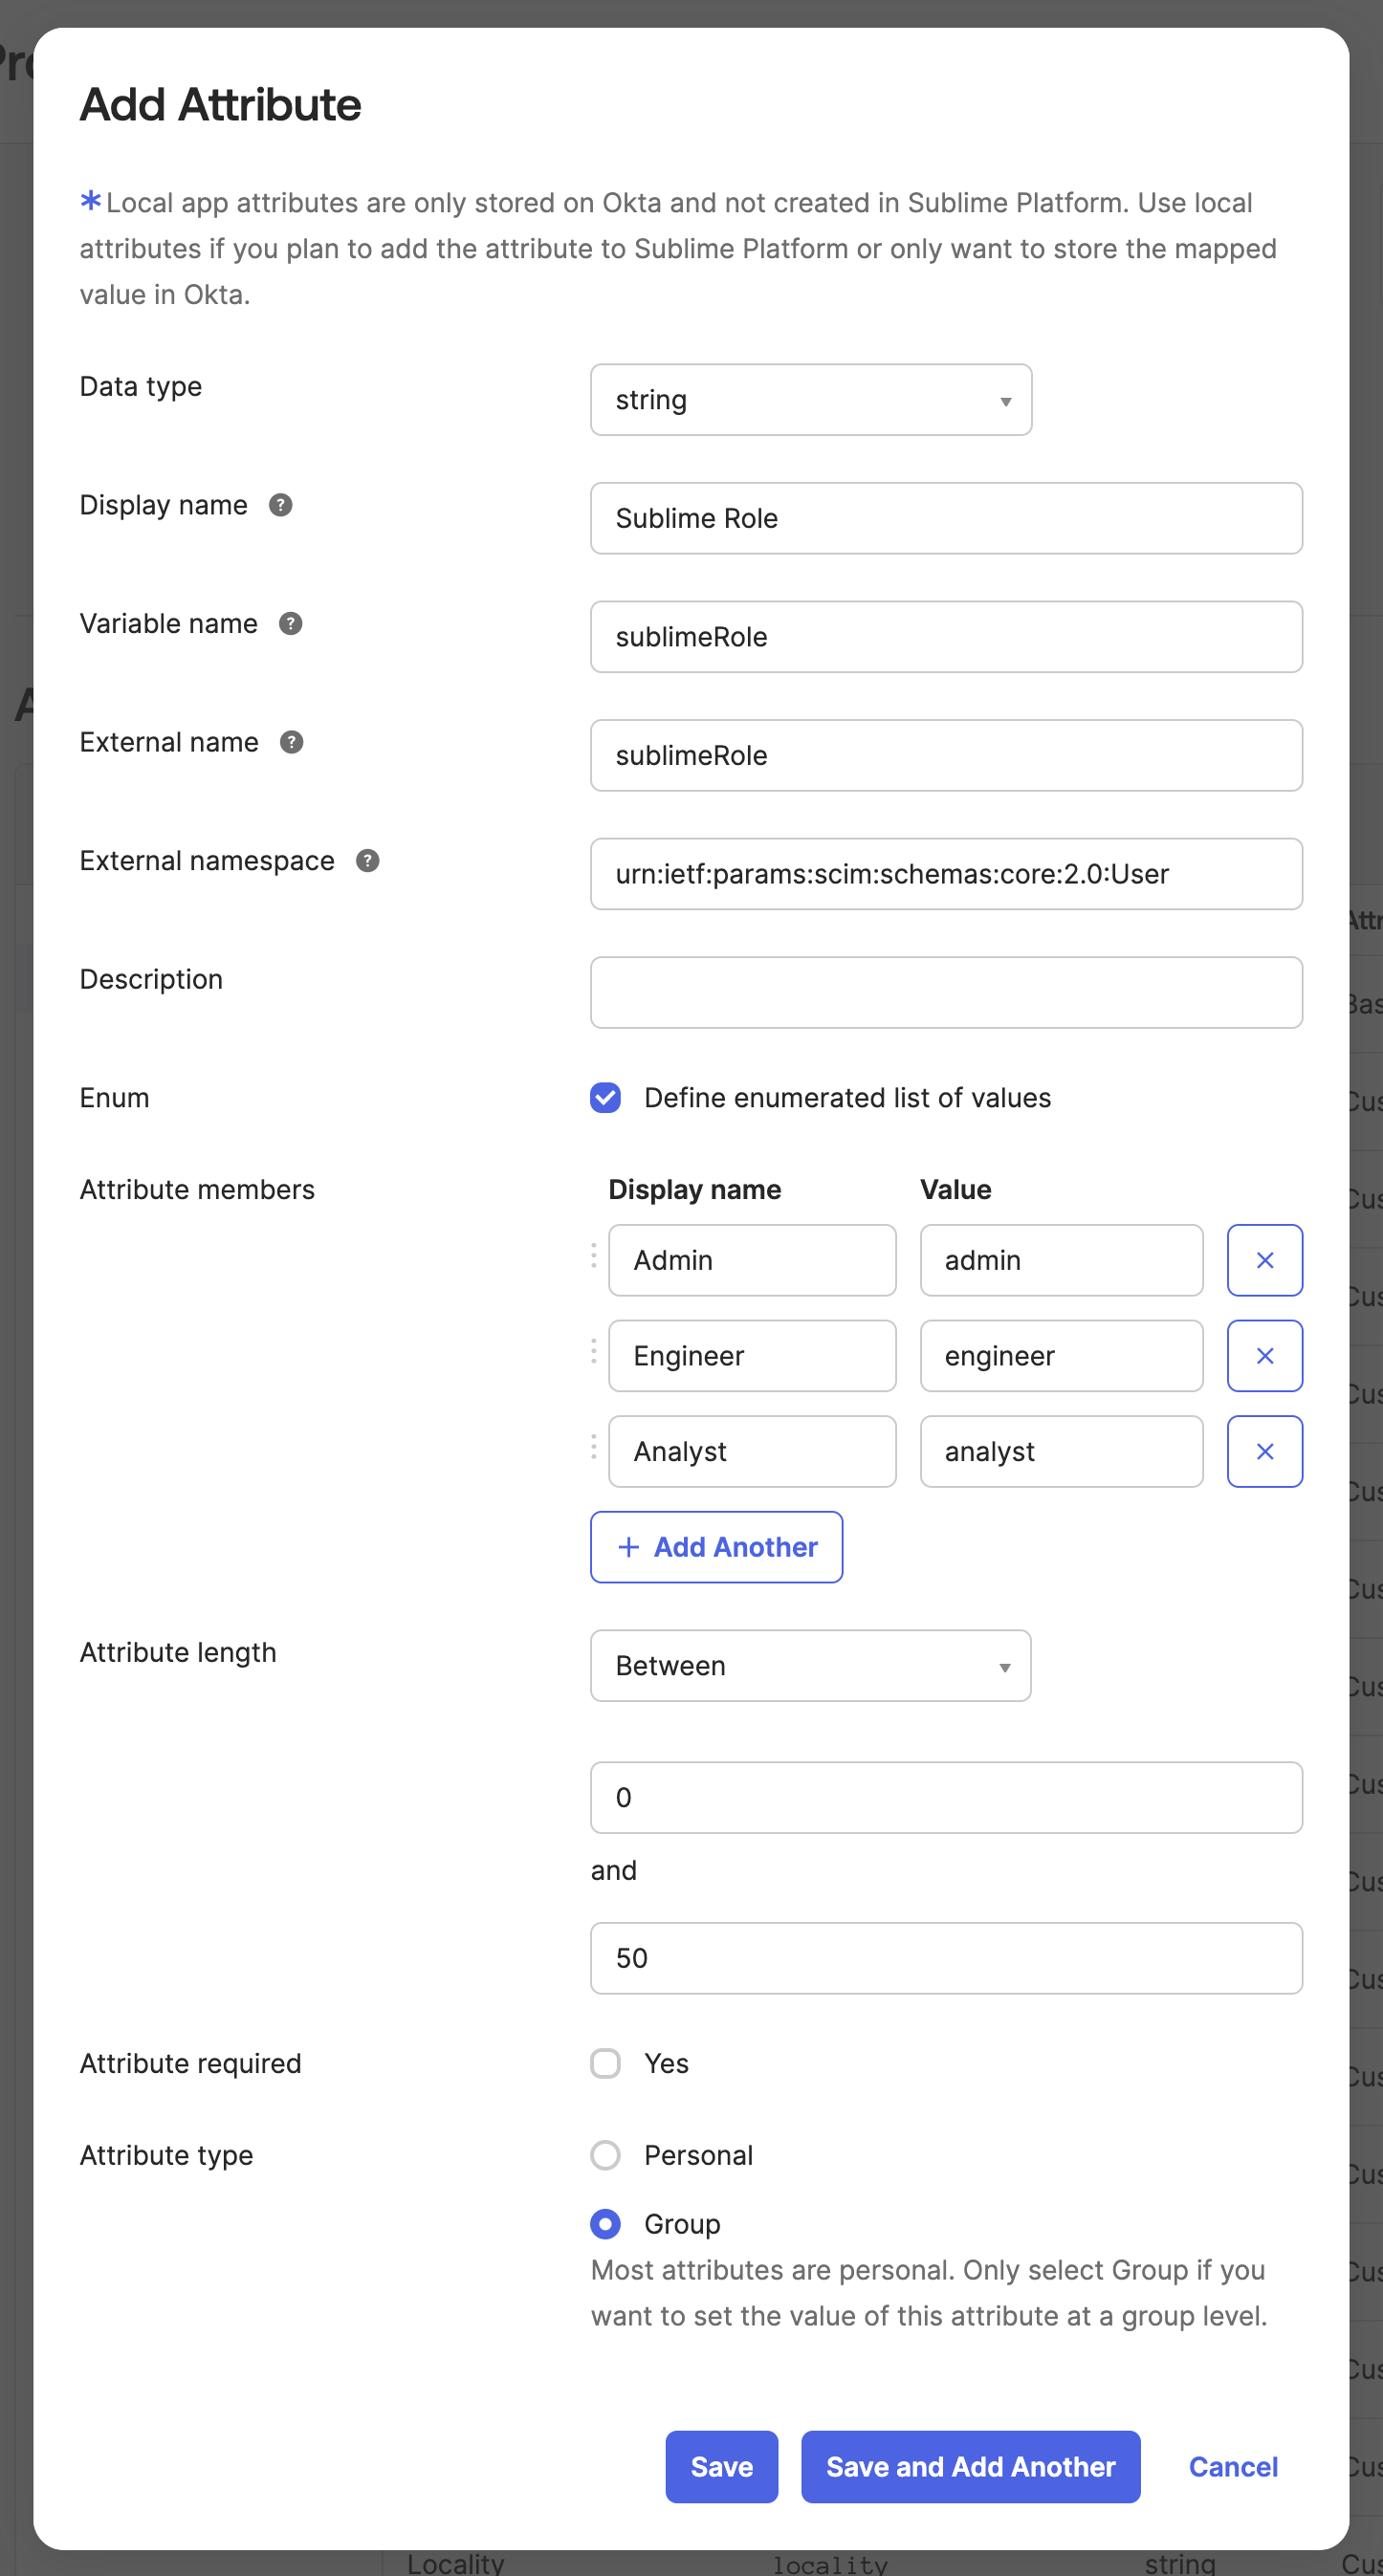
- Click Save
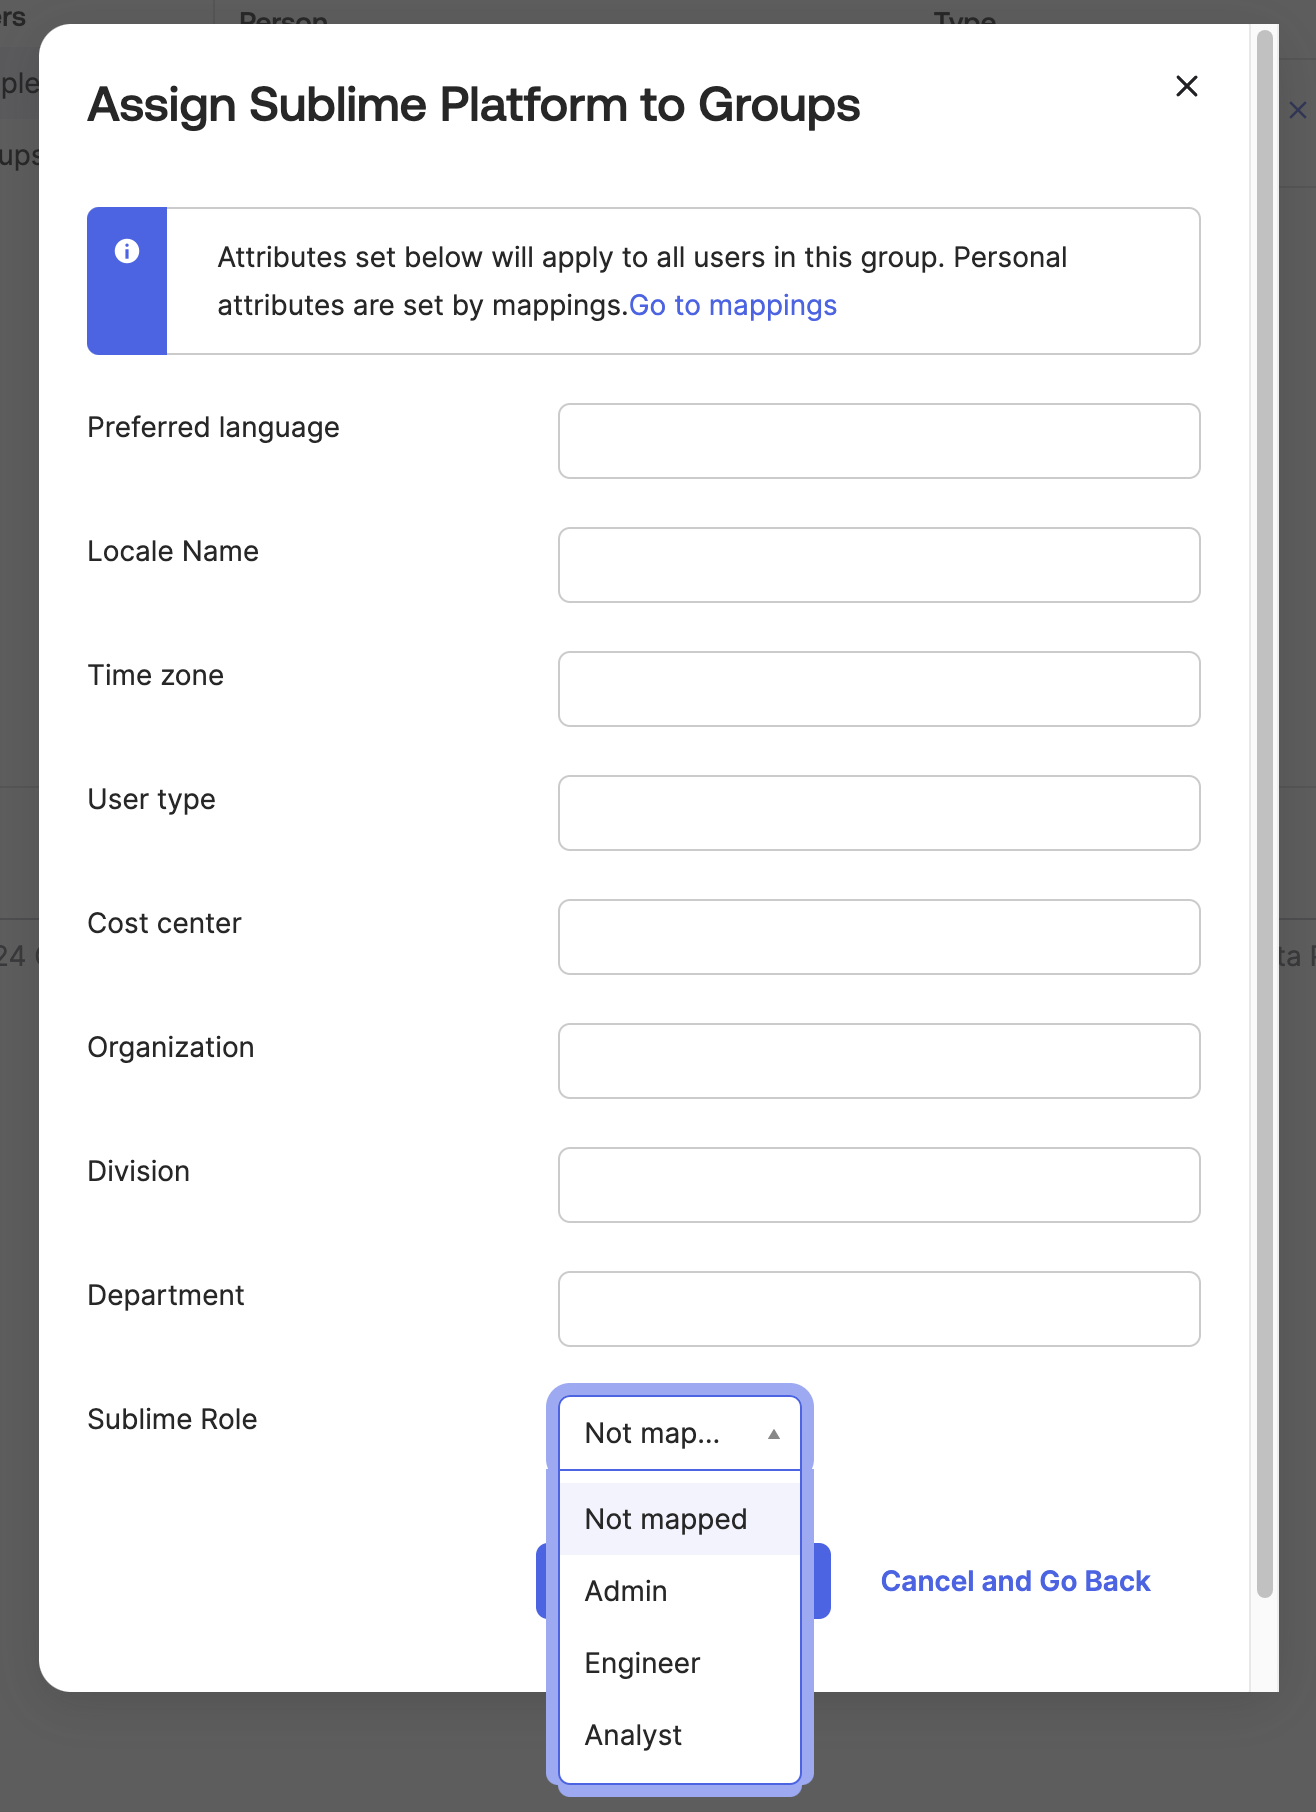
When assigning a group to the Okta app, you can now attach a Sublime role:
Supported Features
The following SCIM features are supported:
- Create Users
- Update Users
- Deactivate Users
Updated 6 months ago