Entra ID (Azure)
Configure Single Sign-On between Sublime and Entra ID
SAML Configuration
Below are the steps for setting up SAML with Entra ID.
Obtain Your Sublime Single Sign-on URL
- Sign in to your Sublime instance. Navigate to
Admin > Account - Scroll down and under the
Authenticationsection, click the pencil icon next toSAML - Copy/take note of the
Single Sign-on URL. You'll use this URL in the next section when configuring SAML for your Azure application.
Azure Configuration
- Navigate to the Azure portal and search/open
Enterprise Applications - Click
+ New Application

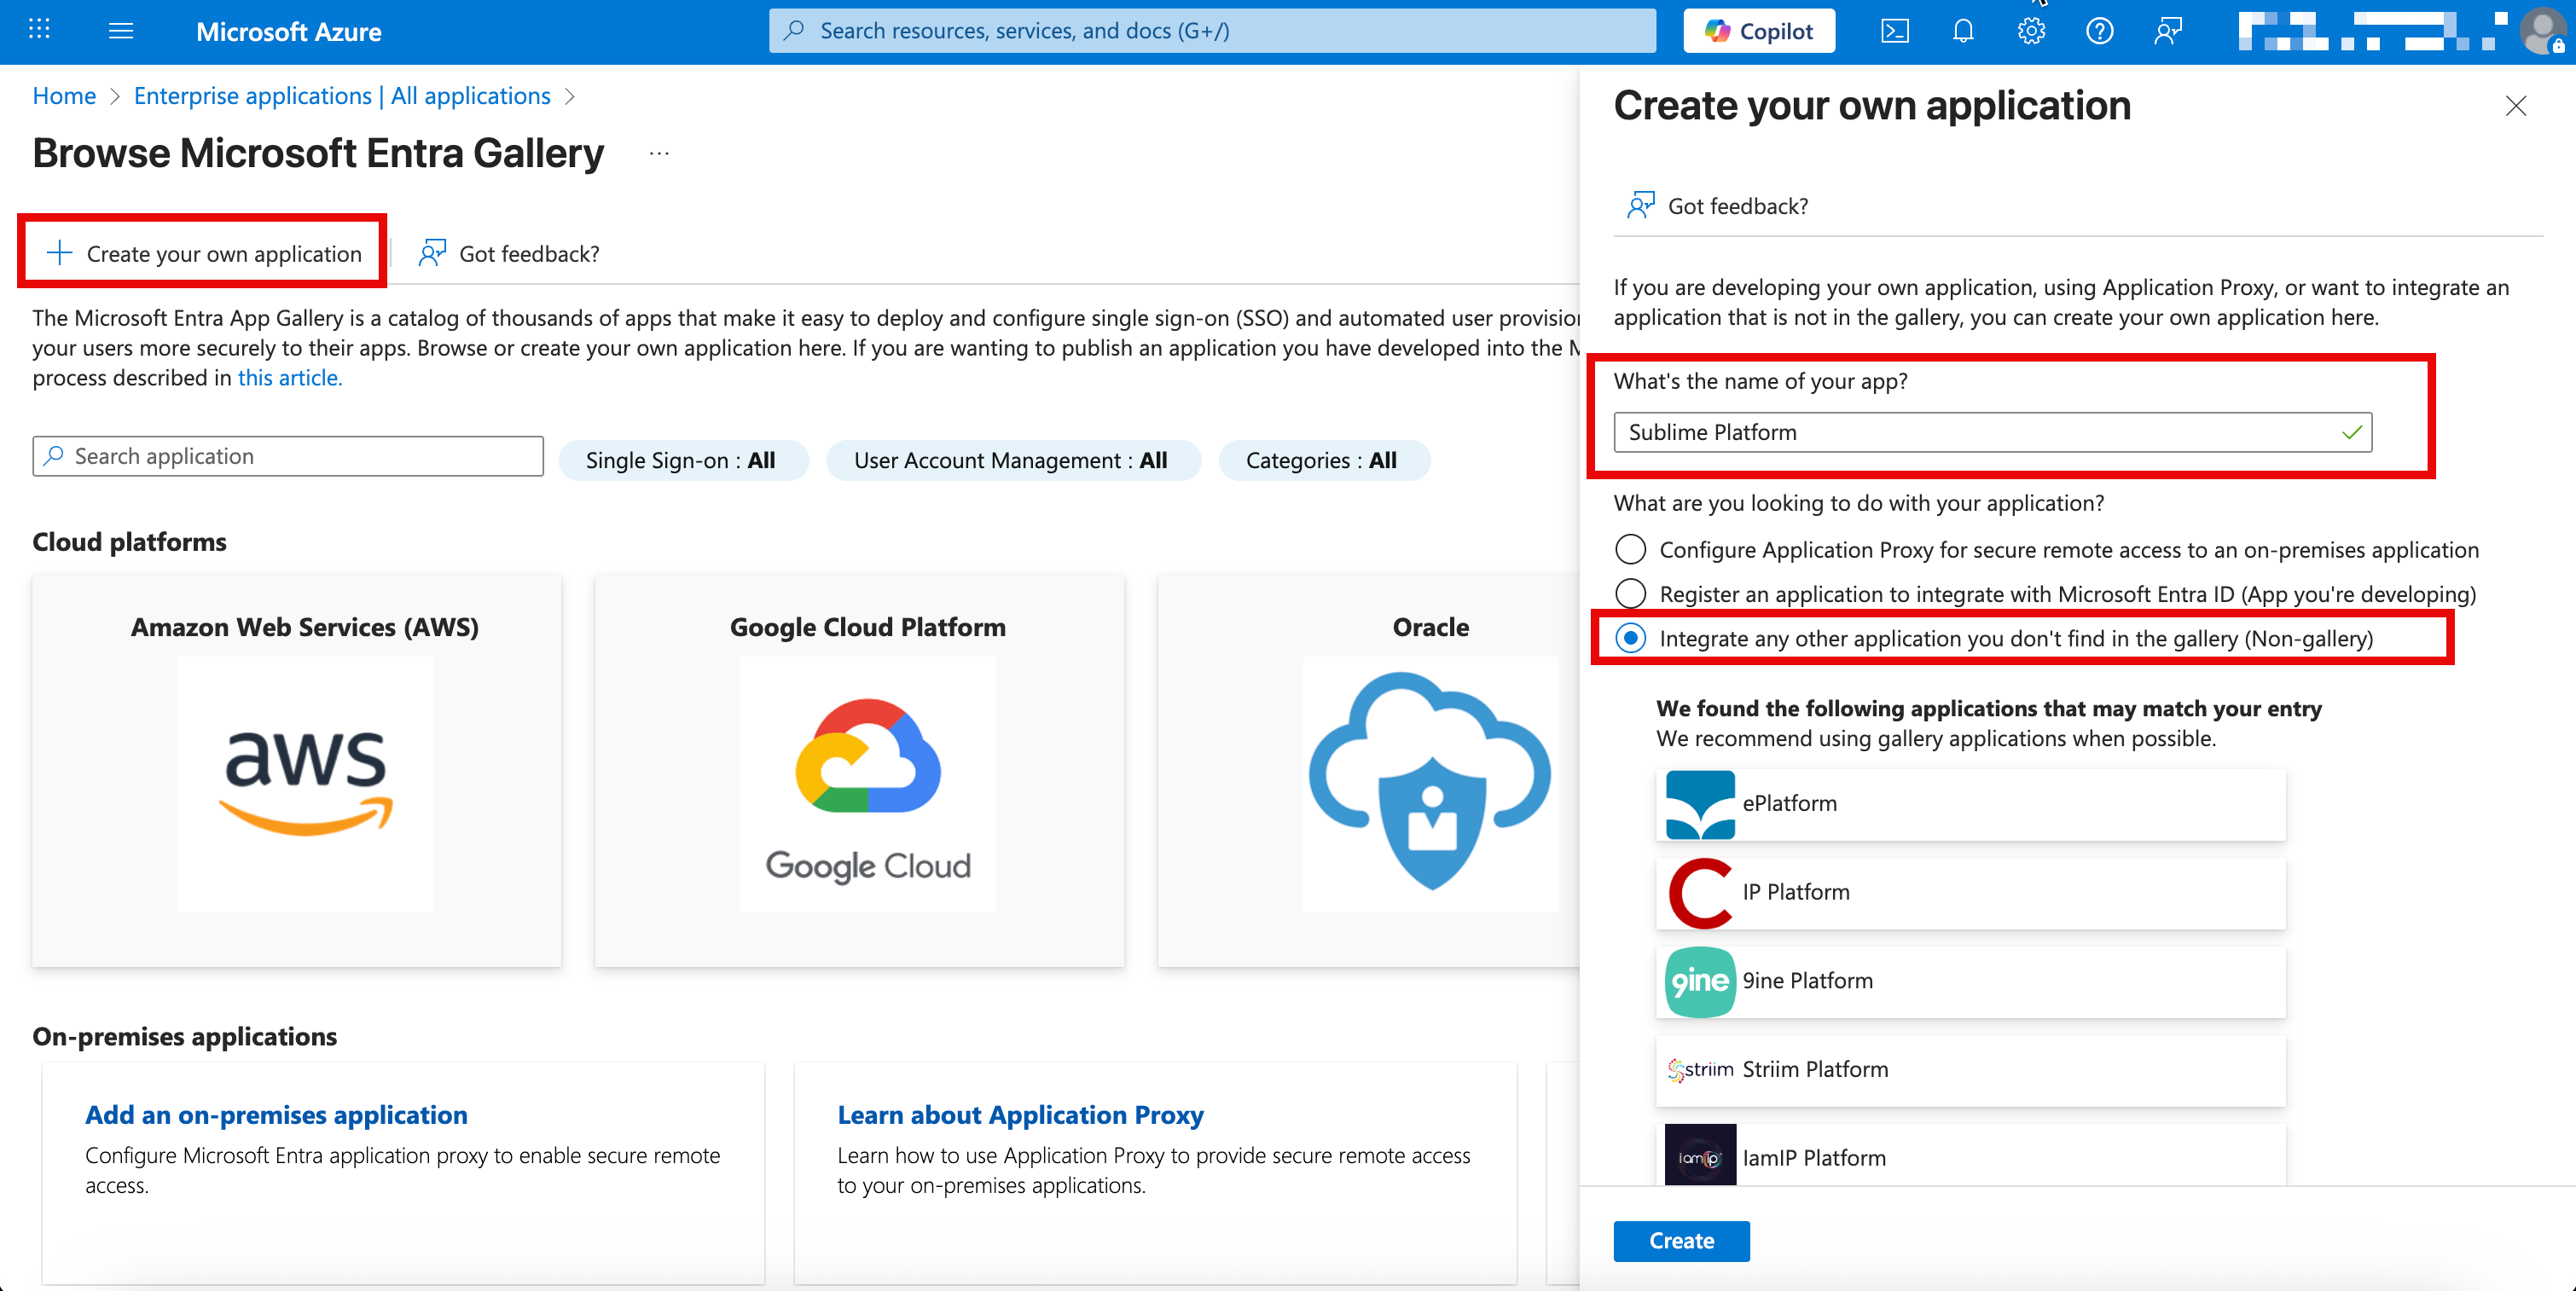
- Click
+ Create your own application - Input a name for the application such as
Sublime Platform, ensure the bottom radio button is selected, and clickCreate - Select the
Integrate any other application you don't find in the gallery (Non-gallery)radio option
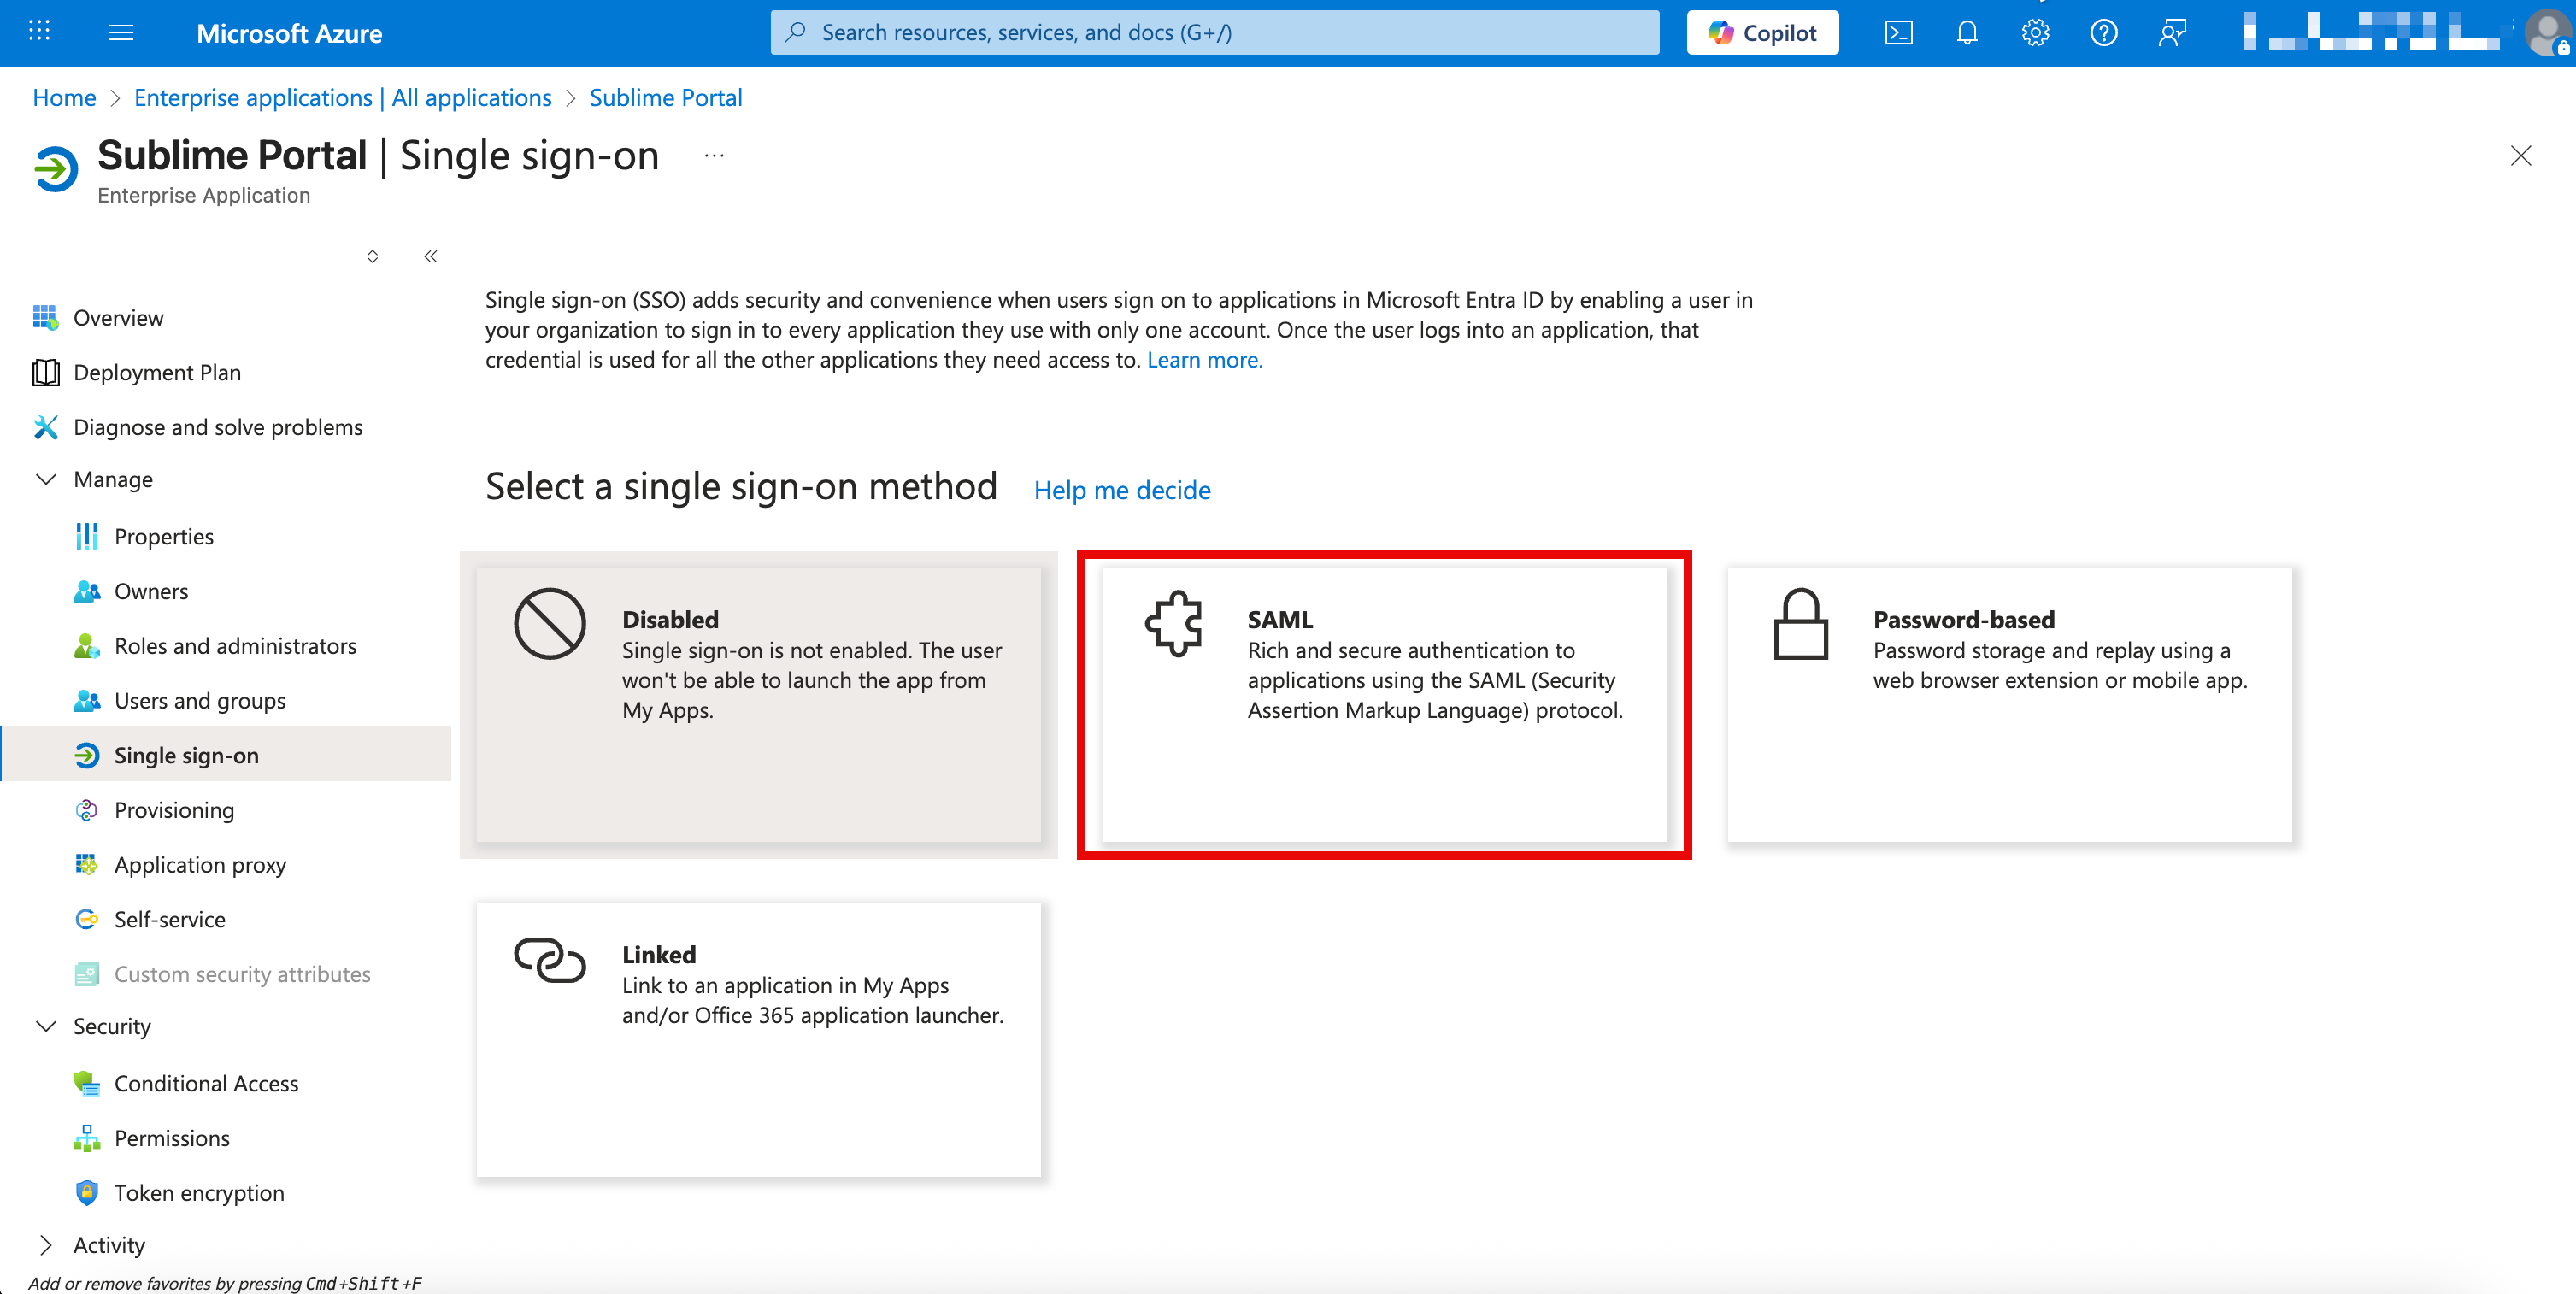
- Once created, on the left hand side, click
Single sign-on - Click
SAML
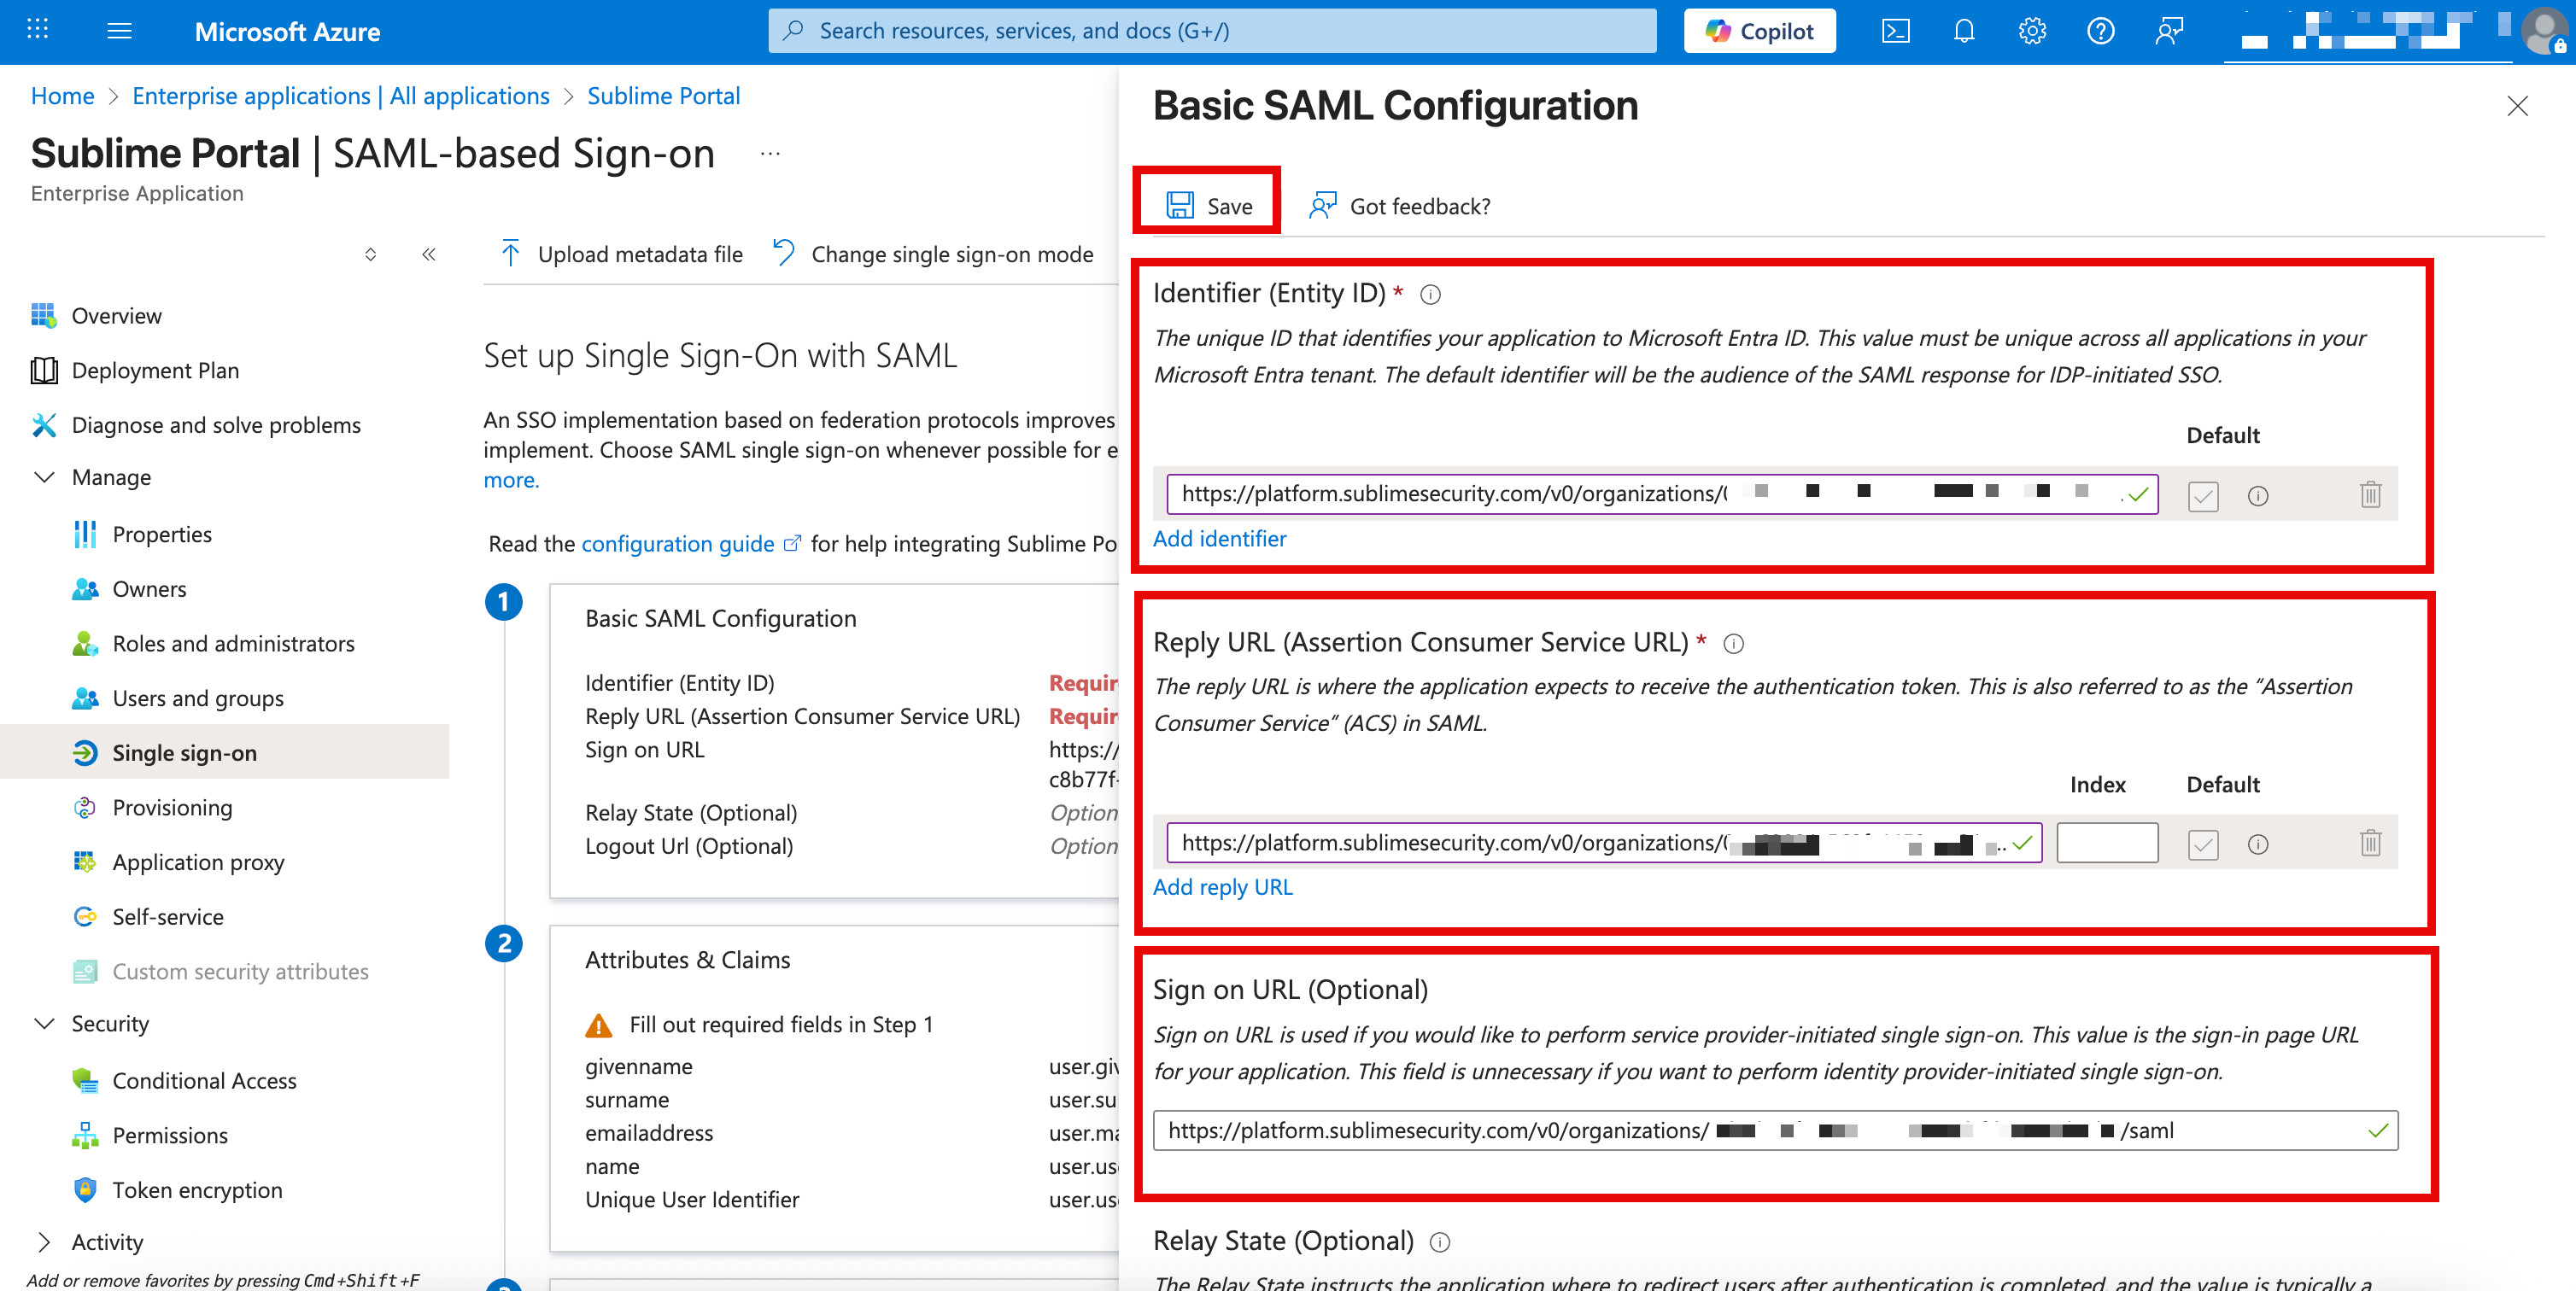
- In the Basic SAML Configuration section, click
Edit - Click
Add Identifier, clickAdd Reply URL - Paste the URL taken from the Sublime Console into
Identifier,Reply URL, andSign On URL. Then clickSaveat the top.
- Verify the
Attributes & Claimssection matches below (it should by default)
| Attribute | Claim |
|---|---|
| givenname | user.givenname |
| surname | user.surname |
| emailaddress | user.mail |
| name | user.userprinciplename |
| Unique User Identifier | user.userprinciplename |
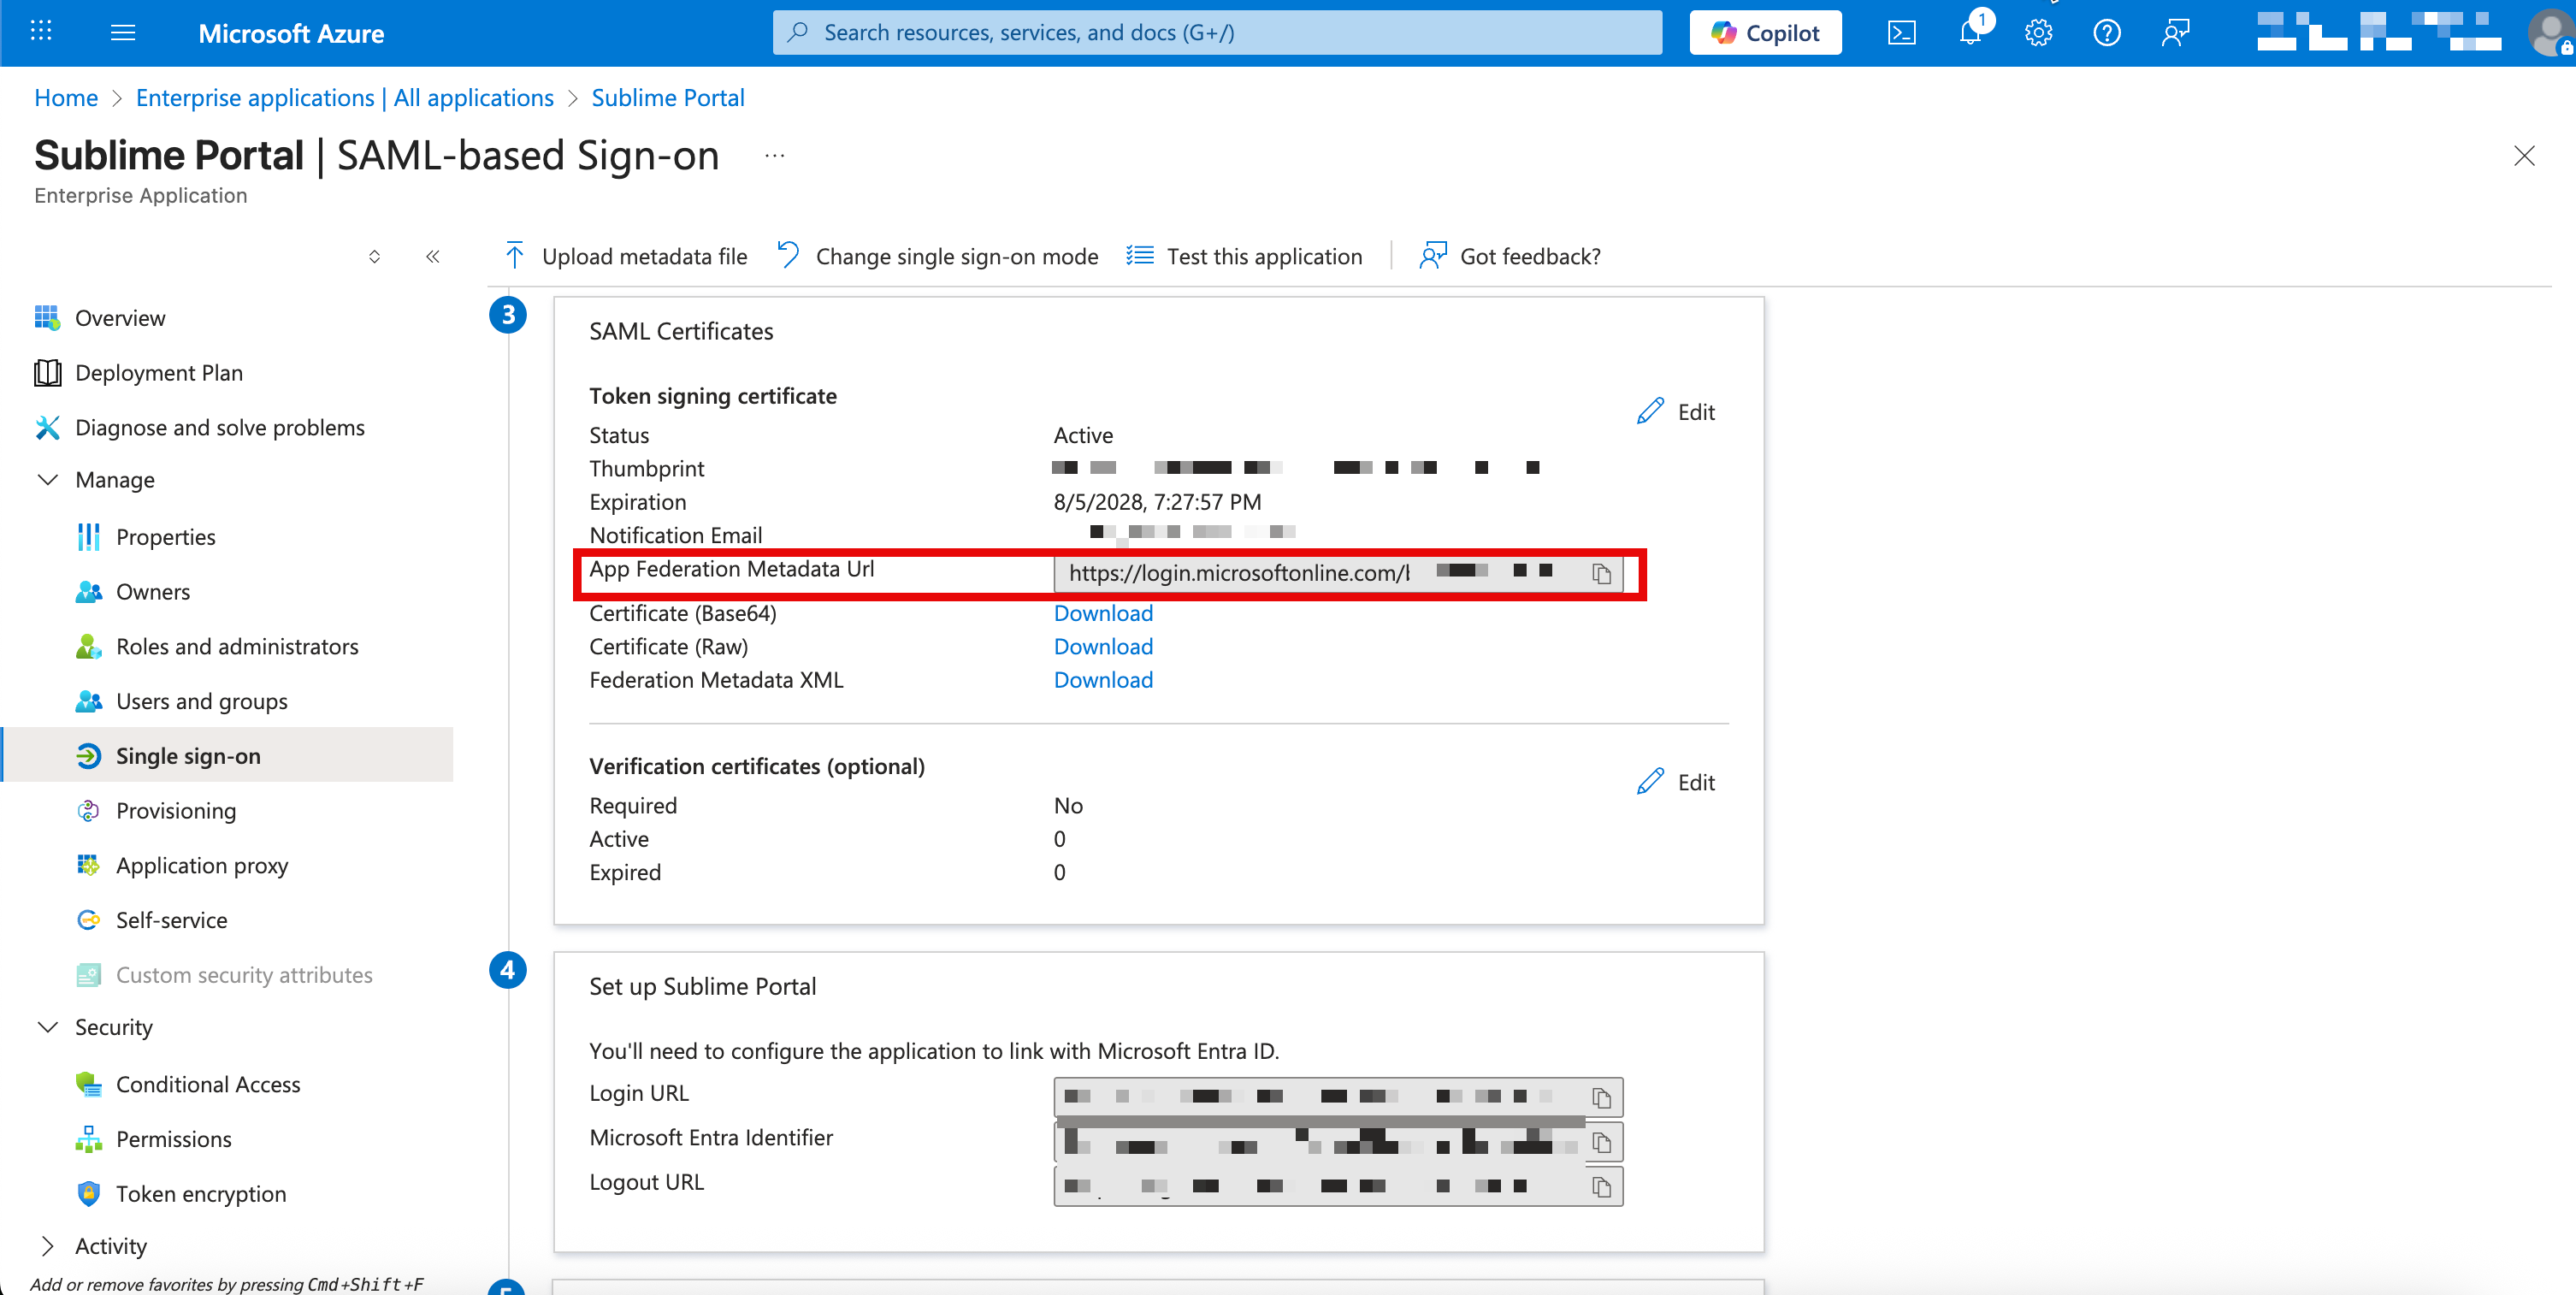
- Scroll down to the
SAML Certificatessection and copy theApp Federation Metadata URL. You'll use this URL in the next section to complete the configuration.
Add SAML Settings to Sublime
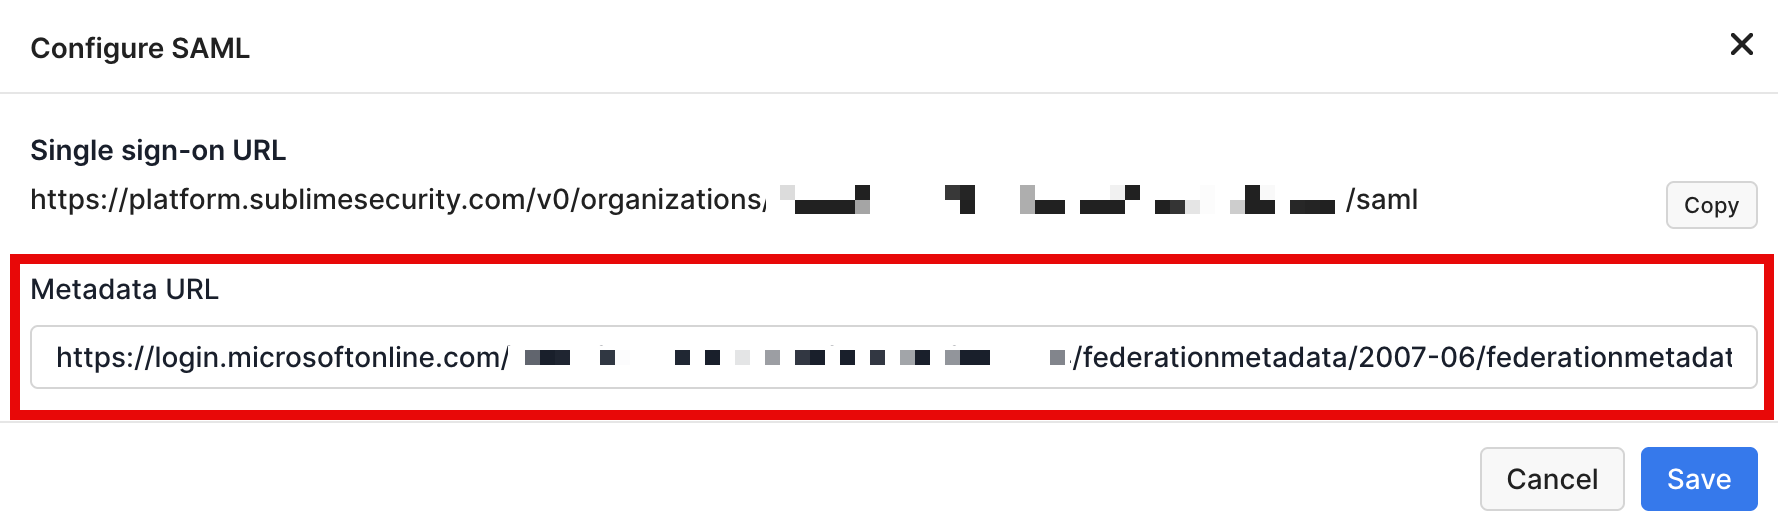
- Navigate back to the Sublime Console and paste that Metadata URL into the Sublime
Metadata URLwithin theConfigure SAMLwindow. Then clickSave.
Test SAML Configuration
- Add/Ensure the expected user(s) to test are present in both the Sublime Console and the Azure Sublime enterprise app.
Matching User RequiredFor a user to successfully sign into Sublime with your OIDC identity provider, there must already be a matching user with the same email address in Sublime.
- In the Single sign-on section of the the Sublime Enterprise app, Click Test and then Test Sign-on
- If successful, you can now change the Sublime Allowed methods config to disable username/password login.
- If unsuccessful, please double check all fields with URL values across both platforms and contact us if you're still running into any issues 👋
OIDC Configuration
Below are the steps for configuring OIDC with Entra ID:
Obtain Your Sublime Redirect URI
- Sign in to your Sublime instance. Navigate to
Admin > Account - Scroll down and under the
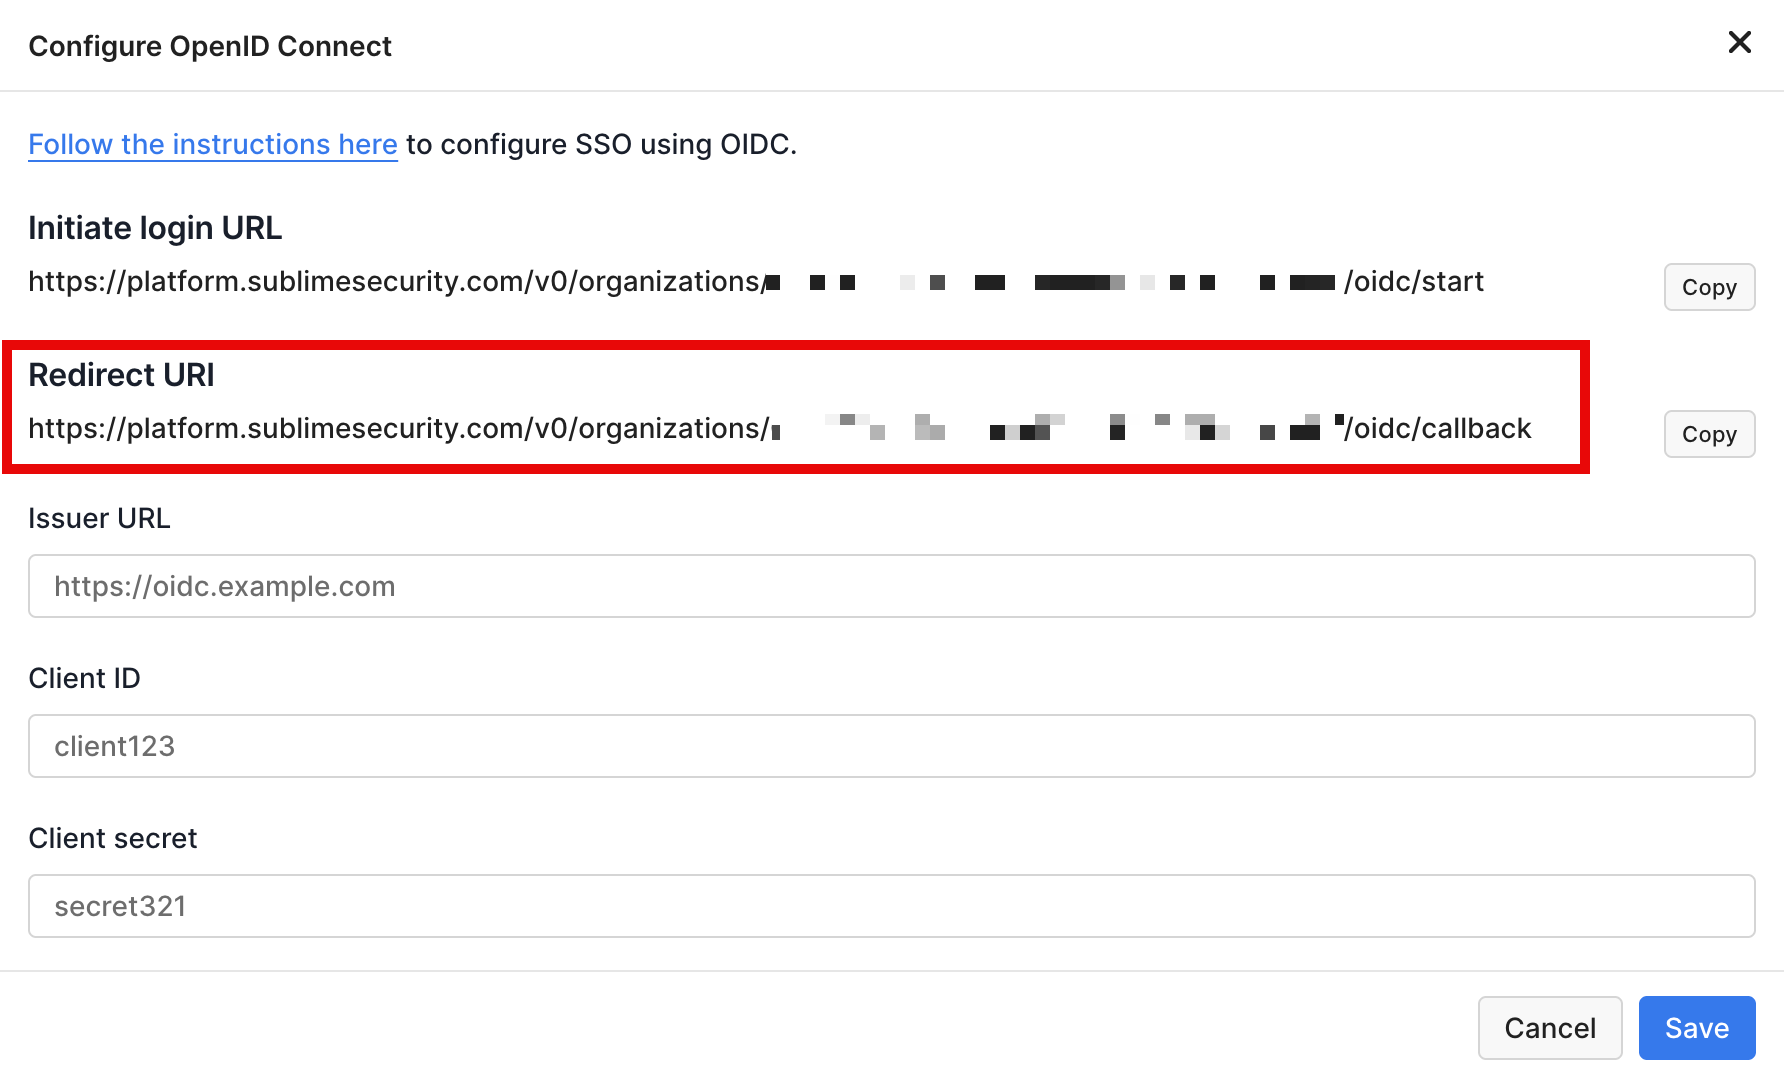
Authenticationsection, click the pencil icon next toOpen ID Connect - Copy/take note of the
Redirect URI. You'll use this URL in the next section when configuring OIDC for your Azure application.
Configure Azure
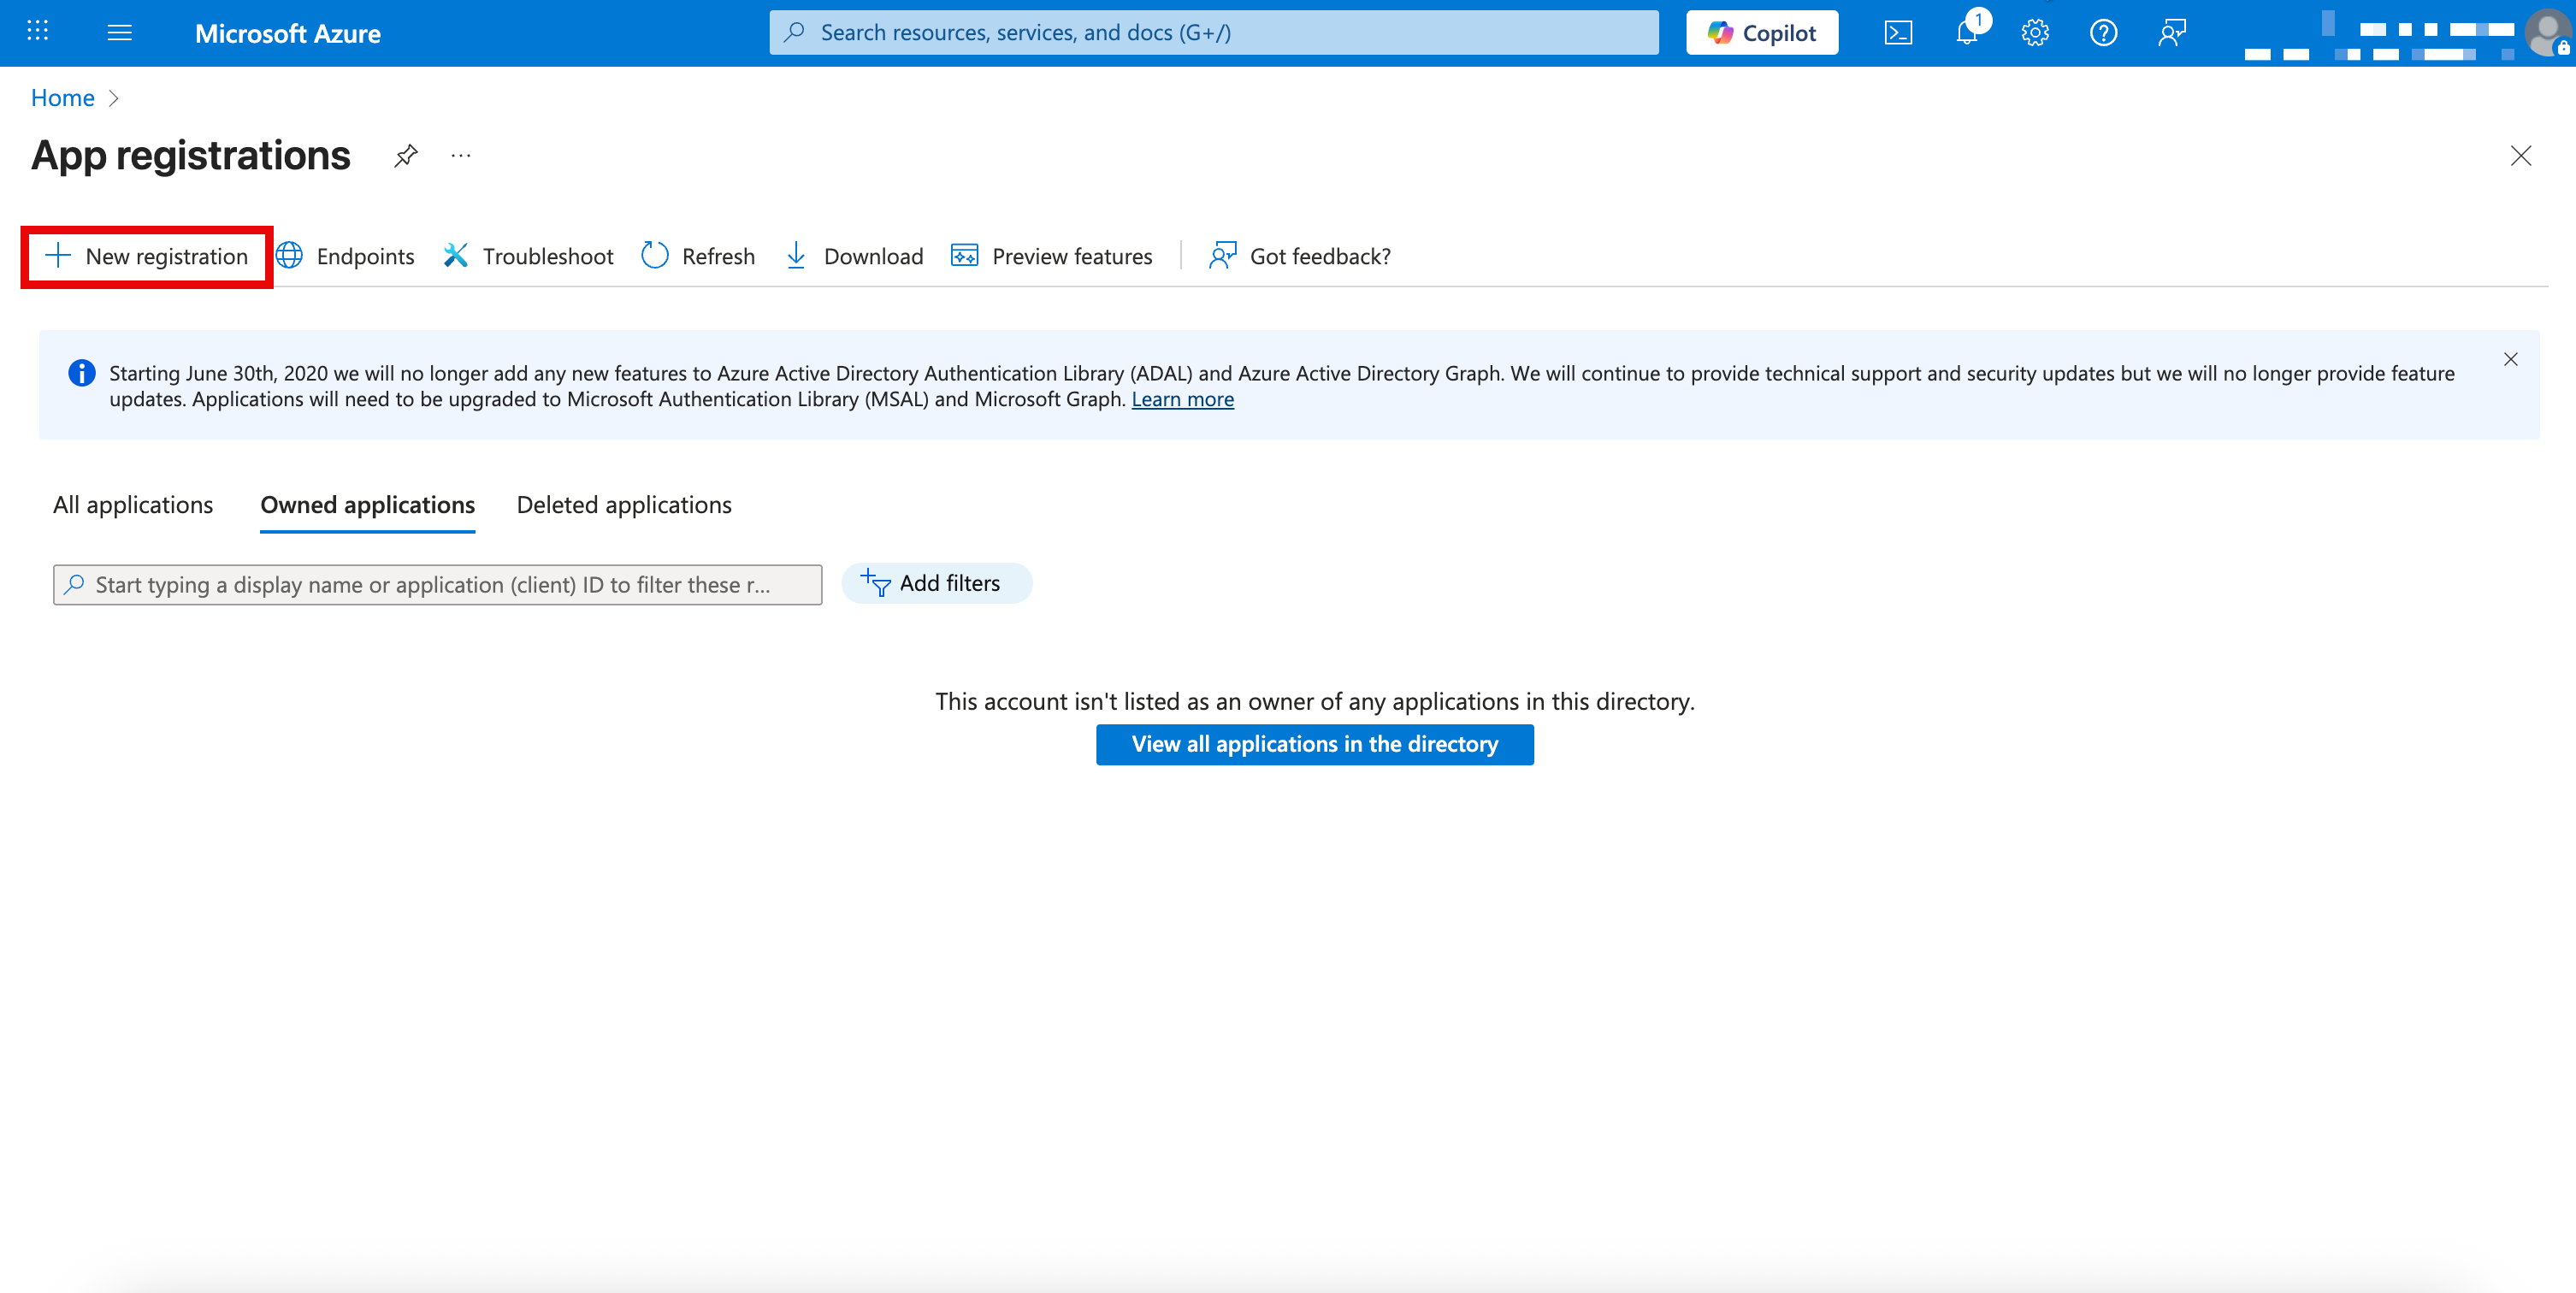
- Navigate to the Azure portal and search/open
App Registrations - Click
New Registration
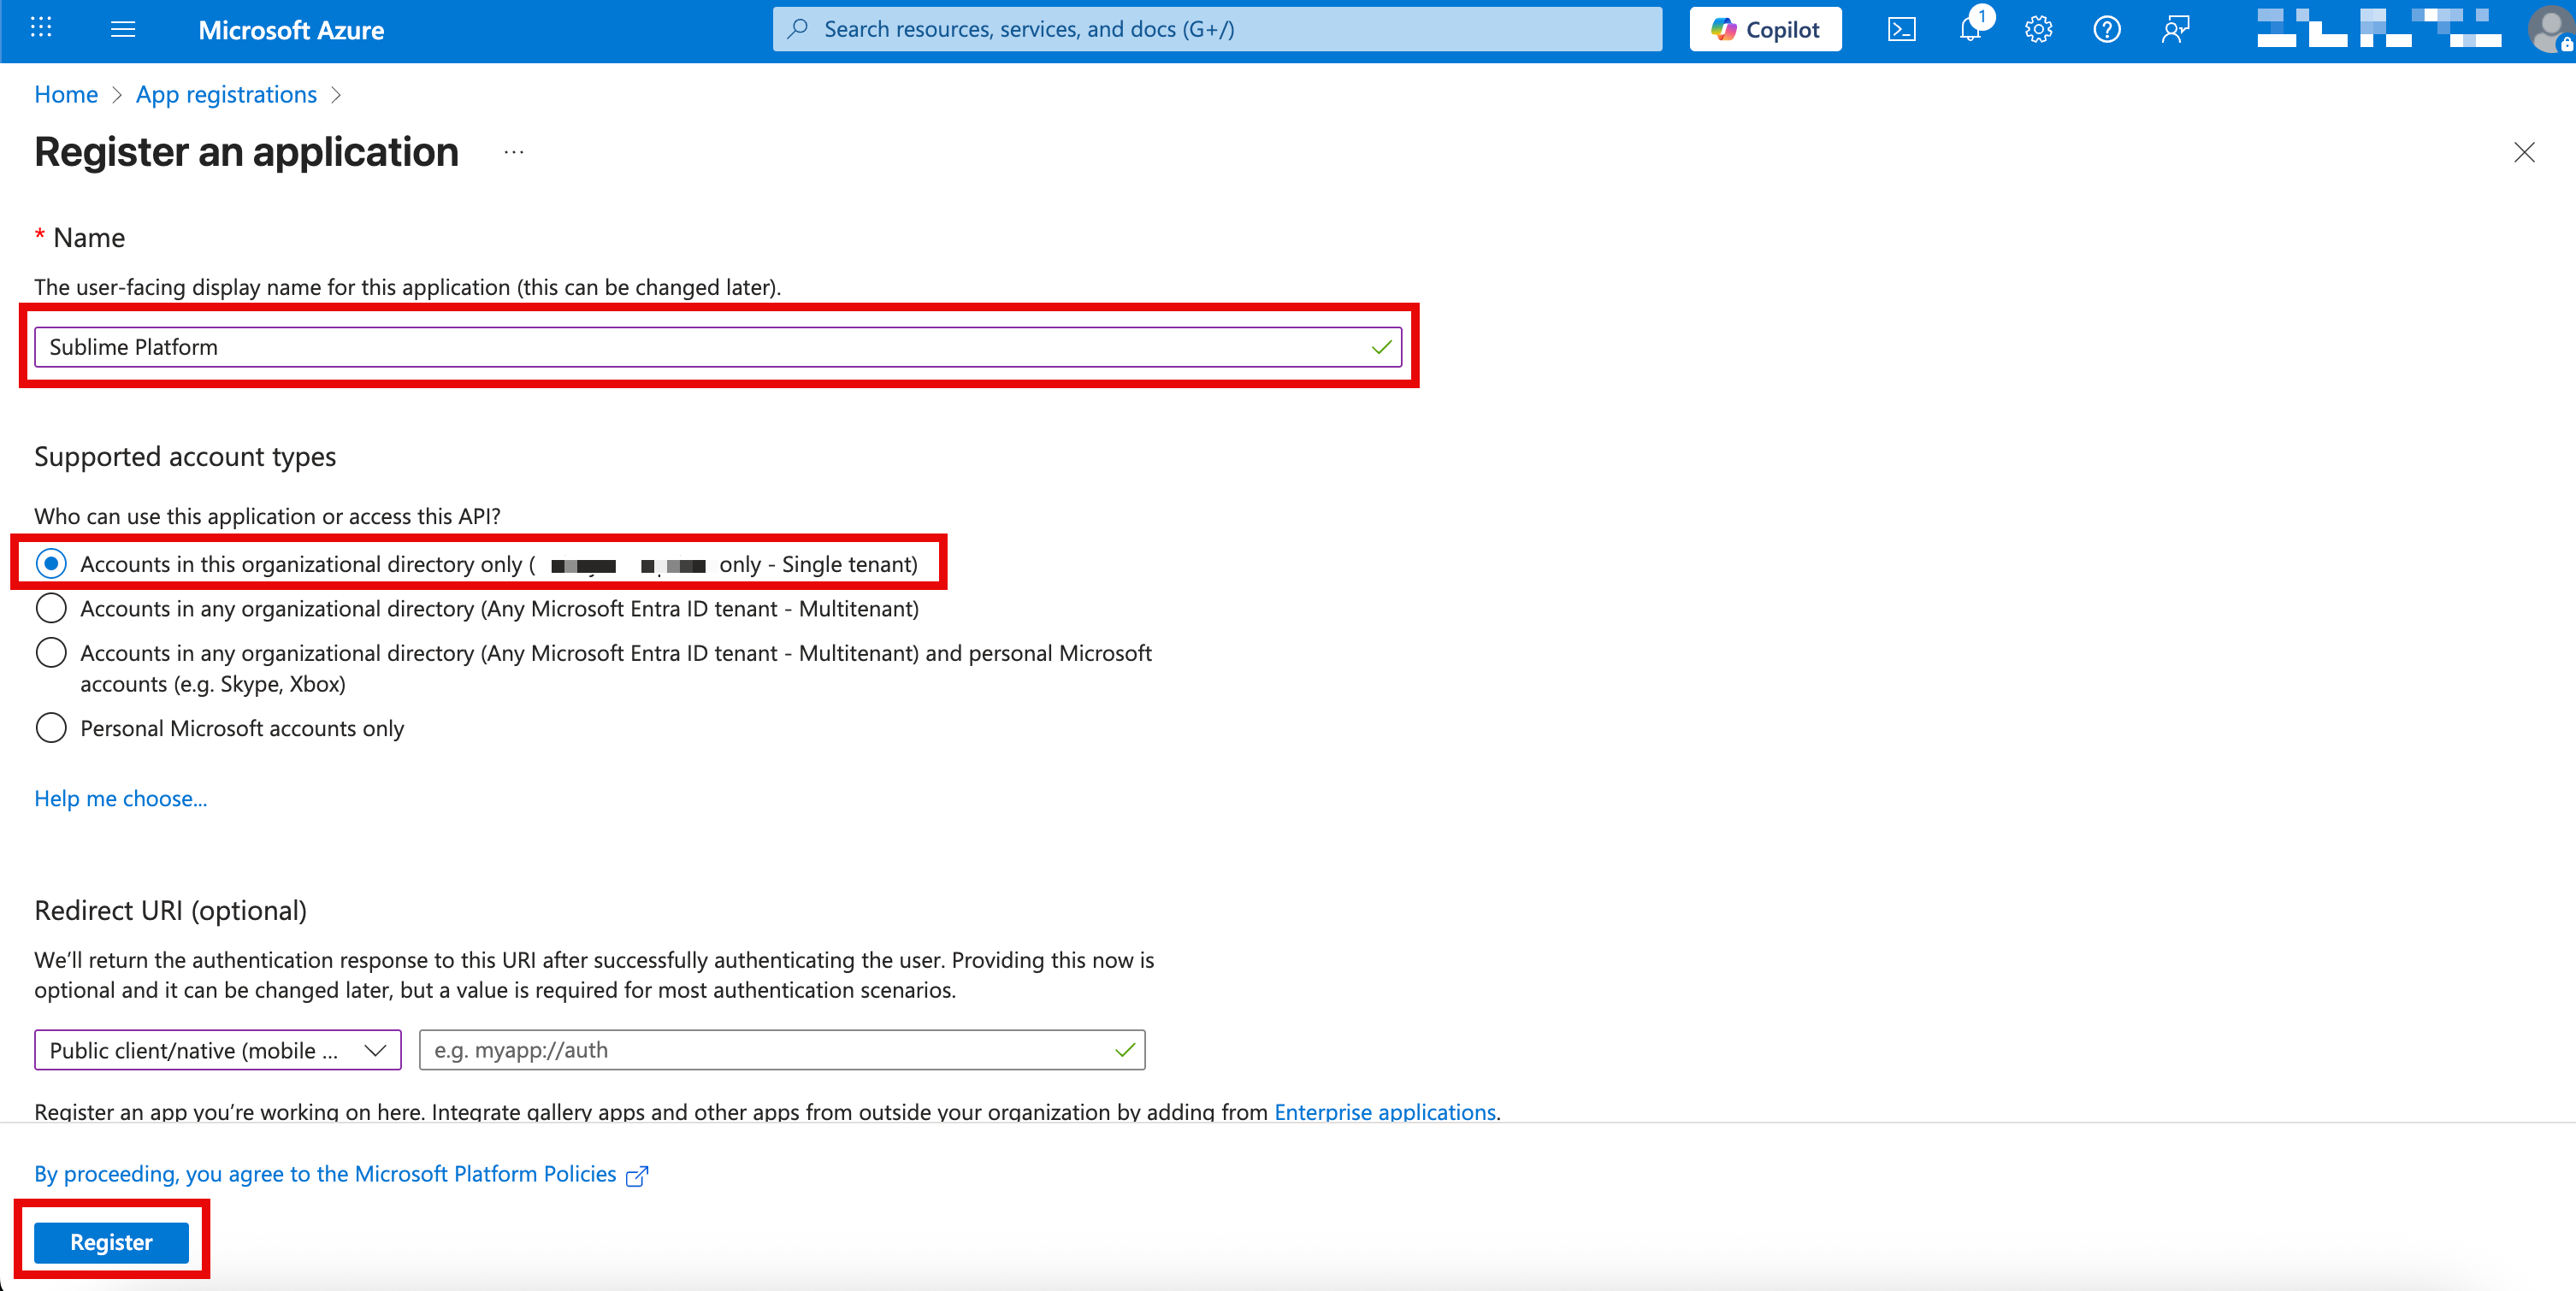
- Give your application a name, such as "Sublime Platform"
- Under Supported account types select
Accounts in this organizational directory onlyif it's not already selected by default - Click
Register(skip the Redirect URI section)
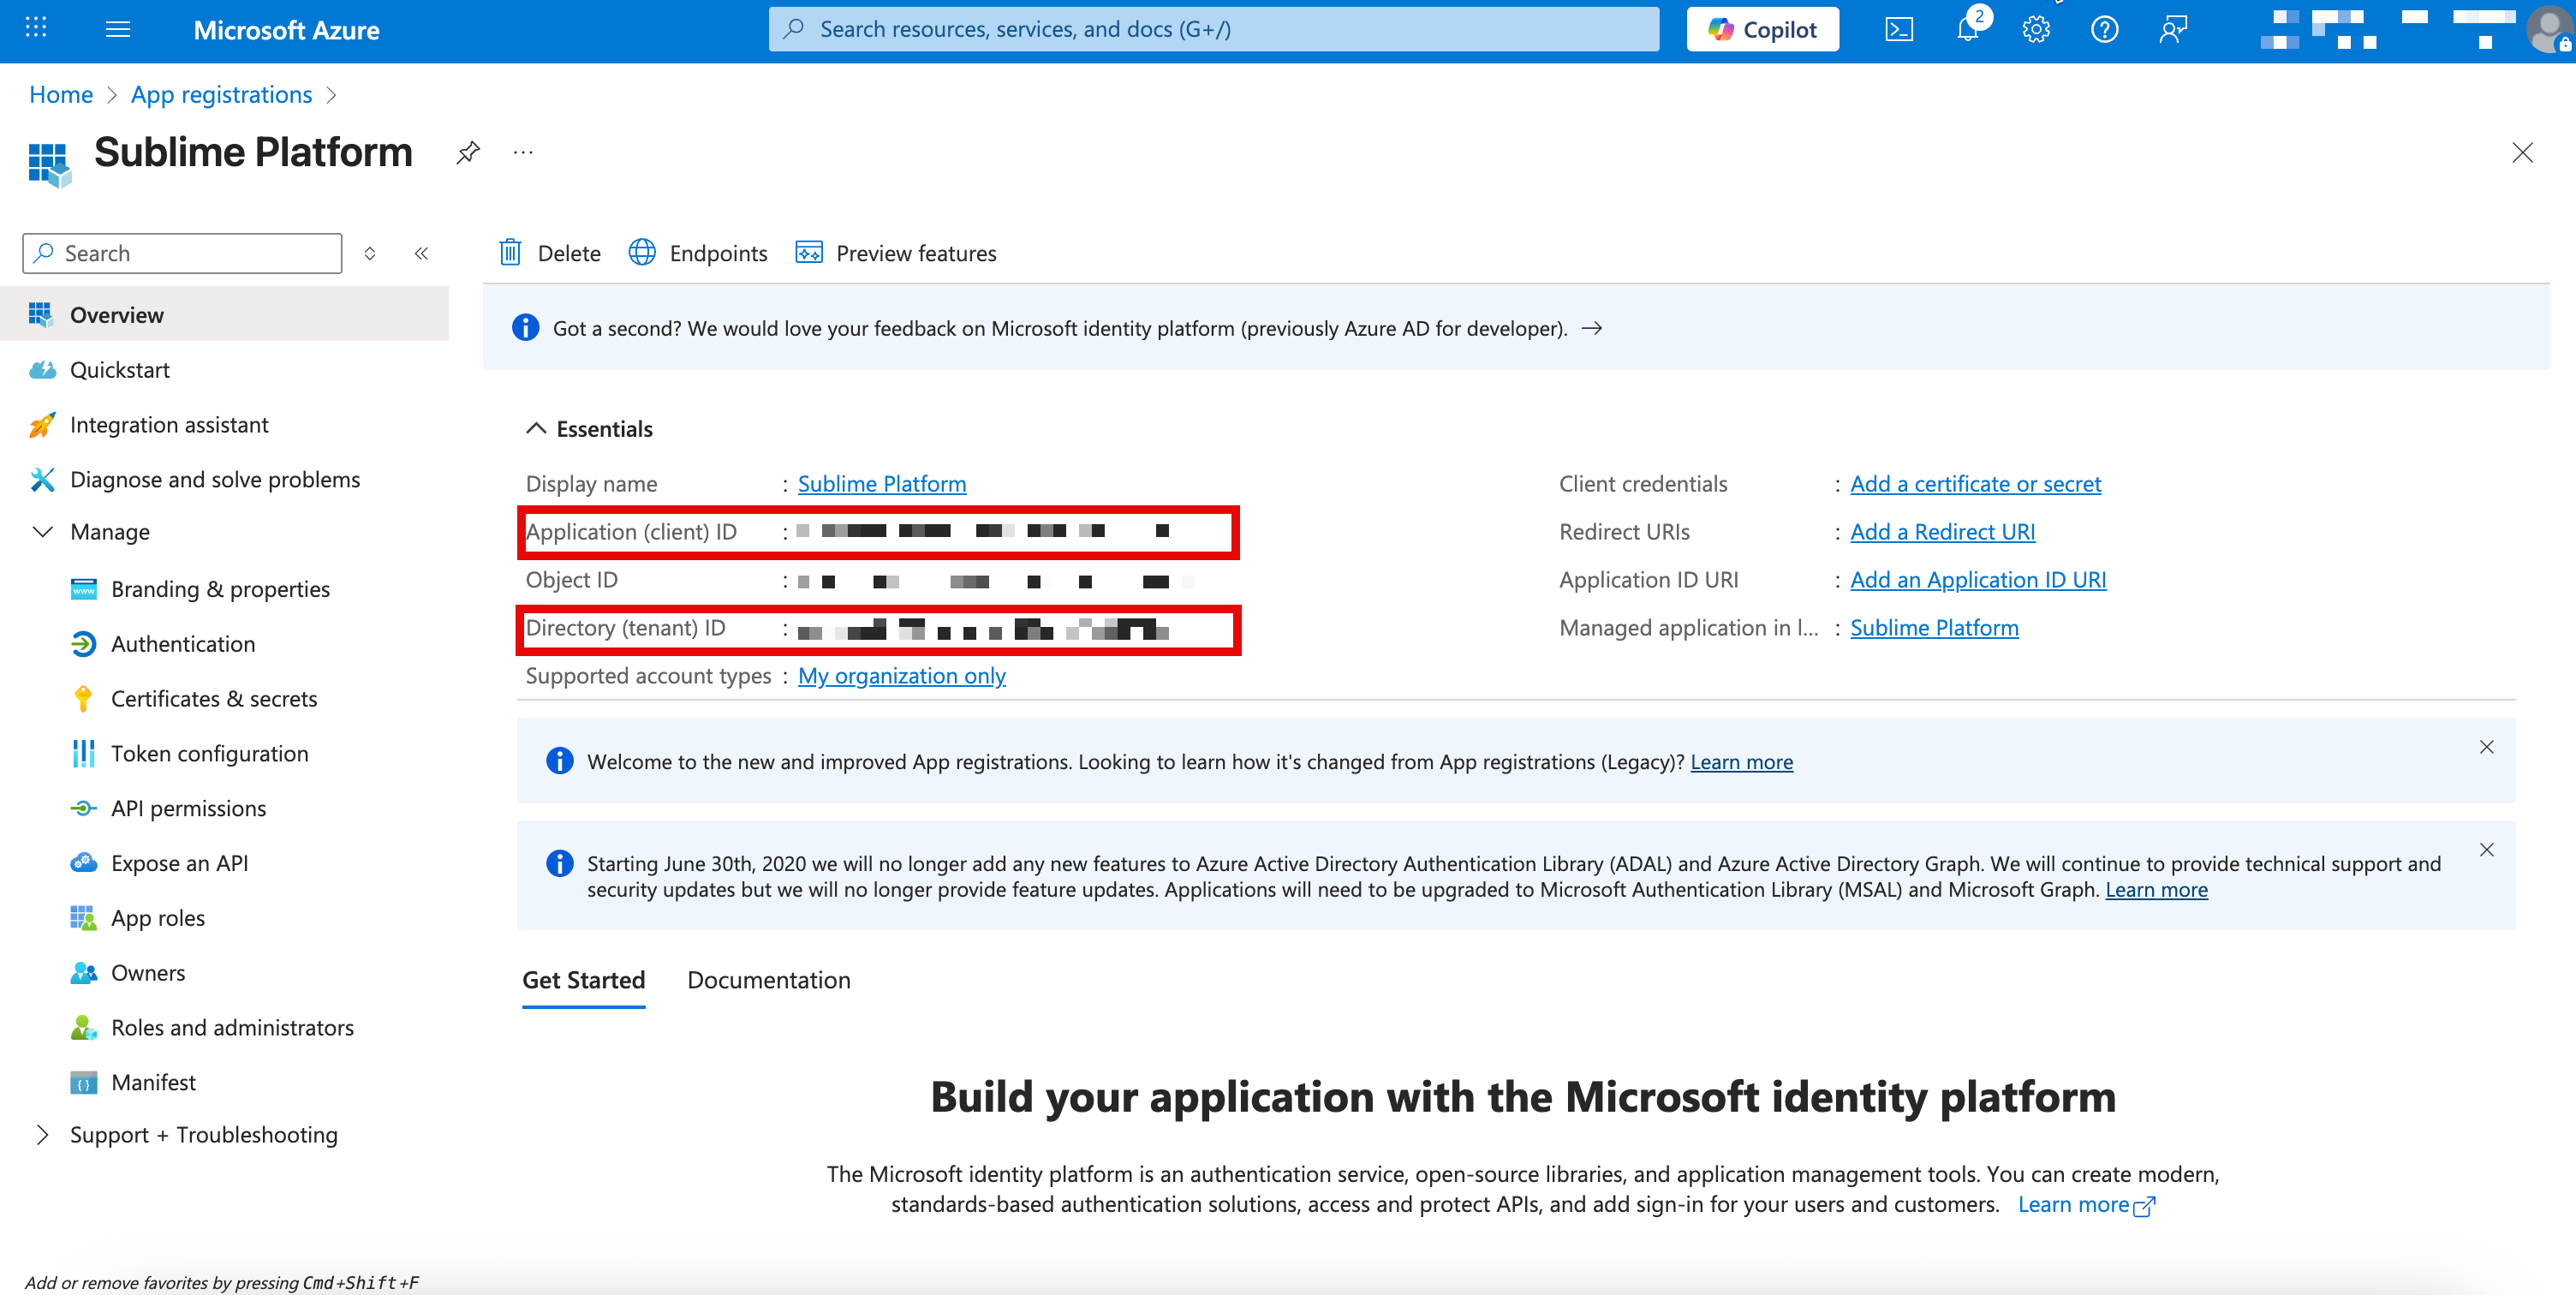
- In the
Overviewsection of the application's settings, note the Application (client) ID and the Directory (tenant) ID. You'll use these IDs later.
- Navigate to the application authentication settings via
Manage > Authentication - Click
Add Redirect URI - In the panel that opens, click
Web
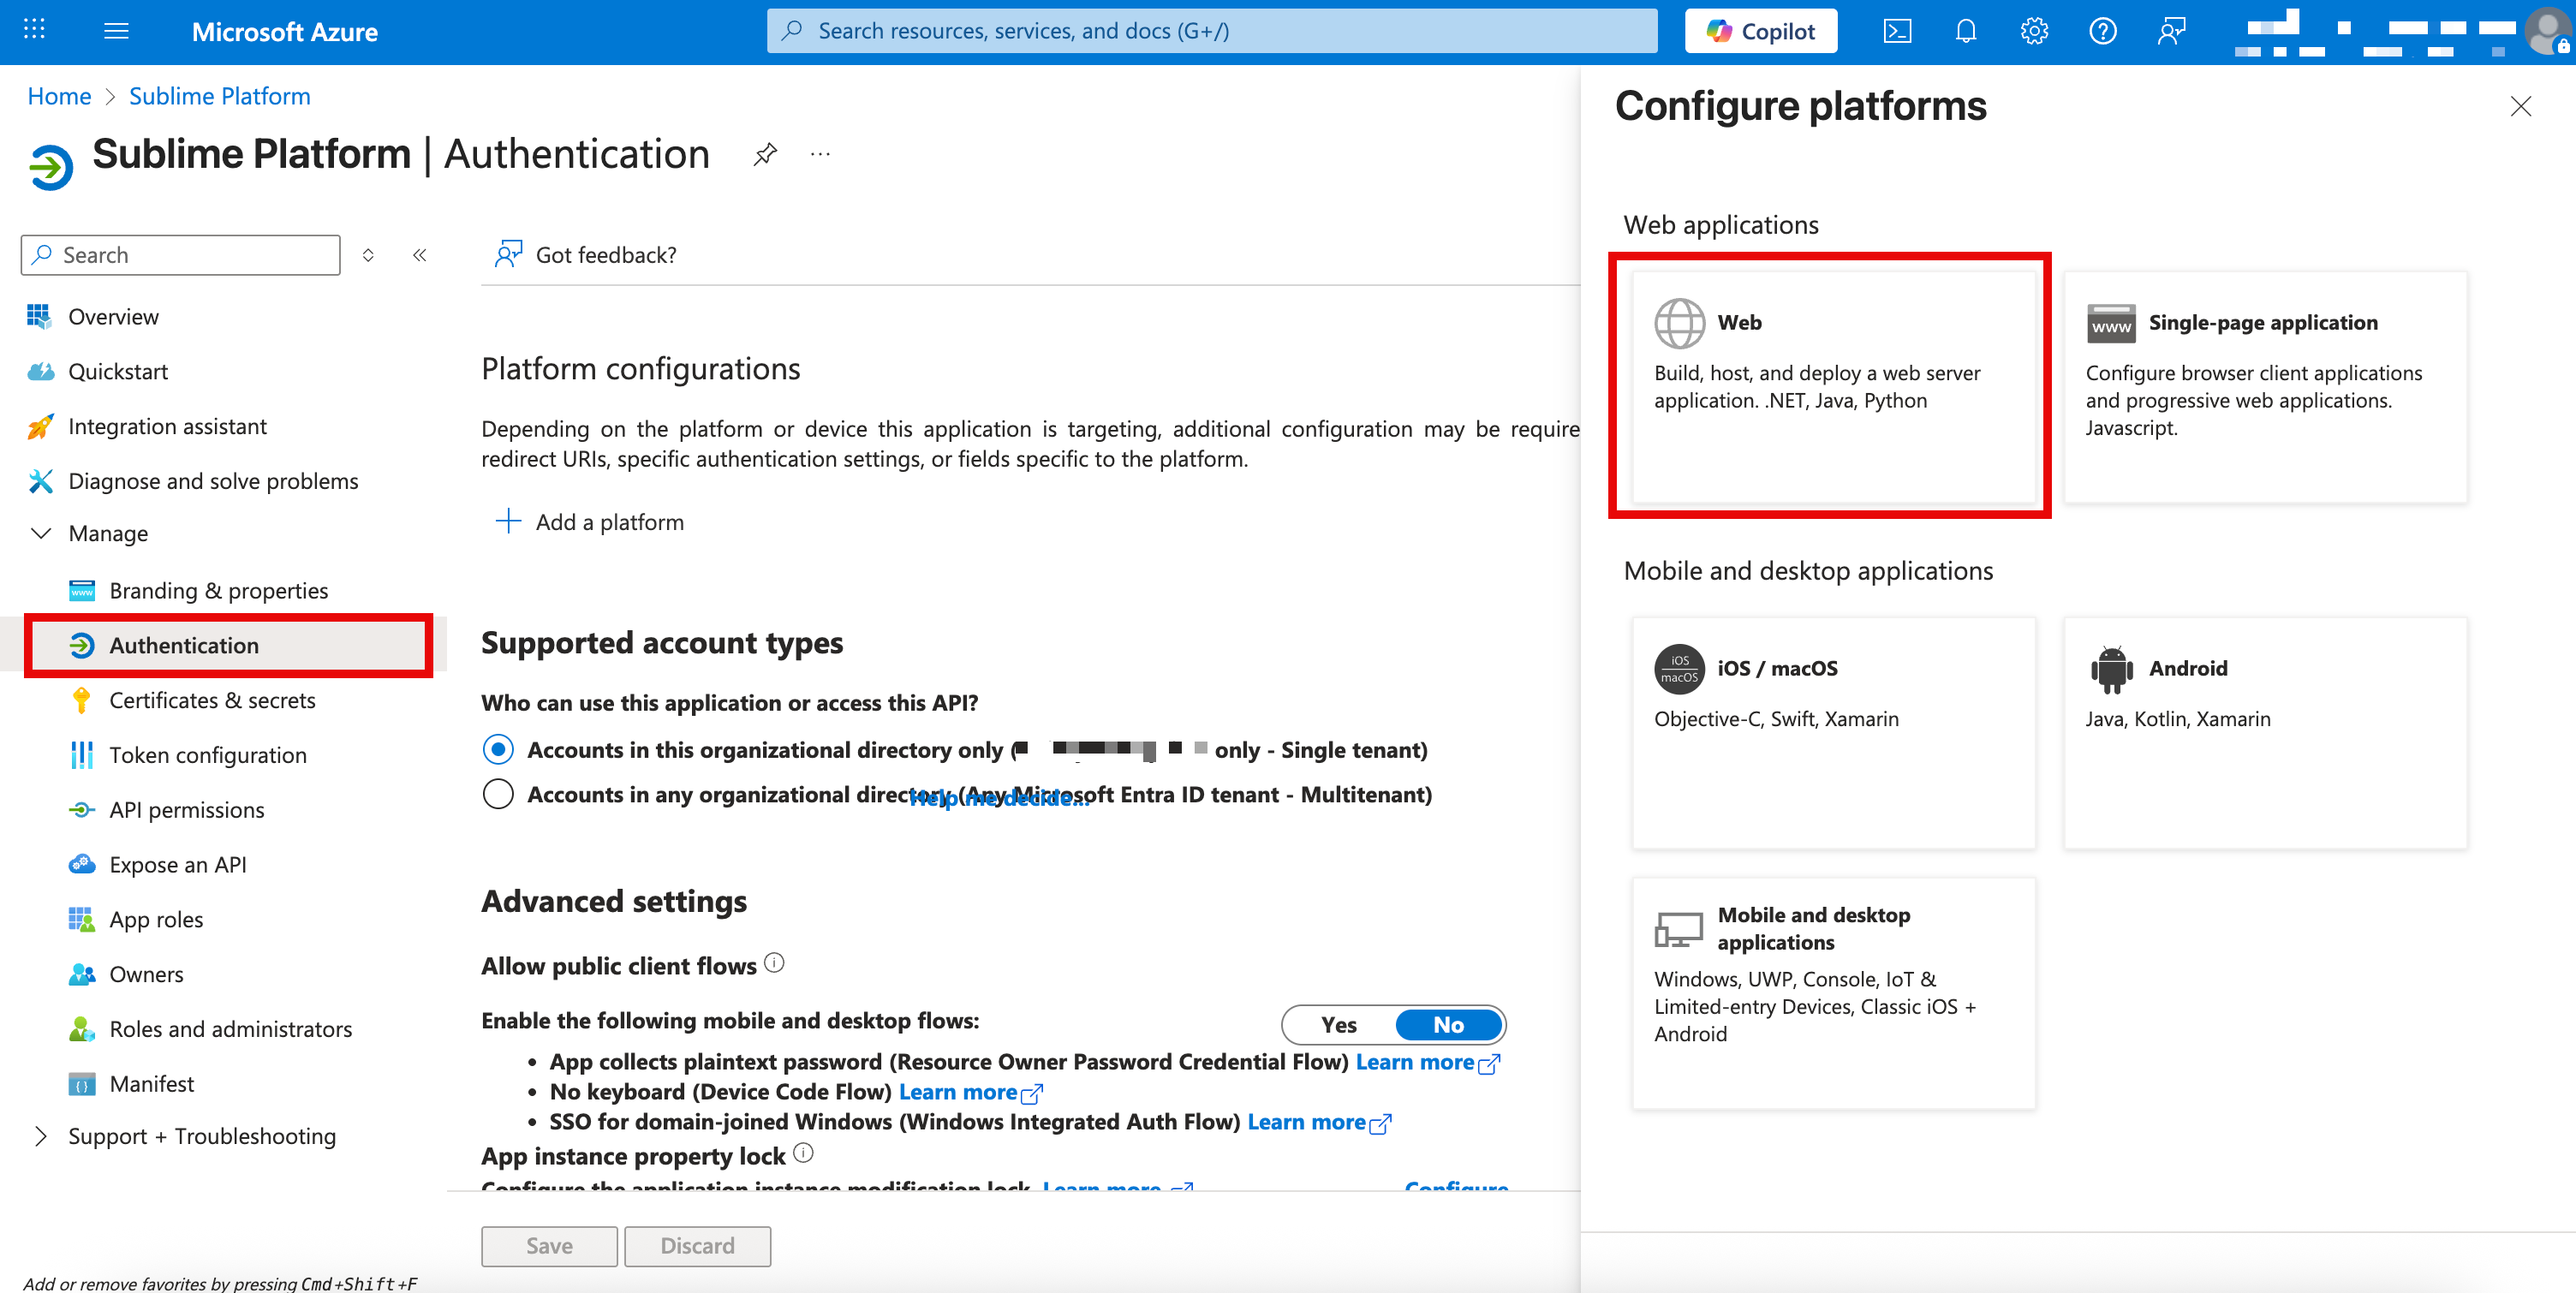
- Under
Redirect URI, paste the Redirect URI from Sublime - Under
Implicit grant and hybrid flows, selectID tokens
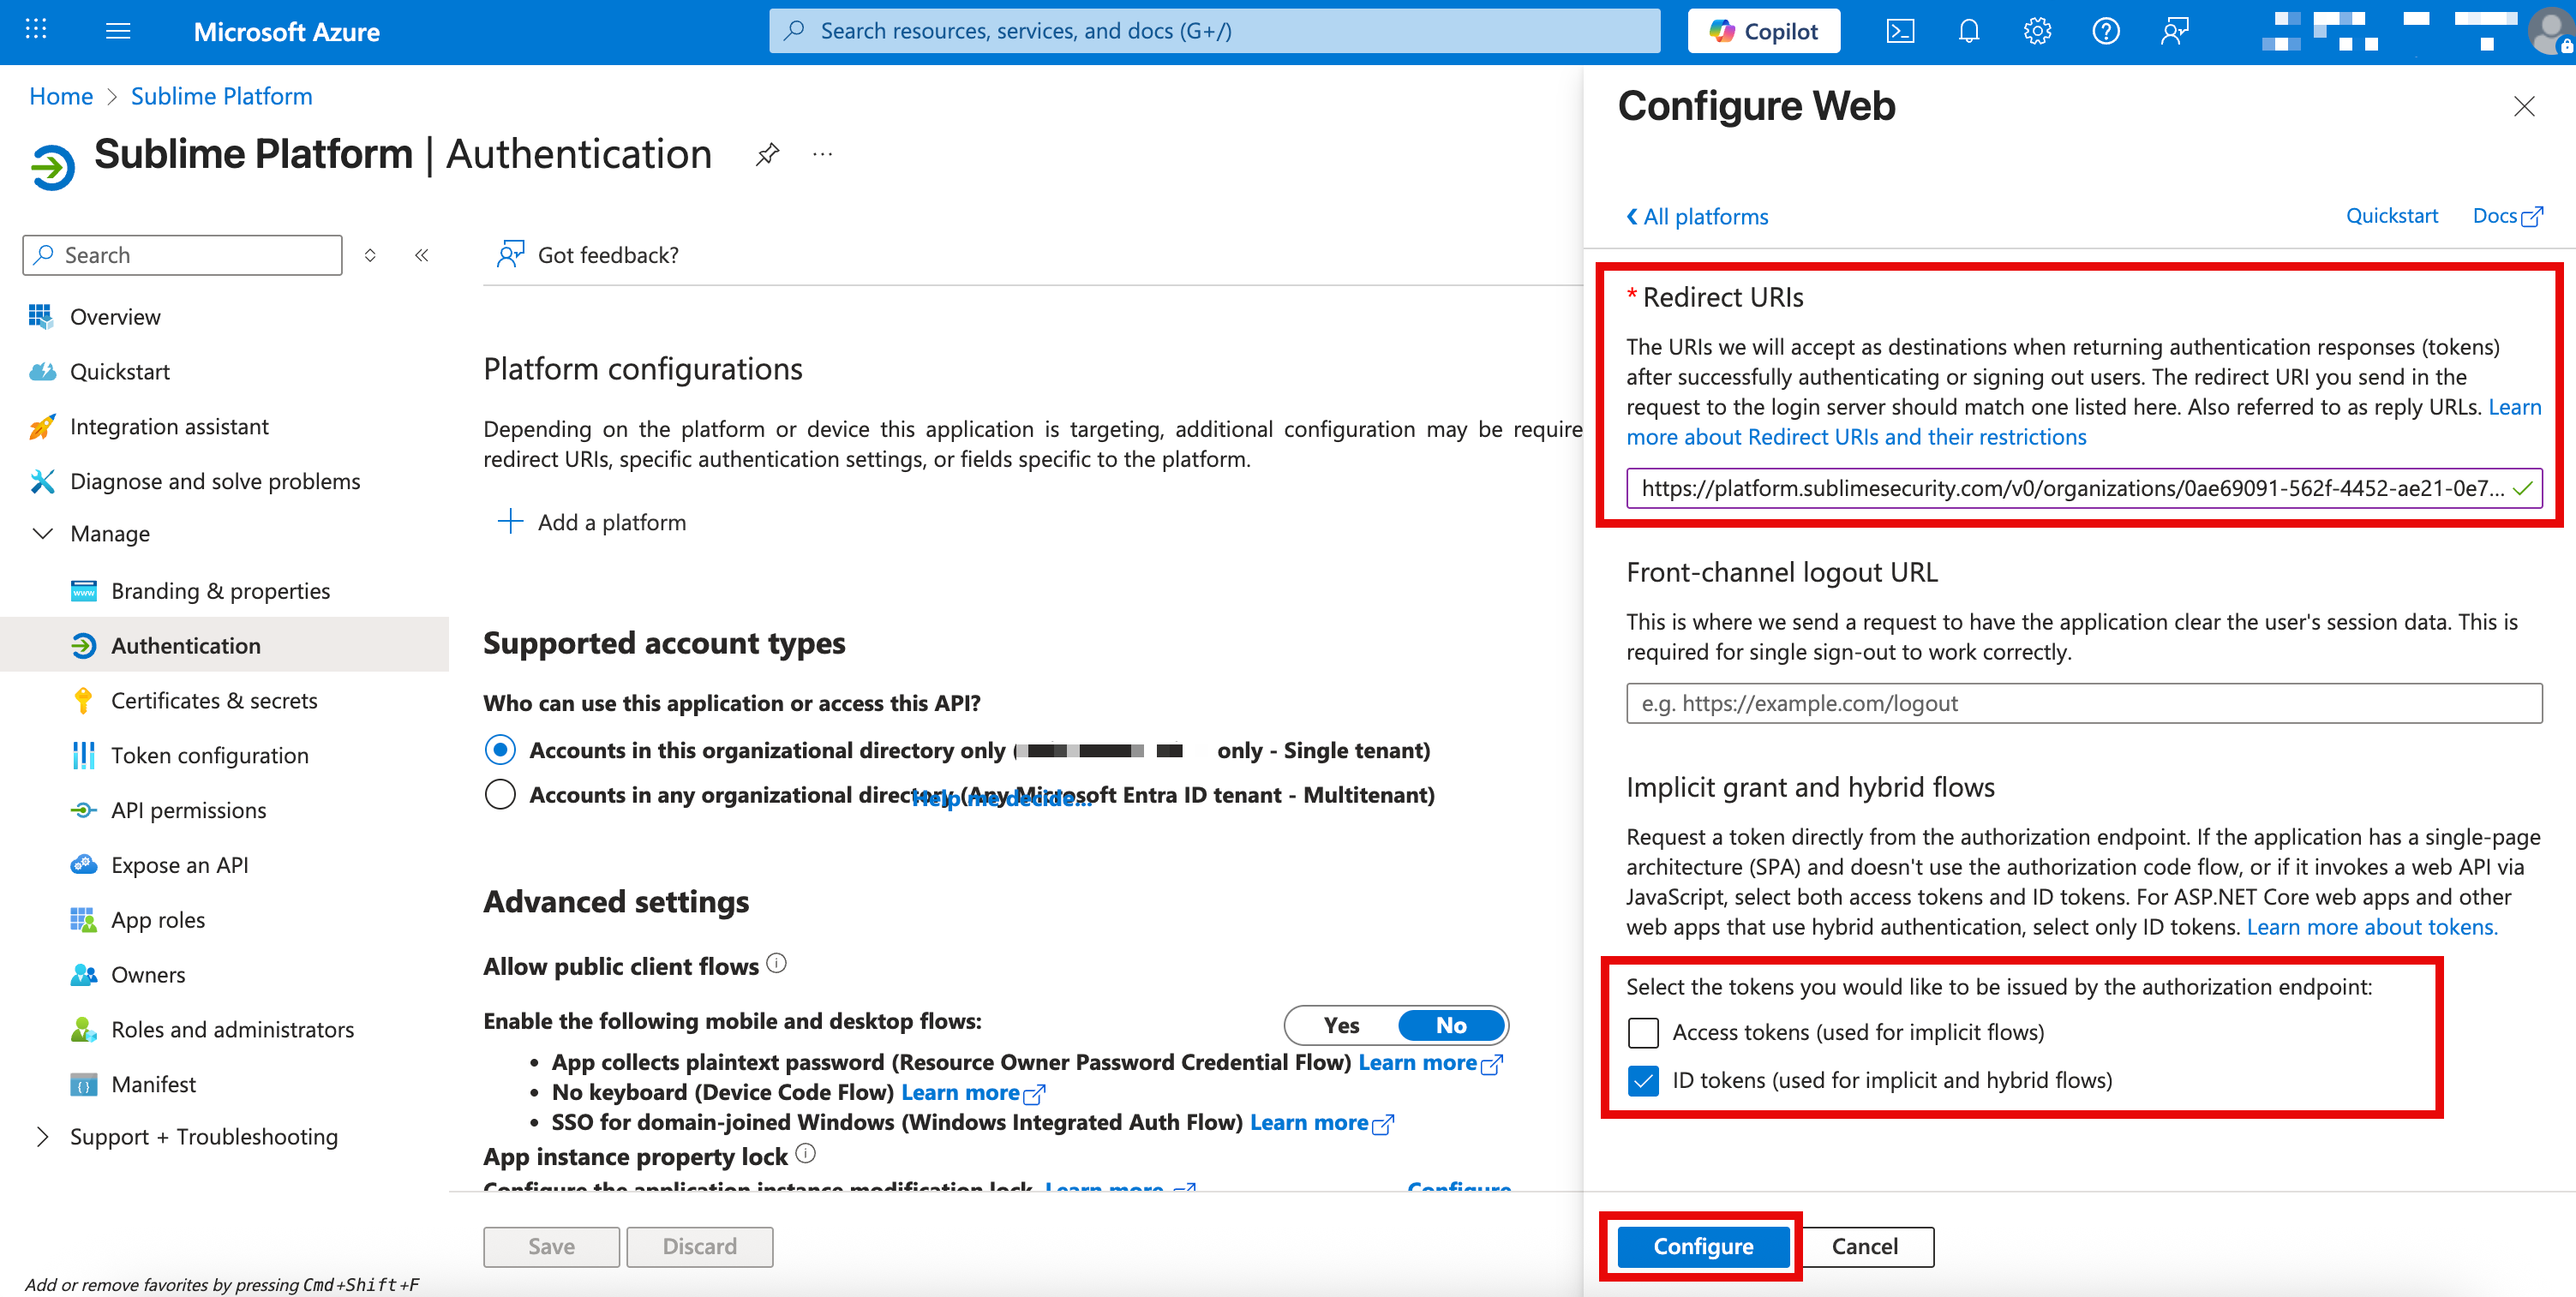
- Click
Configure - Navigate to the Certificates & secrets settings page via
Manage > Certificates & secrets - Click
New client secret - Give the client secret a name like "Sublime SSO" and select an expiration of "24 months"
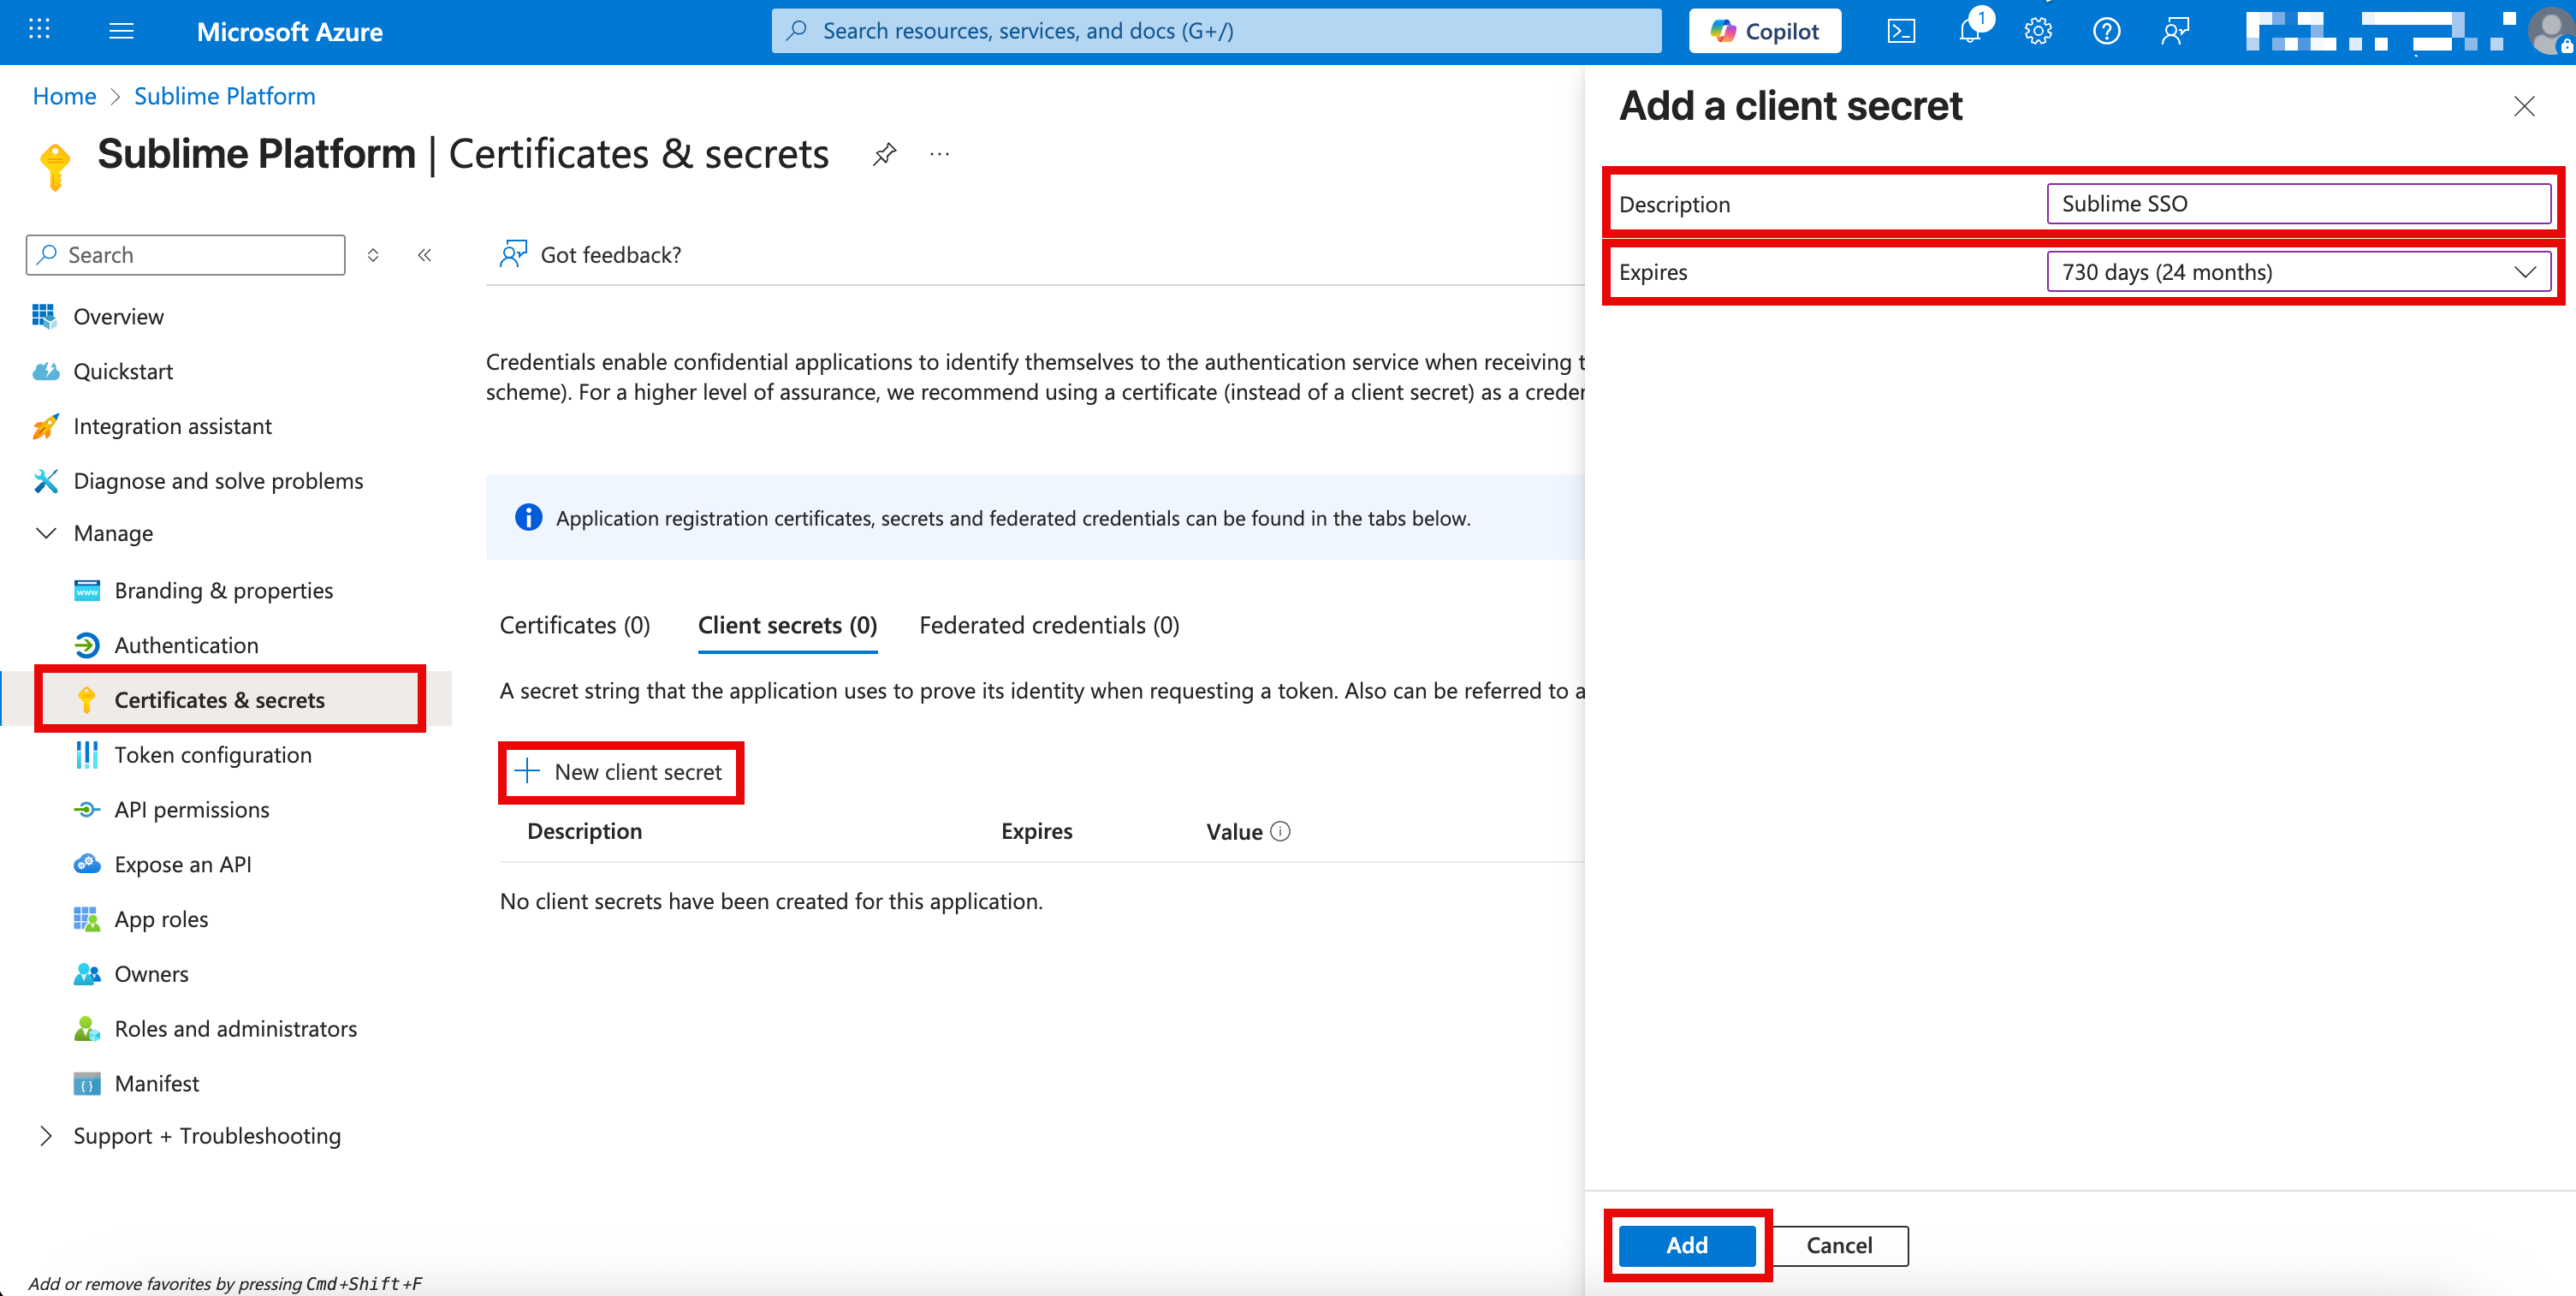
-
Click
Add- Note both the
Valueand theSecret IDof the new client secret for the next section
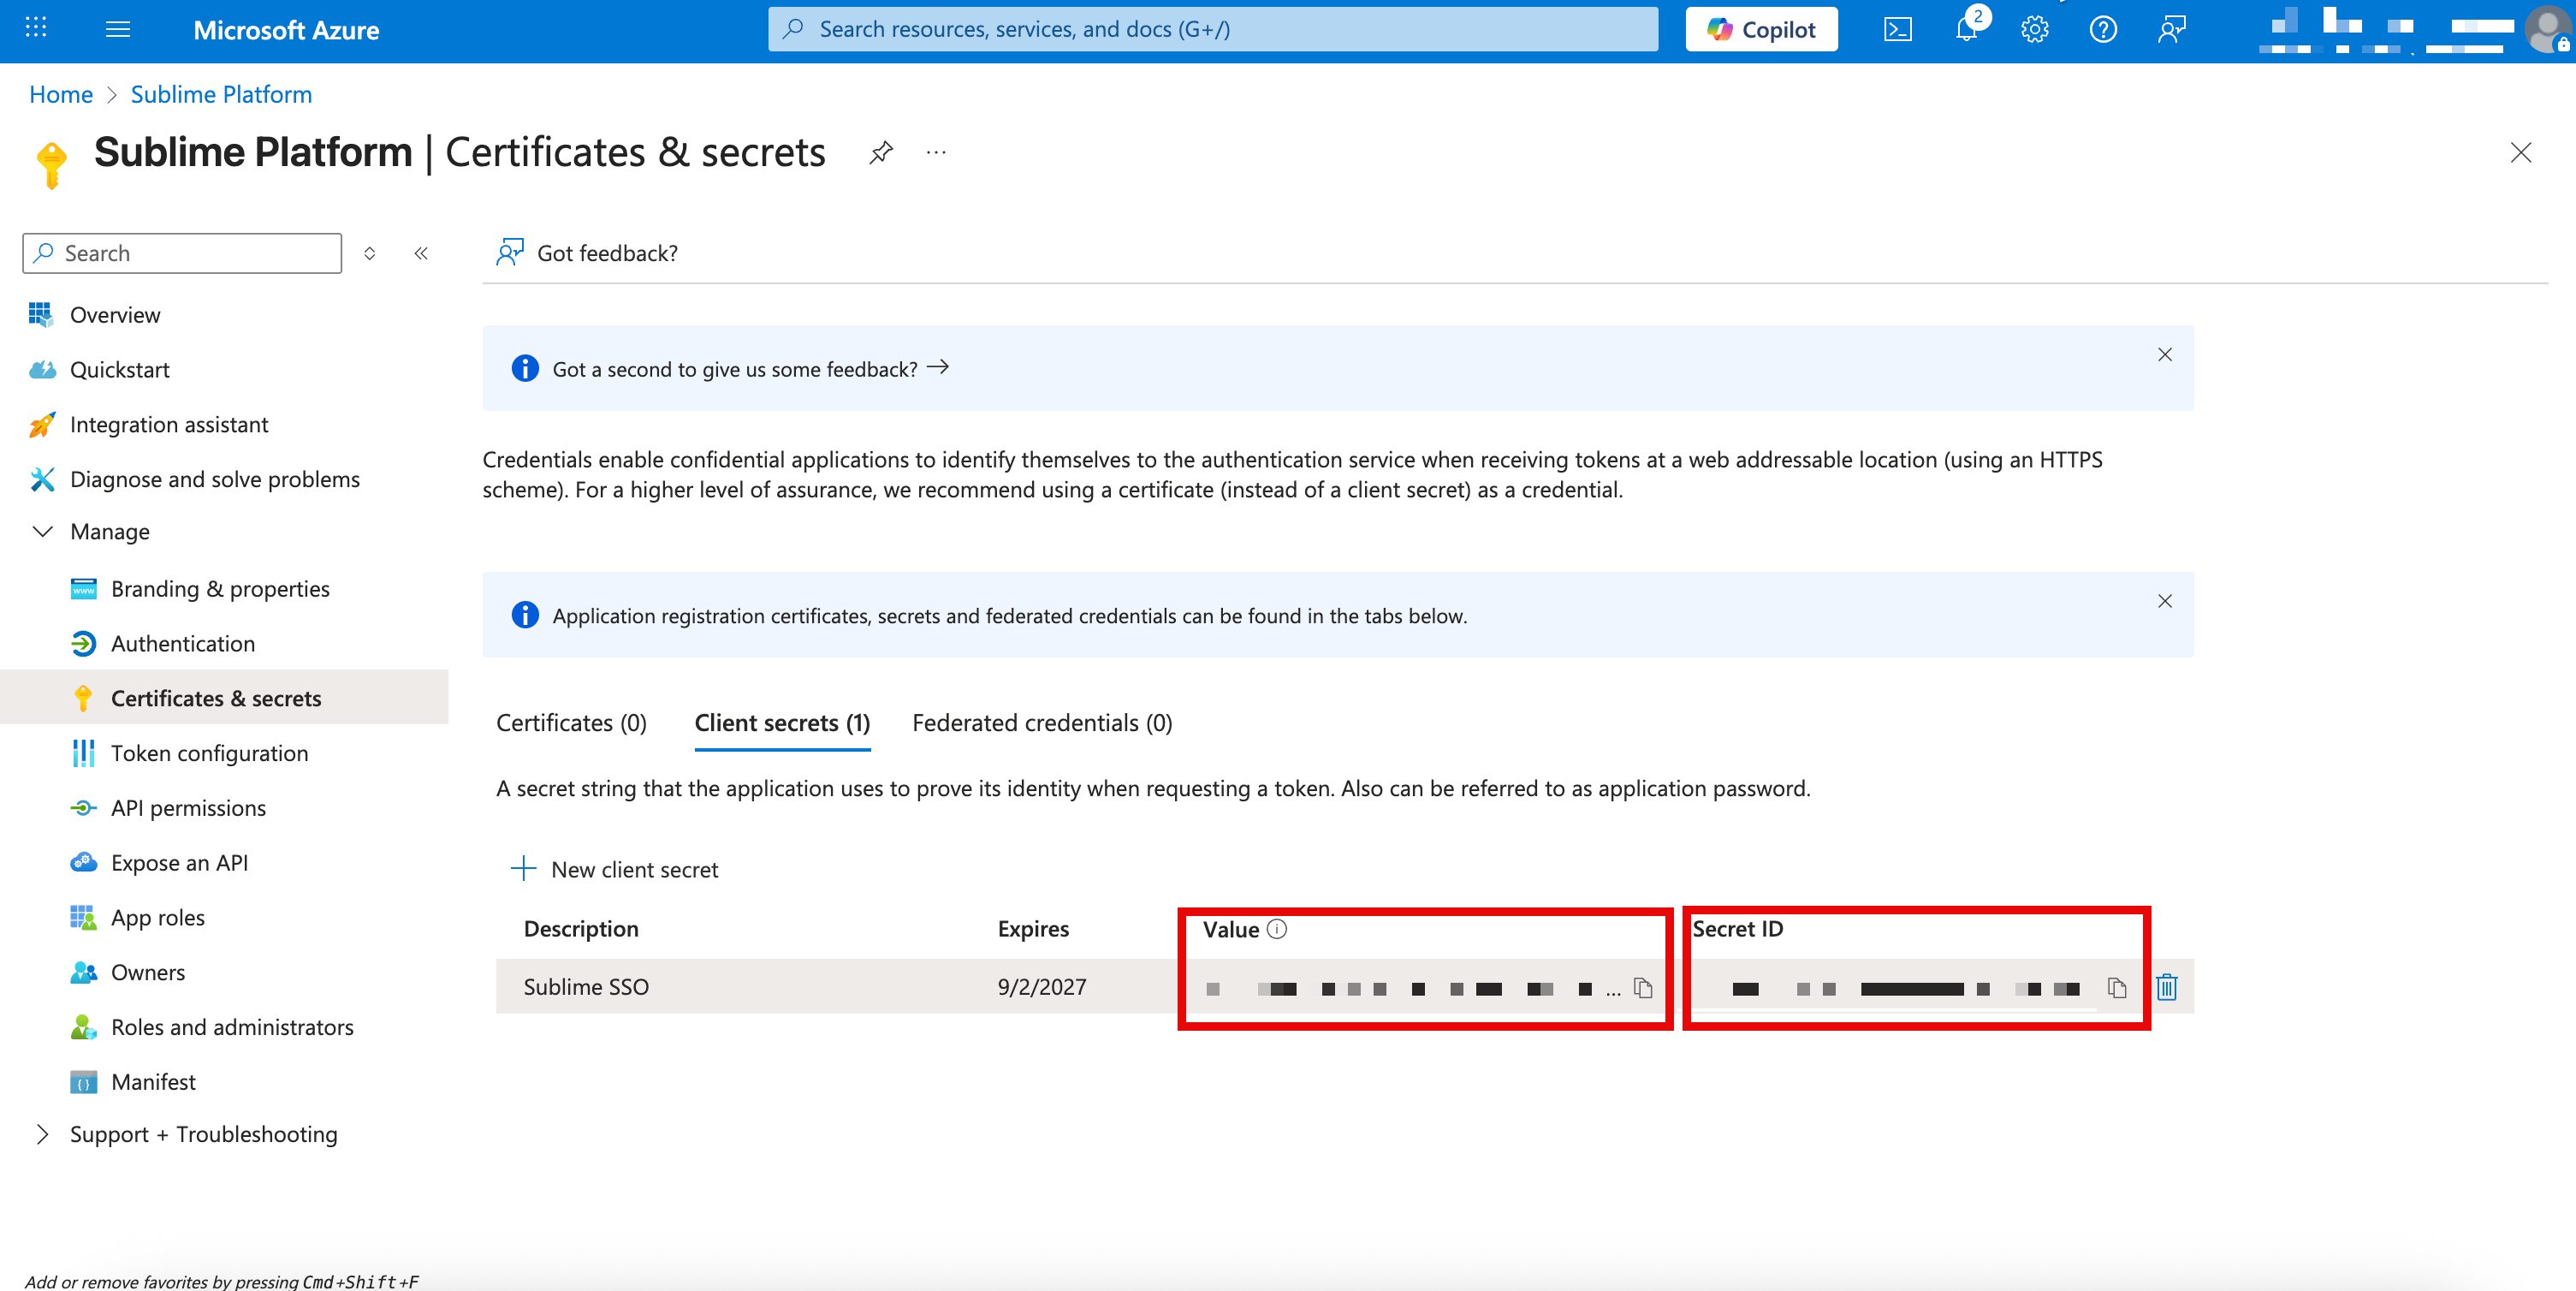
- Note both the
Add OIDC Settings to Sublime
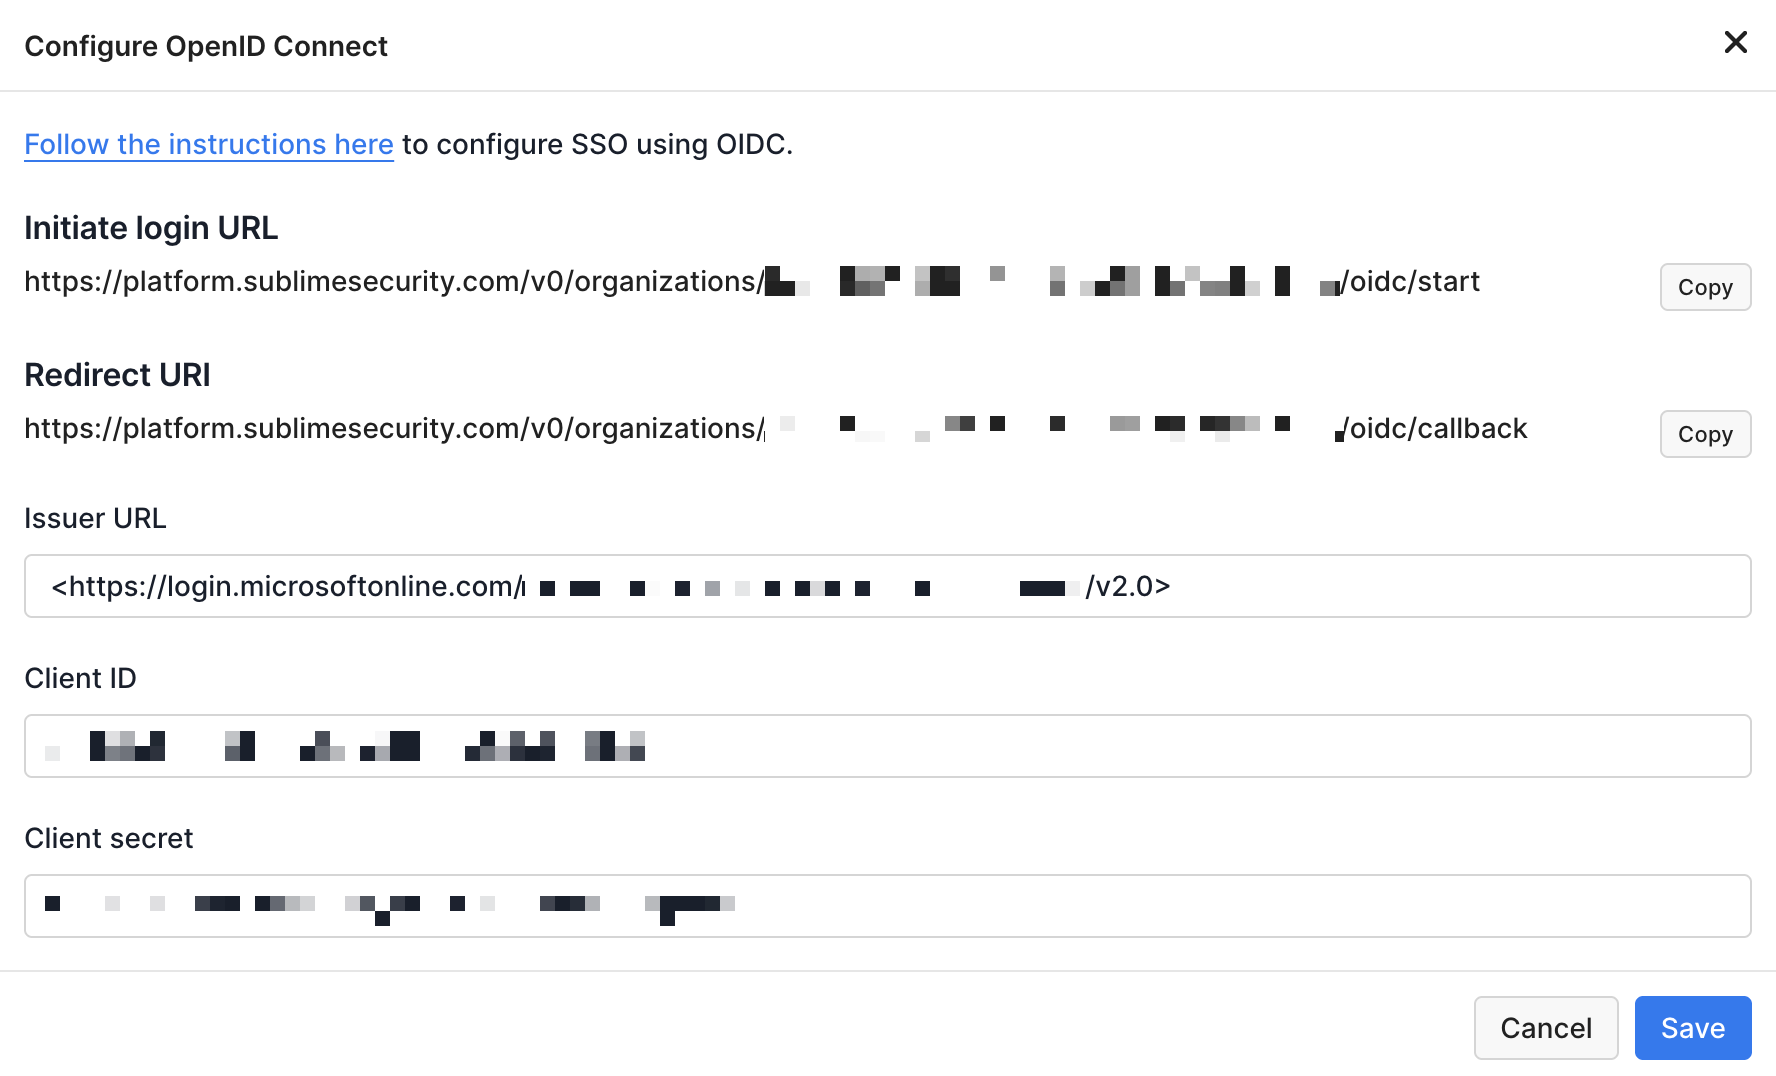
- Log into the Sublime Platform
- Navigate to
Admin > Account - Under
Authentication, click the button next to Open ID Connect - Enter your OIDC issuer URL, client ID, and client secret
- Your issuer URL is
https://login.microsoftonline.com/TENANT_ID/v2.0, withTENANT_IDbeing the Directory (tenant) ID you noted earlier - Your Client ID is the
Application (client) IDnoted in the previous step - Your Client Secret is the
Secret Valuenoted in the previous step
- Your issuer URL is
- Click the Save button
Test OIDC Configuration
You should now be able to sign into Sublime with Entra ID. You can verify the integration is working by either selecting the Sublime Platform application in Entra ID, or by loading the Initiate login URL from your OIDC settings in Sublime.
Matching User RequiredFor a user to successfully sign into Sublime with Entra ID, there must already be a matching user with the same email address in Sublime.
Updated 30 days ago